How-To
Run a Windows System State and System Backup Job on AhsayOBM
Screenshots used for this guide are based on MS Windows System and will include screenshots for MS Windows System State if applicable.
Click the Backup icon on the main interface of AhsayOBM.

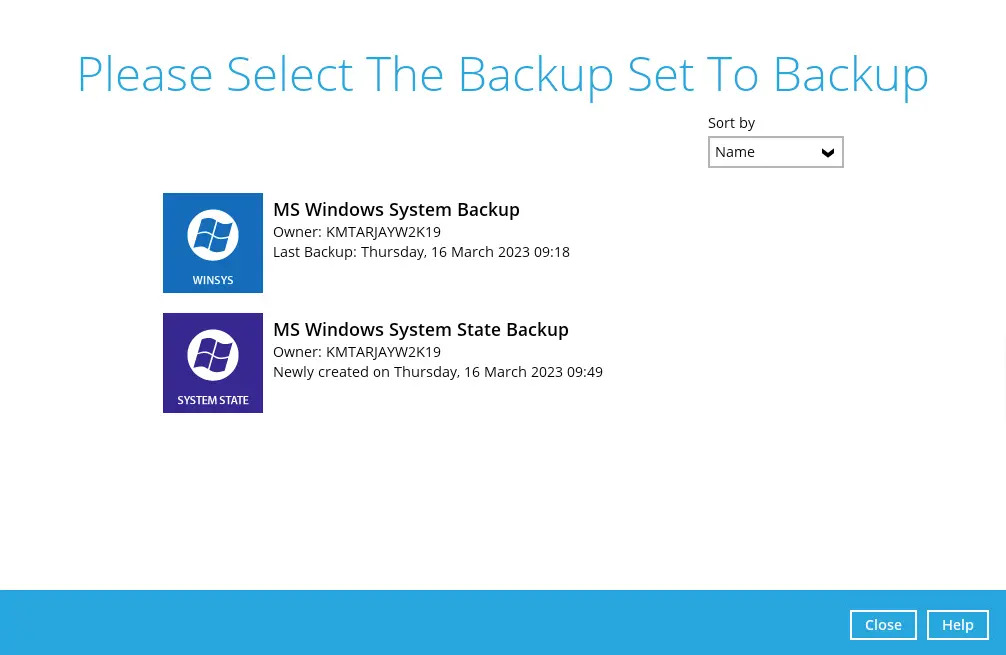
Select the backup set which you would like to start a backup for.
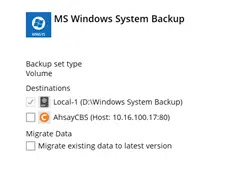
You can modify the "Destinations" and "Migrate Data" options.
Click Backup to start the backup job.
The “Migrate Data” option will only be displayed if Deduplication is enabled for the backup set. When the “Migrate Data” option is enabled, the existing data will be migrated to the latest version during a backup job. This option is disabled by default. Backup job(s) for backup sets with Migrate Data enabled may take longer to finish. For more information about this feature, refer to AhsayCBS v9 New Features Datasheet.
The following screen is displayed when the data are backed up successfully.
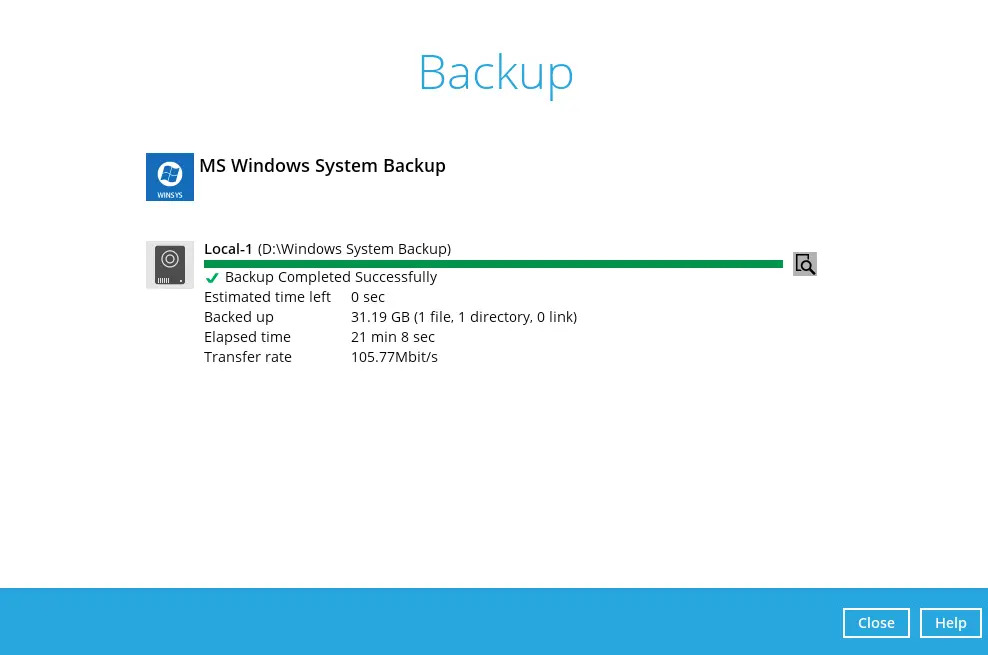
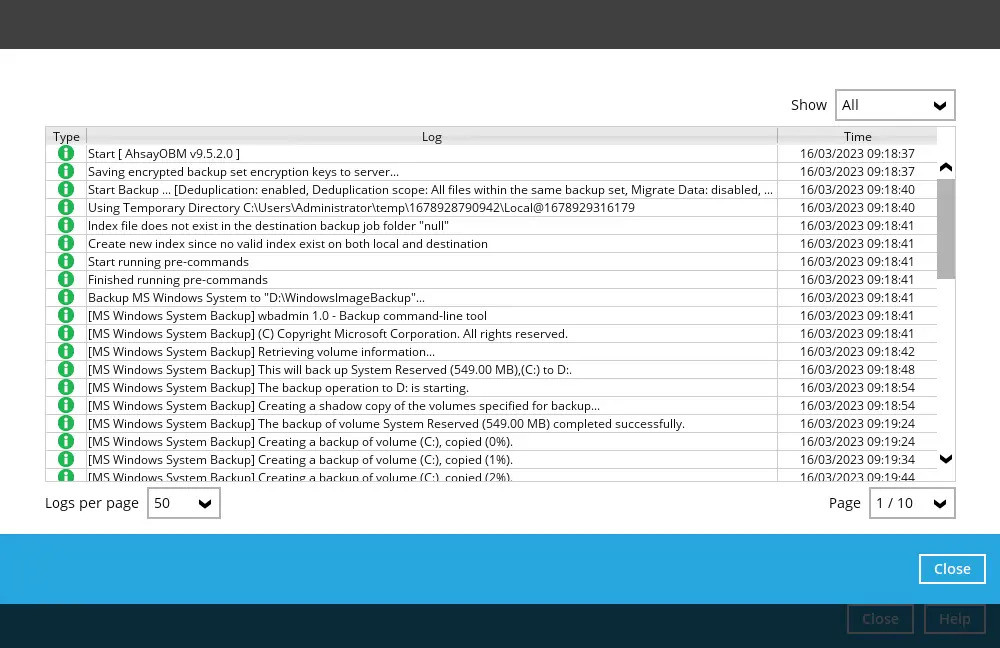
Check the log of your backup by clicking on the 'magnify' icon. It will show you the log of your backup with corresponding date and time.
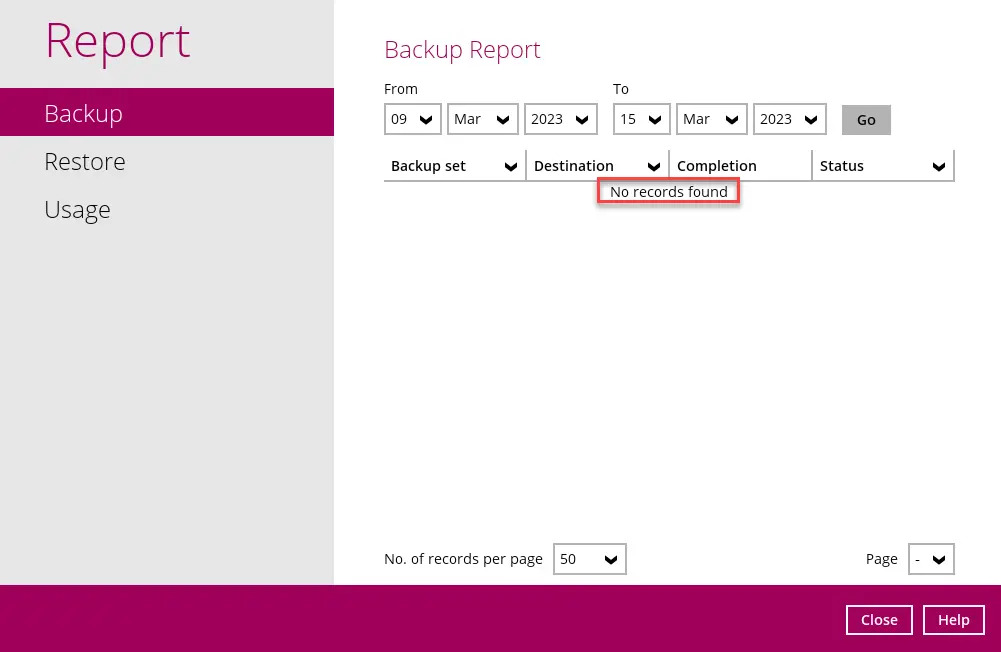
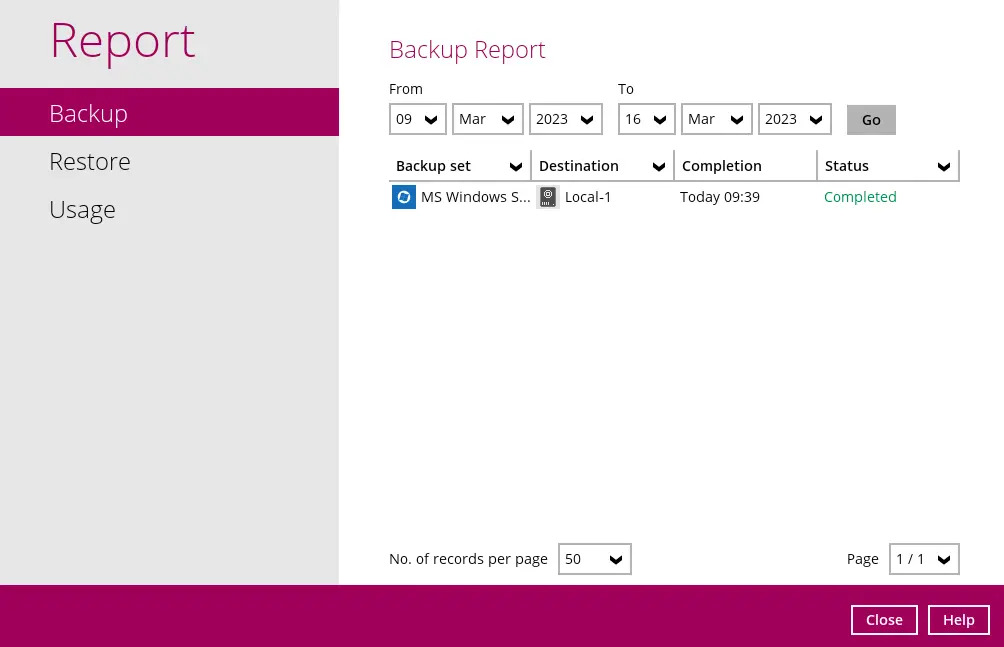
To view the report, go to Report > Backup.

In the "Backup Report" screen, you can see the backup set with corresponding destination, completion date and time, and status.
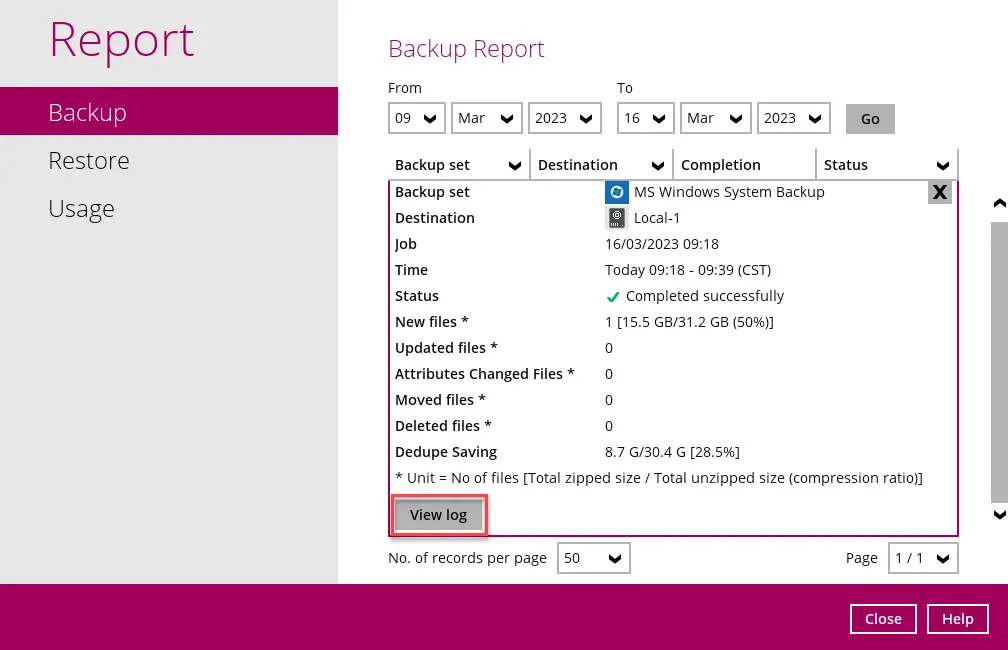
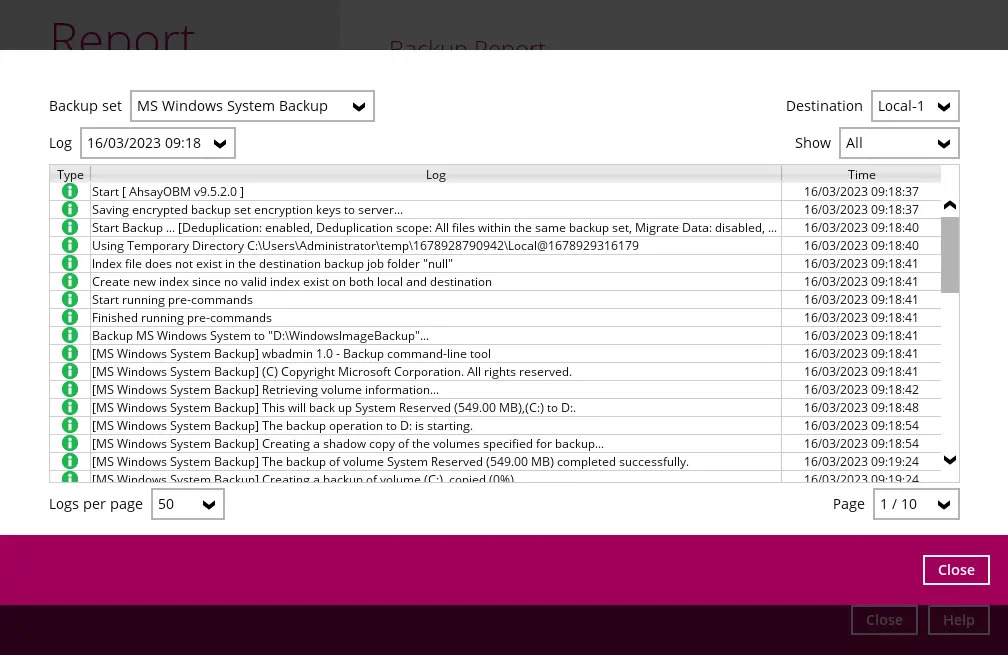
Click the backup report and the summary of the backup will be displayed. You can also click the View Log button that will redirect you to the log summary of your backup.
You can also search for backup reports from a specific date range. Click the Go button to generate the available reports.

If this is a valid date range then backup reports will be displayed unless there were no backup running on the specified dates. A message of “No records found” will be indicated.