FAQ
FAQAhsayCBS Create a Backup Set
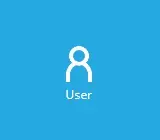
Click the User icon on the User Web Console.
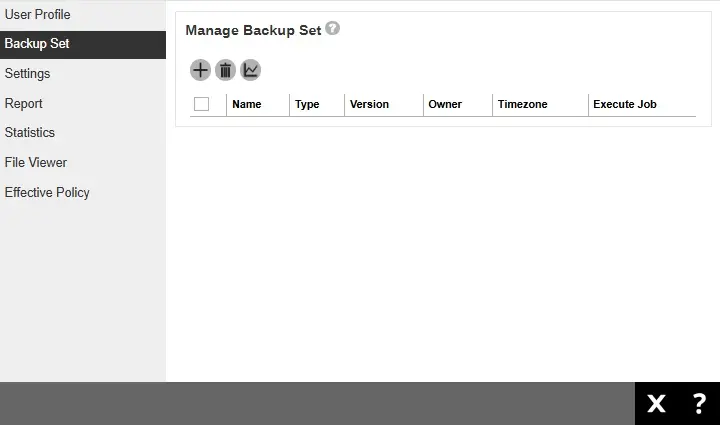
Click Backup Set from the left panel, then create a backup set by clicking Create under "Manage Backup Set".
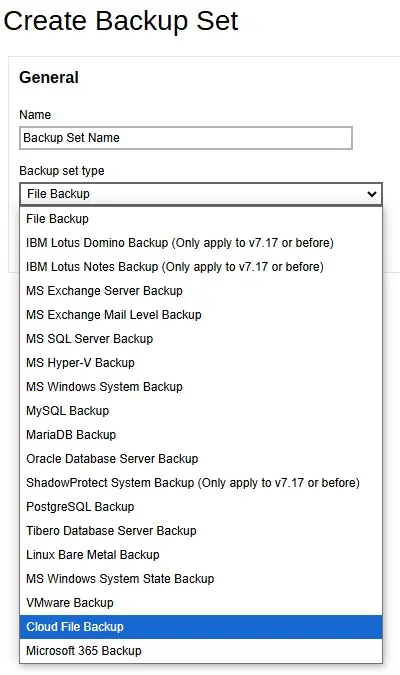
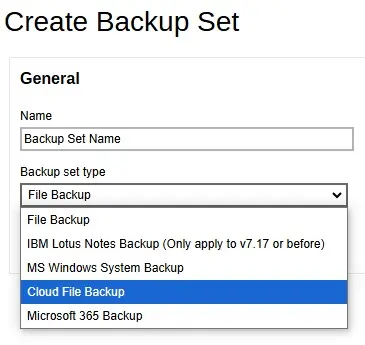
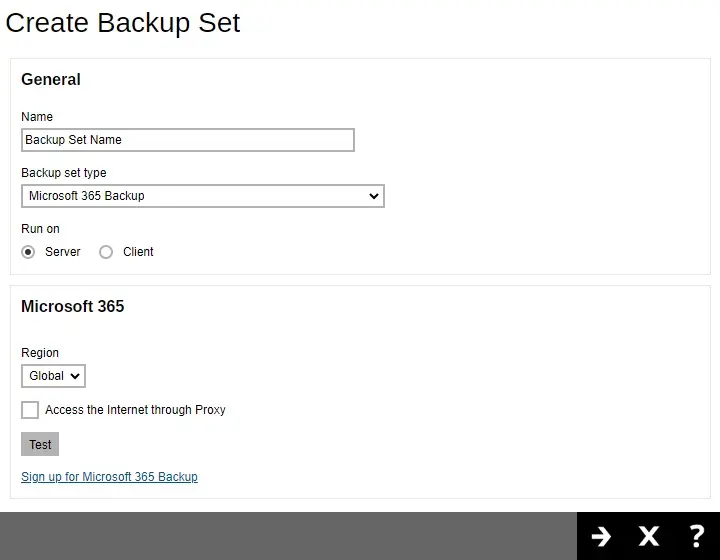
Select the backup set type, then enter a name for the backup set. This guide will only focus on creating a Run on Server backup set which is either Cloud File Backup or Microsoft 365 Backup.
AhsayOBM
AhsayACB
Select Server under "Run on".
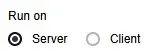
- If you choose to run the backup set on the AhsayCBS server, you won’t be able to back up, restore or manage your backups on the AhsayOBM/AhsayACB client once the backup set is created.
- This setting CANNOT be altered once the backup set is created. If you wish to change the backup method later, you will have to create a new backup set and start over the configurations again.
- For backup sets created in Run on Server backup type, the backup destination is restricted to either AhsayCBS or a predefined destination (if setup by your backup service provider). If you wish to back up to other cloud destinations or back up to multiple destinations, the backup set should be created in Run on Client backup type instead.
The fields that will be displayed will depend on the backup set type selected:
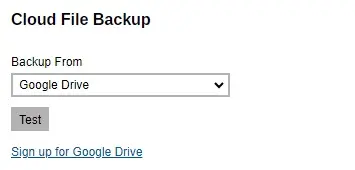
Cloud File Backup
Select the cloud storage that contains the data that you want to backup.

Provide the credentials needed or sign in to the cloud storage selected. The credentials needed will depend on the selected cloud storage. Click Test to validate the connection.

or
The following message will be displayed once validated, click OK then click Next to proceed.

- The authentication request will be opened in a new tab or window. Ensure that the pop-up window is not blocked, and pop-up blocker is disabled in your browser.
- It is advised to have one (1) bucket name per cloud file backup set.
Microsoft 365 Backup
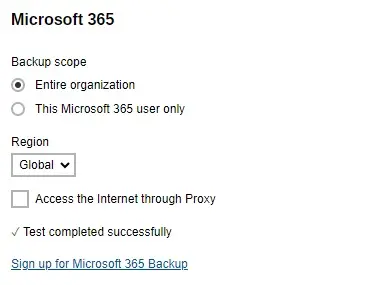
For AhsayOBM select the "Backup scope" and "Region" then click Test.
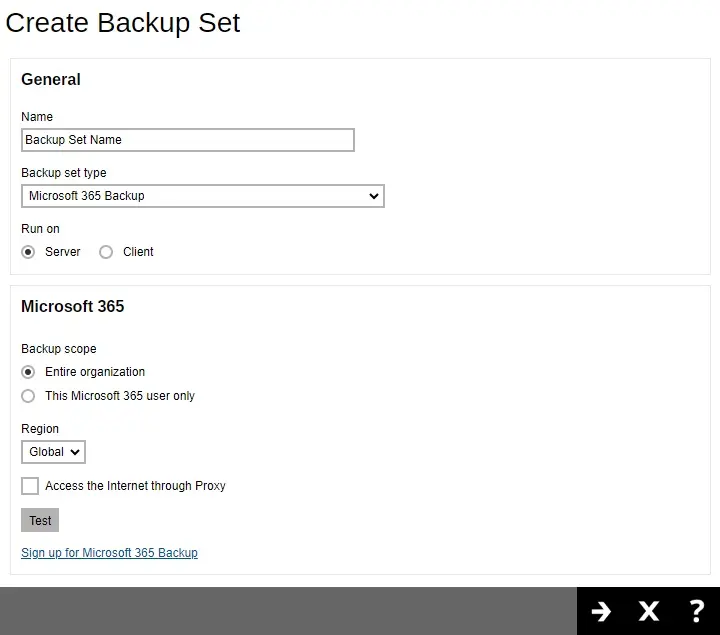
For AhsayACB select the "Region" then click Test.
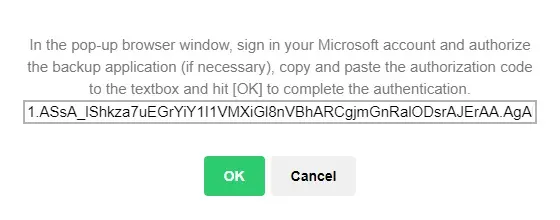
Click Authorize to start the authentication process.

Sign in to your Microsoft account and copy the authorization code.
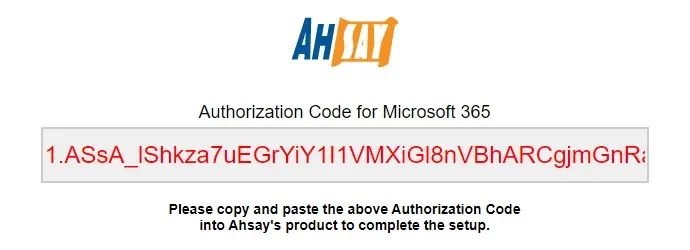
Go back to AhsayCBS and paste the authorization code. Click OK to proceed.
If the "Backup scope" selected is Entire organization but the M365 account used to sign in is a personal account, this error message will be displayed.
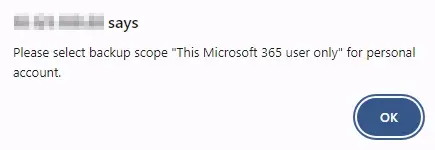
Change the "Backup scope" to This Microsoft 365 user only since only business account may be used to sign in if the "Backup scope" selected is Entire organization.
"Test completed successfully" will be displayed when the validation is successful. Click Next to proceed.
The next window displayed will depend on the backup set type selected.
Cloud File Backup
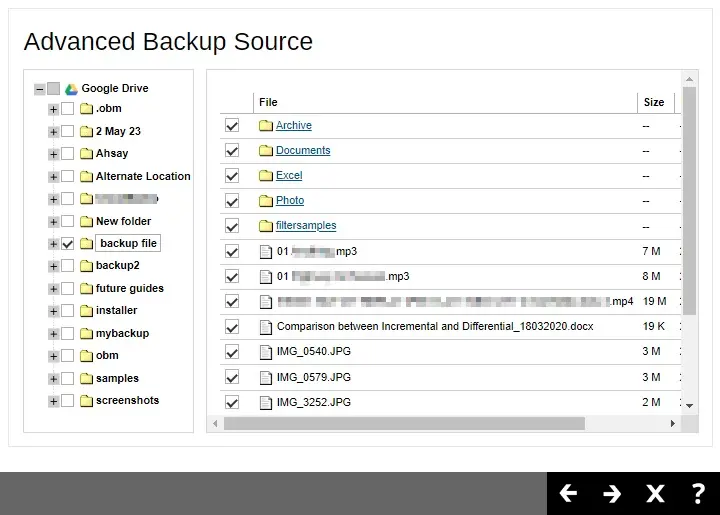
In the "Advanced Backup Source" window, select the file(s) and/or folder(s) that you want to back up then click Next to proceed.
Microsoft 365 Backup
The "Backup Source" window that will be displayed will be different for AhsayOBM and AhsayACB.
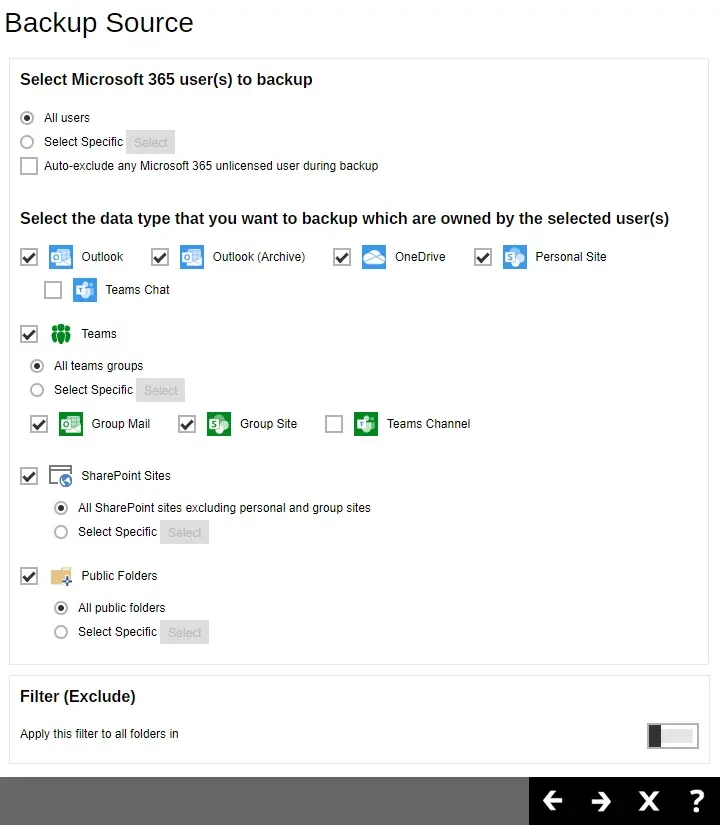
Select the users and data type for backup.
AhsayOBM
For AhsayOBM, the Backup Source window that will be displayed will depend on the backup scope selected. Either Entire organization or This Microsoft 365 user only.
If Entire organization is selected, this will be the screen displayed.
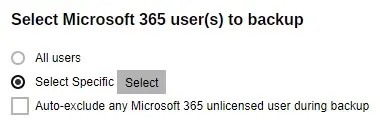
To select specific users, click Select.
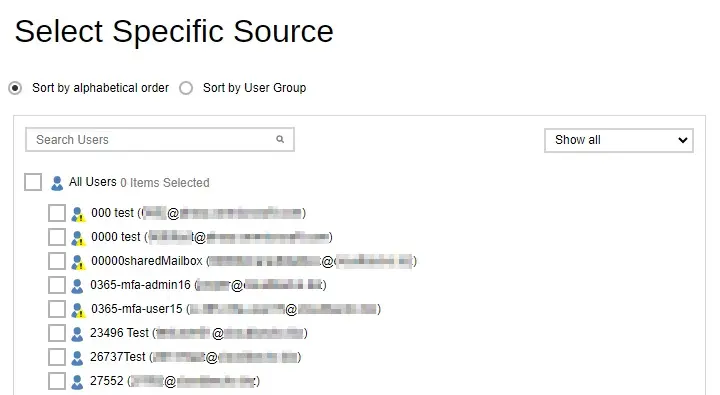
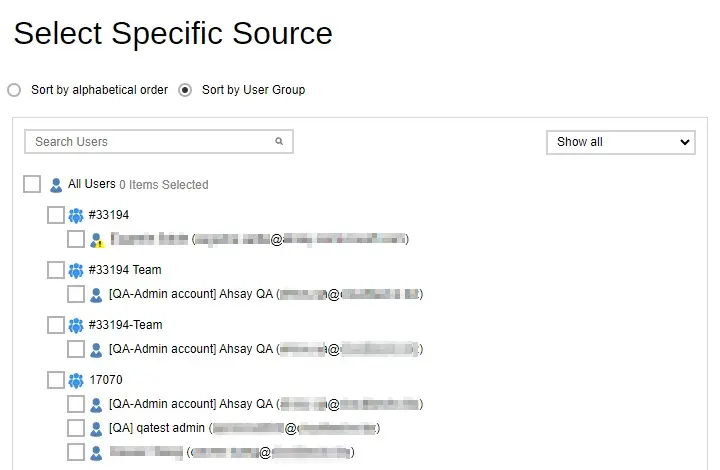
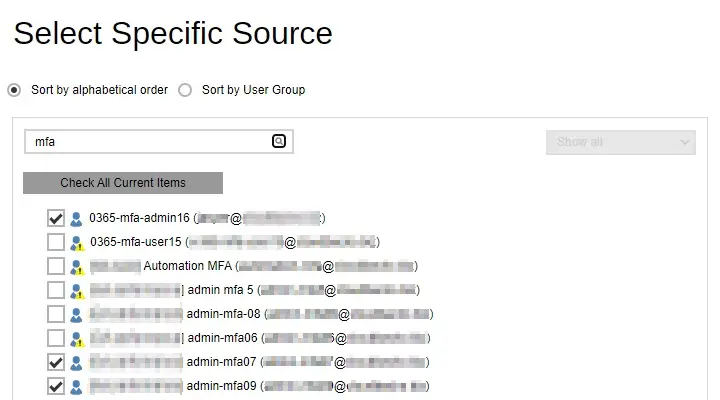
Users can be sorted alphabetically or by User Group.
Example of users sorted alphabetically.
Example of users sorted by User Group.
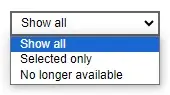
List of users can be displayed in three ways.
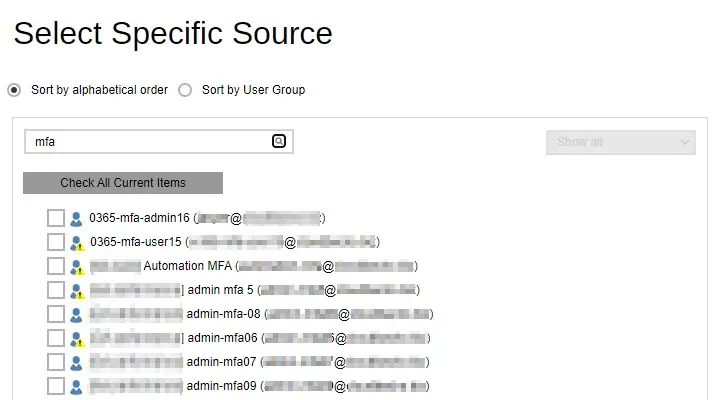
Searching for a particular user is possible by entering the name or email address then click Search. A list of names and email addresses will be displayed containing the search criteria. Click Check All Current Items to select all listed users.
Select specific users by ticking the checkbox beside the user.
To display selected users only, select Selected only.
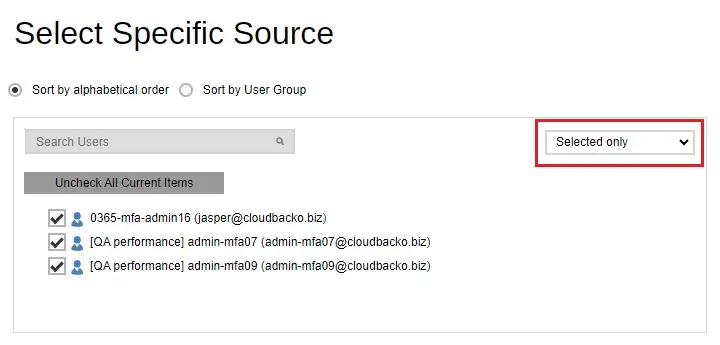
Click OK once done with the selection.
Tick the Auto-exclude any Microsoft 365 unlicensed user during backup checkbox if you do not want to include unlicensed users in your backup.

An unlicensed user is depicted by this icon.

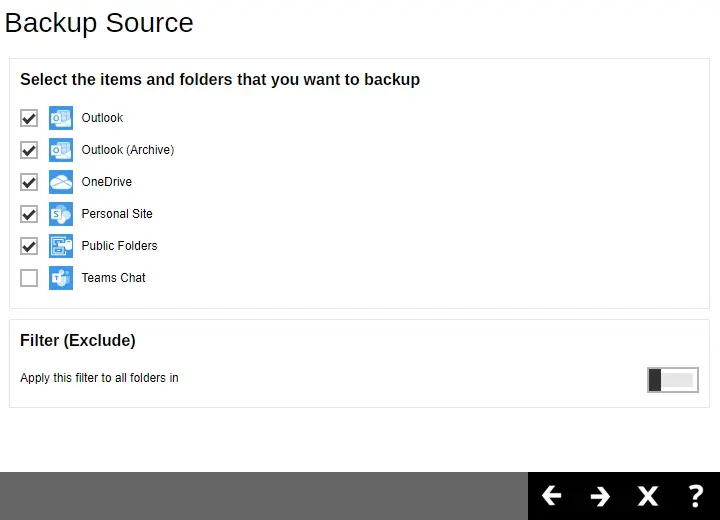
Select the data type that you want to be included in the backup. Select from Outlook, Outlook (Archive), OneDrive, Personal Site and Teams Chat. Ticking the checkbox will backup all, i.e. ticking the Outlook checkbox will back up the mailboxes of the selected user(s). For Teams Chat, it is not necessary to select other user accounts involved in the chat to backup the conversation.

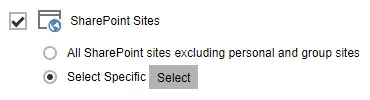
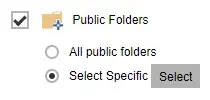
Select to backup Teams, SharePoint Sites and Public Folders.
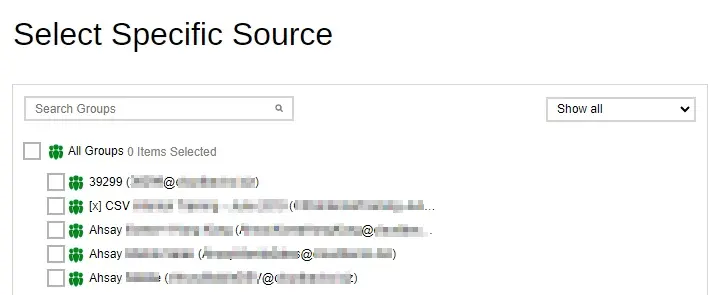
To select a specific Group to backup in "Teams", click Select.
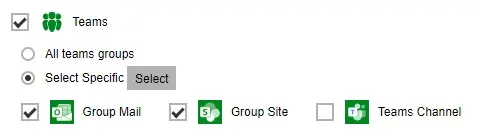
Searching for a particular group is also possible, enter the group name in the "Search Groups" field and click Search. List of groups can also be displayed in three ways: Show all, Selected only and No longer available. Click OK once done with the selection. Also select if "Group Mail", "Group Site" and/or "Teams Channel" will be included in the backup.
 In order to backup shared attachments for certain Teams Channel posts, OneDrive and Group Site must be selected as source.
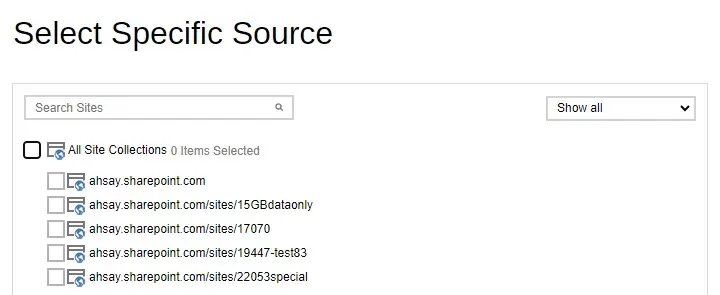
To select a specific Site to backup in SharePoint, click Select.
Searching and listing for Sites is the same process as discussed above.
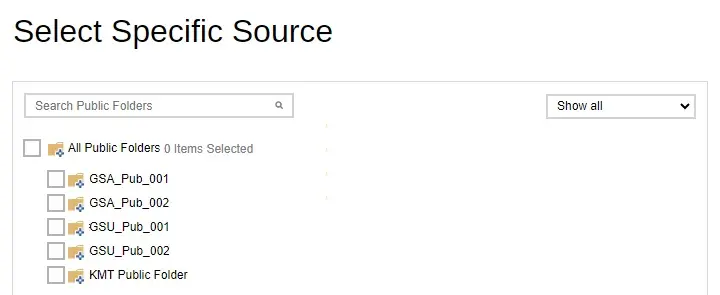
To select a specific Public Foder, click Select.
Searching and listing for Public Folders is the same process as discussed above.
AhsayACB
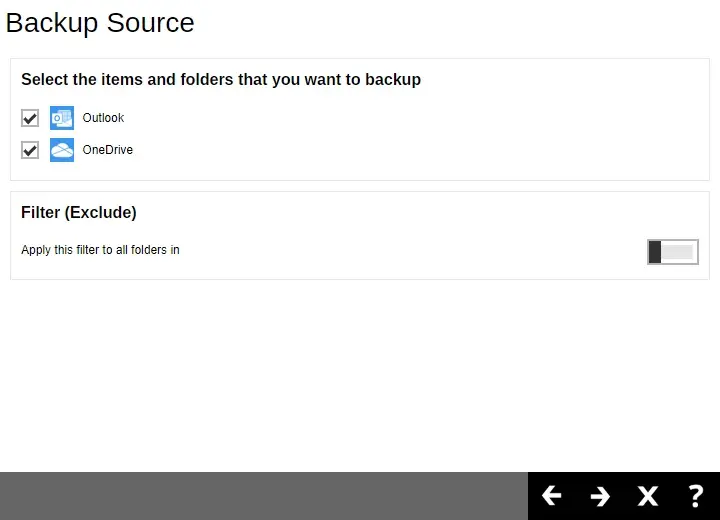
Select the items and folders for backup.
This will be the window displayed if:
- This Microsoft 365 user only is selected in AhsayOBM.
- Personal account is used for authentication in AhsayACB.
But if a business account is used for authentication in AhsayACB, this will be the window displayed:
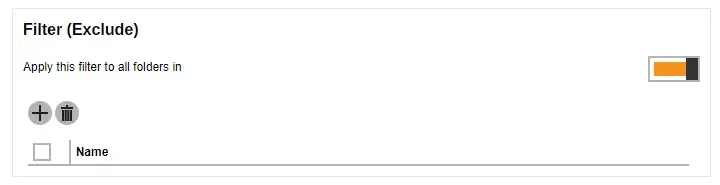
To exclude folders from your backup, use the exclude filter.

Enable the "Filter (Exclude)" by sliding the switch to the right. Click the Create button to specify the criteria that will be used to exclude the folder.
In the "Filter" window, enter a name for your filter.
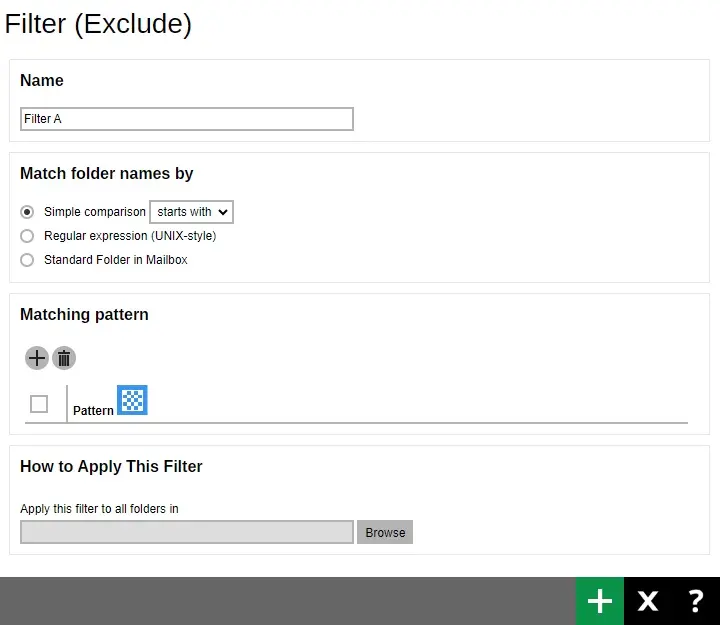
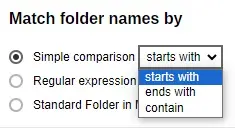
Select how the pattern will be compared, if by:
- Simple comparison - there are three choices:
- starts with, folders that begins with the pattern will be selected
- ends with, folders that ends with the pattern will be selected
contain, folders that contains the pattern will be selected
- Regular expression (UNIX-style) or
Standard Folders in Mailbox - click the Create button to select the folder.
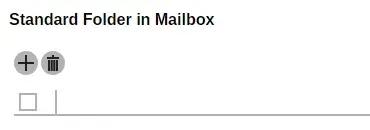
Select the folder from the drop down box then click Add. Repeat adding folders, until all the folders that you want to be excluded has been added to the filter.

Click the Create button to add the pattern.
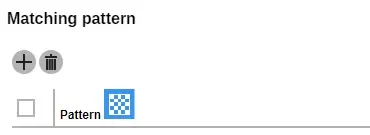
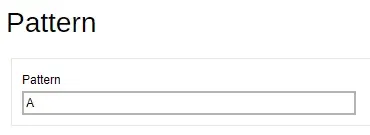
Enter your pattern then click Add. Repeat adding patterns, until all the patterns has been added to the filter.
 Matching pattern is only available for Simple comparison and Regular expression.
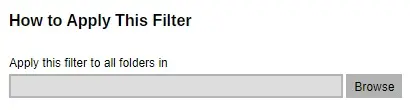
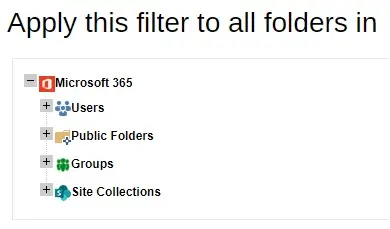
Click the Browse button to select where the filter will be applied.
Click Add or Minus to expand or collapse the tree, then click the node where you want the filter to be applied. Click OK once done with the selection.
Click Add to add the filter.
Click Next to continue.
- Simple comparison - there are three choices:
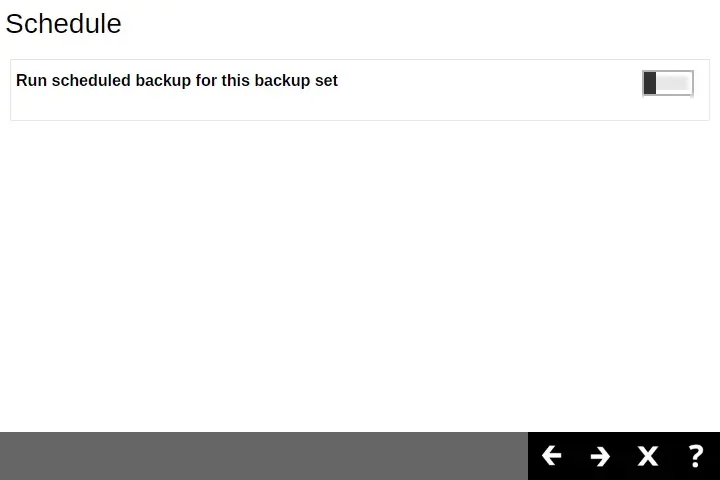
If you would like the backup set to run at a specified time interval of your choice, turn this feature on by sliding the on/off switch in the "Schedule" menu.
Click the Create button to add a schedule.
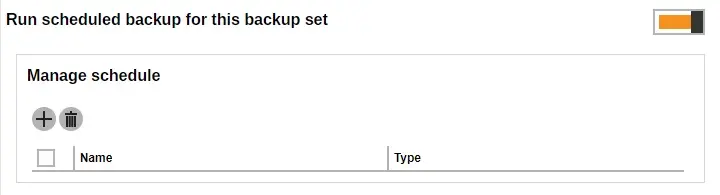
Configure the backup schedule settings and click Add once done. Then click Next to proceed.
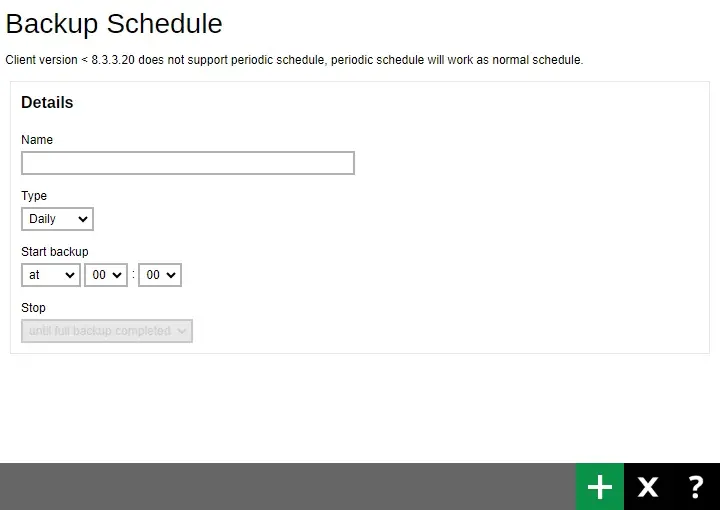
For instructions on how to configure the backup schedule settings please refer to the Overview section.
To add a destination, select from the existing storage destinations listed in the drop-down list as provided by your backup service provider.
Backup destination is preset to AhsayCBS or Predefined Destination.
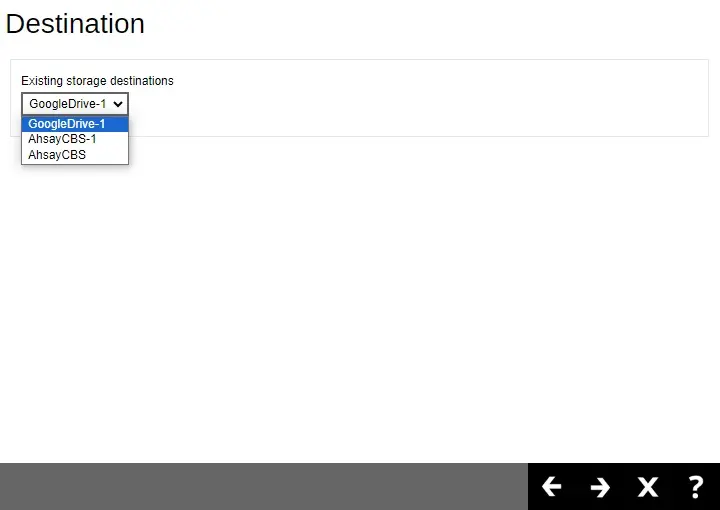
In the sample screenshot above, the backup service provider has setup three (3) available destinations (i.e. GoogleDrive-1, AhsayCBS-1 and AhsayCBS).
Click Next to proceed when you are done with the setting.
By default, the "Encrypt Backup Data" option is enabled with the Encryption Type preset as Default which provides the most secure protection.
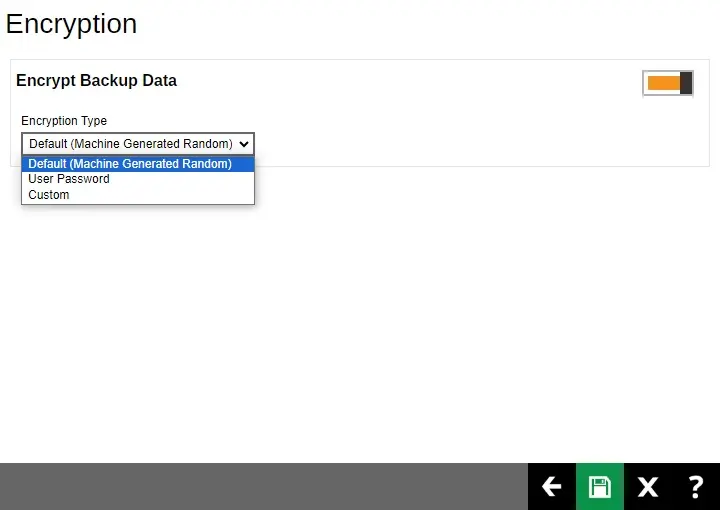
Click Save to confirm the creation of this backup set.
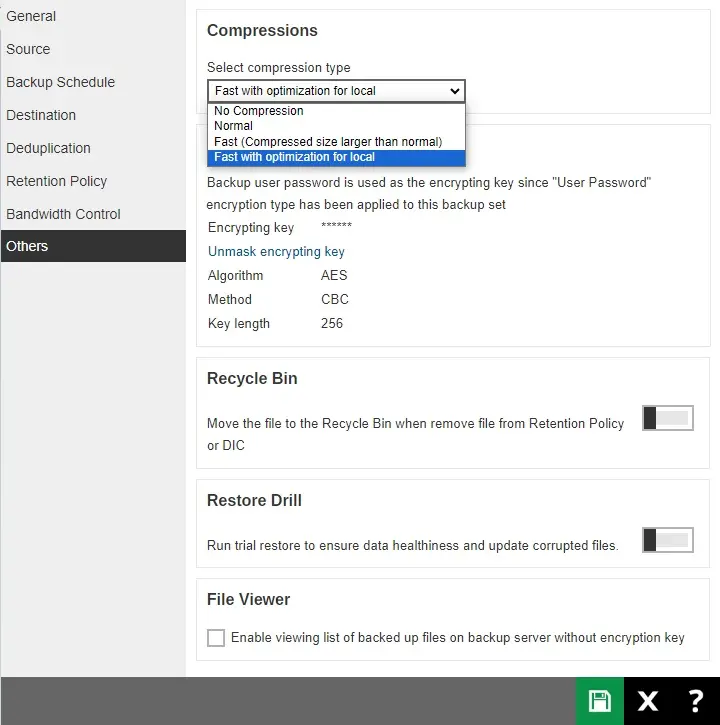
Optional: Select your preferred compression type. For newly created backup set, Fast with optimization for local is selected by default.
Go to Others > Compressions, then select the compression type. Click Save to save the changes.