Backup / Restore
Administrators can create backup user accounts and manage group policies. They can also create user groups which is used together with the group policies to customize the behavior of client backup applications.
Aside from these, administrators can configure the following: user home directory, free trial options, run direct setting, Windows Active Directory integration and restore drill settings.
Backup / Restore is divided into two sub menus, which are:
Basic
To manage your AhsayCBS backup / restore basic configuration, simply click the Basic icon under “Backup / Restore” from your AhsayCBS environment.
![]()
You can perform the following basic configurations:
- Configure the user home directories that will be used by the backup user.
- Determine if free trial will be available for users.
- Define maximum number of concurrent VMs permitted to be started using Run Direct on AhsayCBS.
- Configure the Windows Active Directory integration settings.
- Configure the restore drill settings.
There are 5 tabs under Basic backup / restore configuration, each of which is described below:
User Home
The following shows the “User Home” tab under Backup / Restore > Basic. It is used for configuring the user home directories for storing all user data.
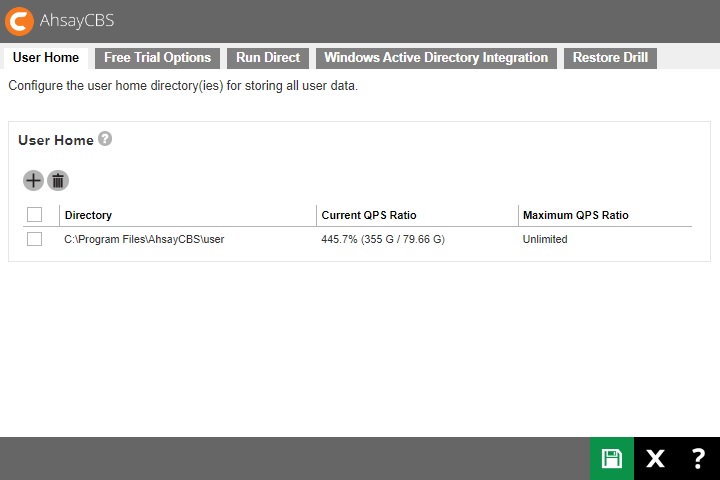
If you want to modify the existing user home, click on the user home directory.
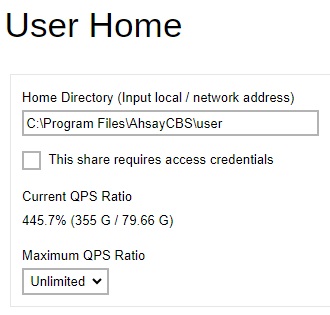
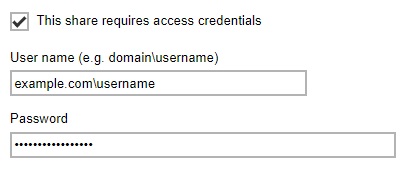
Enter the “Home Directory” path and tick the box next to “This share requires access credentials” if your user home drive is on a path that requires access credentials.
Provide the "User name" and "Password" for the path.
QPS Ratio (Quota - Partition Size Ratio) ) is the ratio (in percentage) of the sum of all user quotas within a user home divided by the total size of the partition of the user home. You can see the “Current QPS Ratio” displayed in the form of a percentage. You can select the “Maximum QPS Ratio” from the dropdown list.
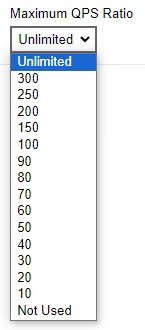
If the QPS ratio of a user home exceeds the Maximum QPS ratio after adding a user, the user will be added to the next available user home. Unlimited means that the QPS ratio is not checked and new users can be added to that user home. Not Used means that new users are never added to that user home.
After you have modified the desired information, click OK to exit. Then click Save to save the changes.
Free Trial Options
The following shows the “Free Trial Options” tab under Backup / Restore > Basic. It defines various free trial settings available in AhsayCBS.
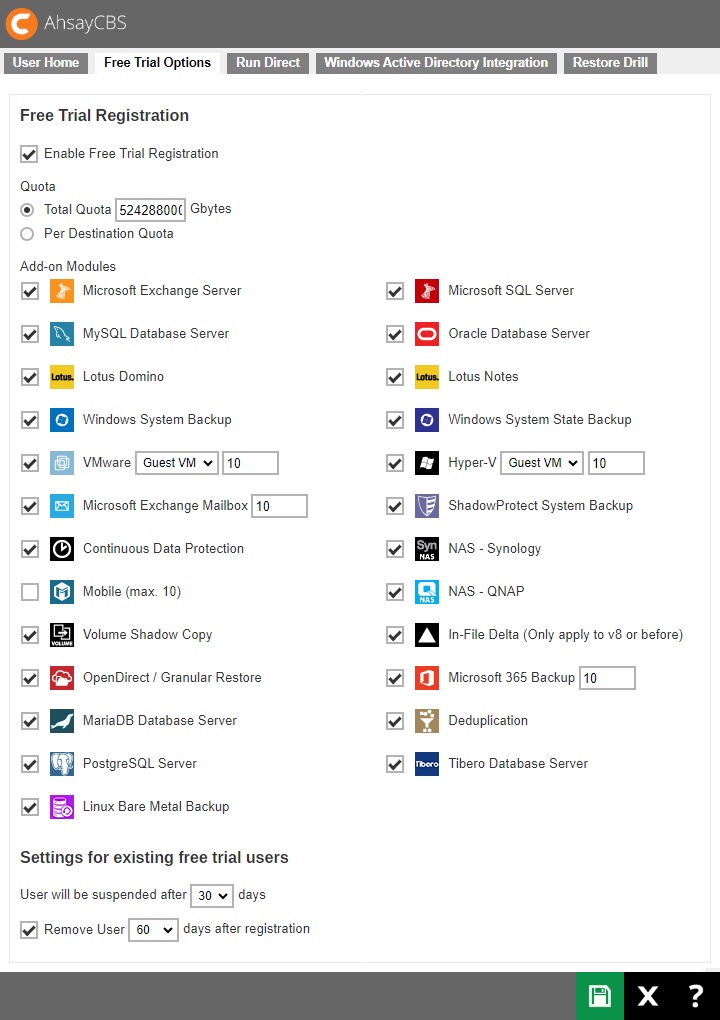
Trial users do not count towards the maximum number of users allowed within AhsayCBS under the paid software license, therefore it is possible to have an unlimited number of trial users within AhsayCBS. However, each trial user is limited to the quota storage settings for a maximum period of 90 days.
- To allow users to create a trial backup account from AhsayOBM or AhsayACB, please tick the “Enable Free Trial Registration” checkbox at the top of the page. If this feature is unticked, the option to register for a trial account will not be available to end users.
- "Quota" can either be Total Quota or Per Destination Quota.
- Total Quota will be the total maximum backup storage quota for all destinations per trial backup account upon registration.
- Per Destination Quota, the Destination and Quota defines the backup destination and maximum backup storage quota for per destination of trial backup accounts. Destination includes predefined and standard destination, and the quota settings for free trial user account is independent of the quota settings in Group Policy. For the backup destinations which are not listed under “Per Destination Quota”, the quota storage assigned for the destination is unlimited.
- The “Add-on Modules” option defines whether you want to allow trial users to have different add-on modules.
- The “User will be suspended after days” option under “Settings for existing free trial users” defines the number of days after which the trial users will be suspended. In our example, the period is 30 days, and the maximum value is 90 days.
- The “Remove User days after registration” option under “Settings for existing free trial users” defines whether you want to remove trial backup users after a certain number of days after registration. In our example, you can use this option to tell AhsayCBS to remove trial backup users from the system automatically after backup users have registered for 60 days, and the maximum value is 180 days.
Run Direct
The following shows the “Run Direct” tab under Backup / Restore > Basic. It defines the maximum number of virtual machines started by Run Direct on AhsayCBS. Simply enter the number of virtual machine and path of the temporary directory then click Save to save your changes.
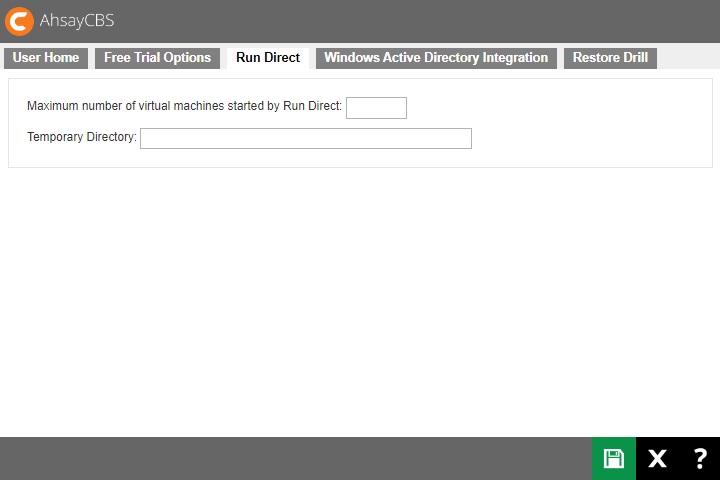
For more information on Run Direct on AhsayCBS, please refer to the Run on Server Backup and Restore section.
Windows Active Directory Integration
The following shows the “Windows Active Directory Integration” tab under Backup / Restore > Basic.
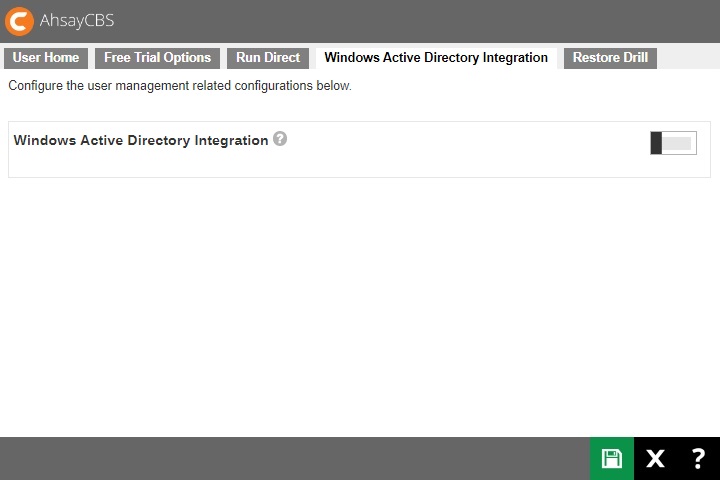
When this feature is enabled, this means that if an AD is present in the local network, it is only required to create a user account once in the Windows Active Directory. The same user account will be used on the AhsayCBS server. This is because AhsayCBS will create this user account automatically after authenticating this logon using AD.
The user account created will be:
- of the type Paid.
- of backup client AhsayACB (unless the user logon uses AhsayOBM).
If AhsayCBS fails to authenticate a user logon using its own records, a user authentication will be dispatched to Windows Active Directory automatically.
To enable Windows Active Directory Integration:
- Slide the switch to the right to enable this feature.
Enter the “Domain name” and “Domain controller IP” of the machine where the active directory is hosted.
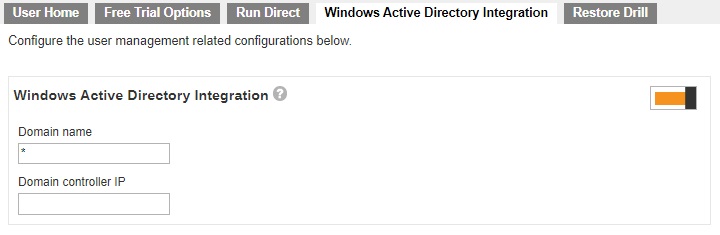
- Click the Save button to save the settings.
- This is for first time account creation only.
- Password changes in AD are reflected to existing AhsayCBS user accounts. If the password was changed in AD, the user’s password will sync upon login to AhsayCBS, AhsayOBM and AhsayACB.
- Users will also not be deleted in AhsayCBS even if it was deleted from AD, not unless user was deleted from AhsayCBS.
Restore Drill
The following shows the “Restore Drill” tab under Backup / Restore > Basic. It defines the directory path where the temporary data and index will be stored and the maximum number of concurrent restore drill jobs that will run on AhsayCBS. It will also define the required minimum space available in the temporary directory before the restore drill can be run.
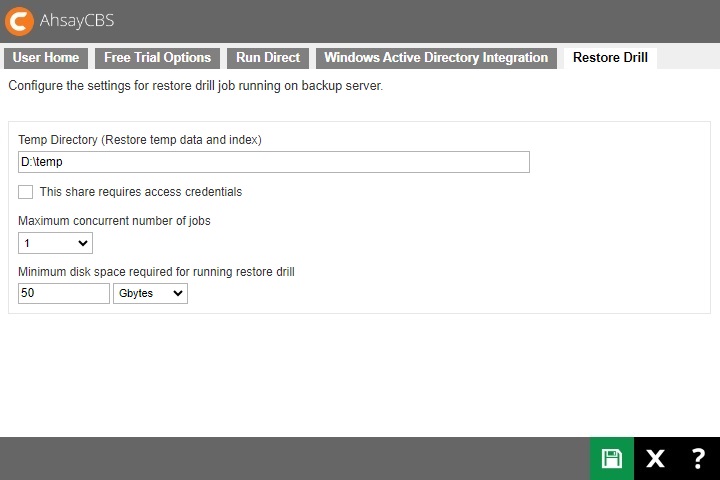
Enter the path of the temporary directory.
Make sure that the temporary directory is not set to a network drive, which is not supported, to ensure that the restore drill job will run properly.Tick This share requires access credentials if the path requires credentials to be accessed. Once ticked, provide the “User name” and “Password”.
- Select the maximum number of restore jobs allowed to run concurrently.
- Enter the value for the minimum disk space required and select the file size unit, whether kbytes, Mbytes, Gbytes or Tbytes. 50 Gbytes is the default size.
- Click the Save button to save the settings.
Users, Groups & Policies
To manage your AhsayCBS users, groups and policies configurations, simply click the Users, Groups & Policies icon under “Backup / Restore” from your AhsayCBS environment.
![]()
There are 3 tabs under Users, Groups & Policies, each of which is described below:
Backup User
A backup account contains account information of users, client type, backup modules and backup set settings, etc. A backup user account can be created by administrator or registered via the backup client application by the end user as a trial account (if this option is enabled).
To make the discussion for backup user easier to navigate, it will be divided into two parts. One will discuss the functions that can be done in the Backup User tab. And the other will focus mainly on the different settings that can be configured for the backup user, as well as the backup sets.
Functions
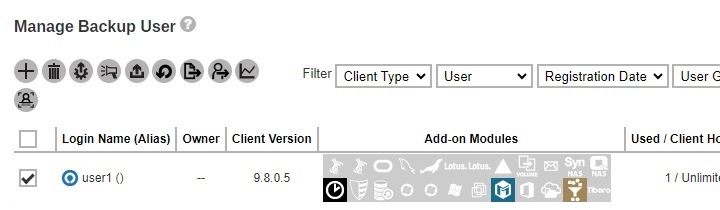
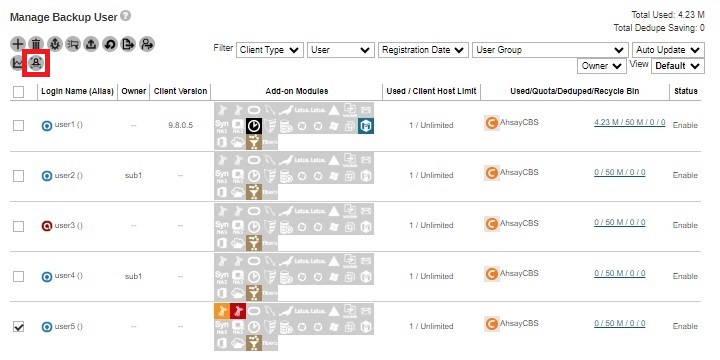
The following shows the “Backup User” tab under Backup / Restore > Users, Groups & Policies.
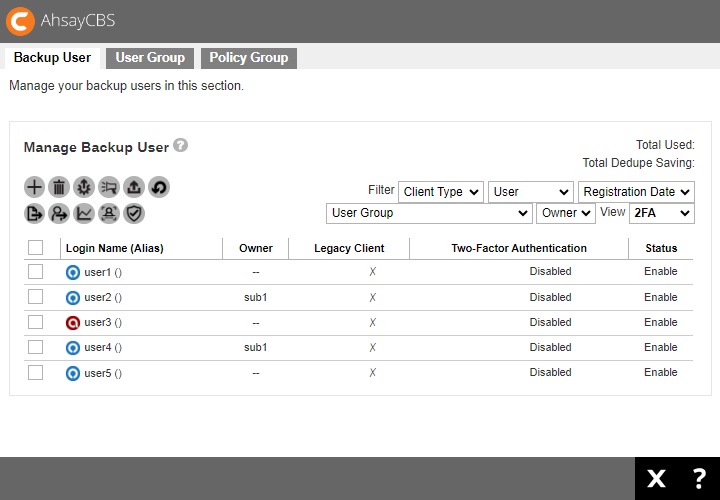
There are 11 functions available here:

- Create
- Delete
- Auto Update
- Broadcast
- Initiate Backup Job
- Run Restore Drill
- Export Users' Usage Statistics to CSV
- Move / Import / Export Users
- Rebuild Storage Statistics
- Rescan all user home directories
- Enable / Disable Two-Factor Authentication
Create a new backup user
If AhsayCBS is deployed for internal use, as a system administrator, you need to determine the following when you create a backup account:
- Backup client type, whether it is AhsayOBM or AhsayACB.
- Backup destination.
If you are a Managed Service Provider (MSP) or reseller you may require to take into consideration the following items when you create a backup user account:
- Types of users, whether it is Paid or Trial.
- Backup client type, whether it is AhsayOBM or AhsayACB. Also the modules subscribed by the client.
- The backup destination and the subscribed quota.
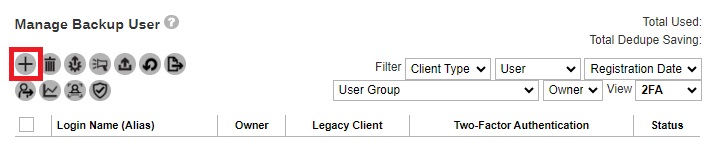
Follow the steps below to create a new AhsayOBM/AhsayACB backup user account.
Click Create to add a backup user.
Enter the “Login Name”, “Password” and select the “Owner”. Also select the “User Group” by checking the desired user group. Click Next to proceed.
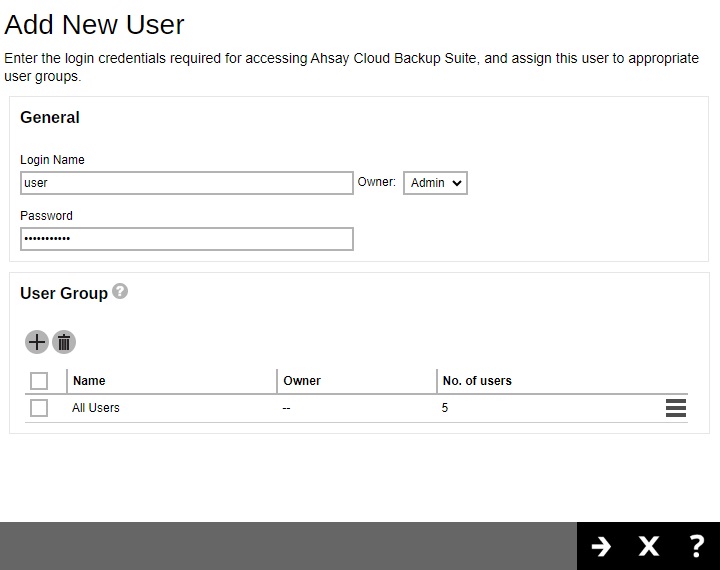
System user accounts that will be available for selection in “Owner” will only be Admin or Sub Admin accounts. All Admin accounts will just be listed as one Admin option, since all Admin accounts share the same functionality. While the Sub Admin accounts that will be available in the drop-down list will depend on the system user account that is creating the backup user account.
If a backup user account is being created by a system user account that was created by a Sub Admin account, only the main Sub Admin account will be available as a choice in the drop-down list for the “Owner”.
Example: Sub Admin 2 was created by Sub Admin 1, when Sub Admin 2 creates Backup User 1 only Sub Admin 1 will be listed in the “Owner” drop-down list.
Configure the following. Click Next to proceed when done with the settings.
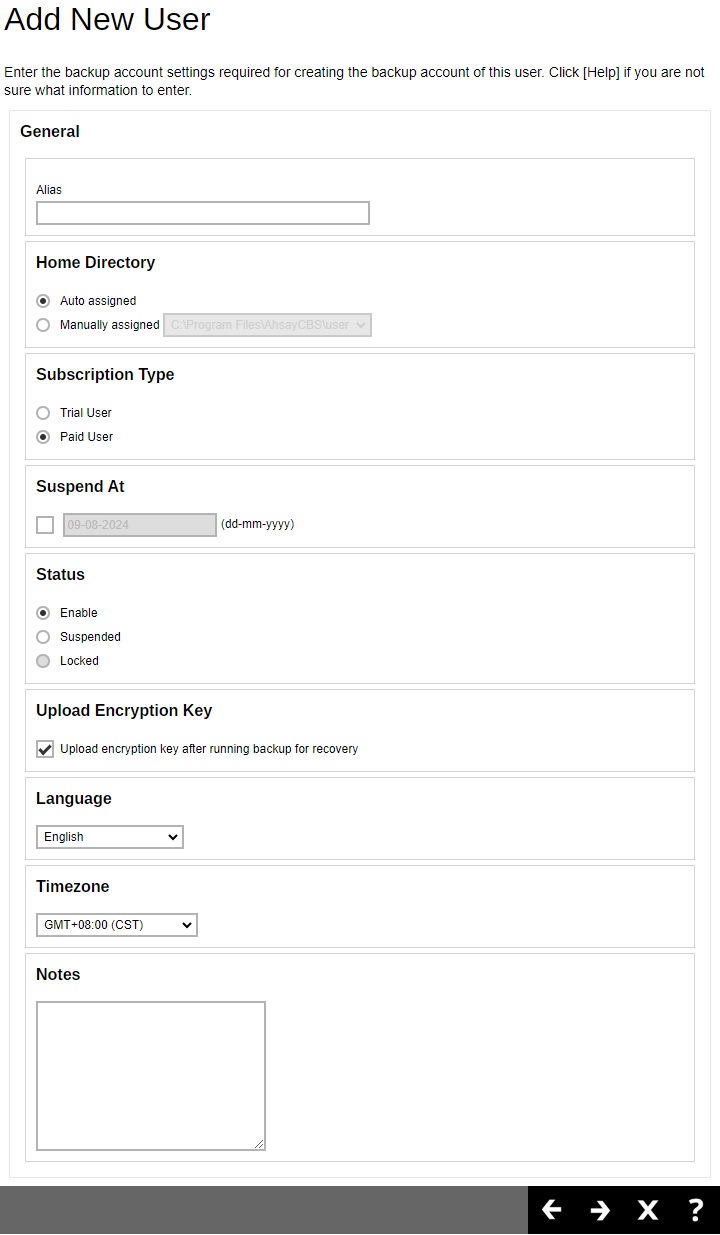
- Alias - another name for the backup user.
- Home Directory - select Auto assigned or Manually assigned user home path. The user backup data will be stored here.
- Subscription Type - there are 2 subscription types: Trial User and Paid User. Trial users are subject to automatic removal as defined by the Free Trial Options tab under Backup / Restore > Basic. The automatic removal option can be disabled.
- Suspend At - a scheduled date to suspend this user. For trial users, the suspension date is based on the settings in the Free Trial Options tab under Backup / Restore > Basic.
- Status - there are 3 types of status for a user account: Enable, Suspended, and Locked. Under normal circumstances, administrator may change the Enable or Suspended status of a user. The Locked status is referring to account lockout rules that are set inside the policy group, refer to the Policy Group section for more details. For example, if a user has 3 consecutive unsuccessful log in attempts in 10 minutes, the user account will be locked out. This is the default setting.
- Upload Encryption Key - once the encryption recovery option is enabled, the encryption key file is uploaded to the backup server. In case the user forgot the encryption key, the encryption key can be recovered using this step Recovering Encryption Key via AhsayCBS Web Console. The recovered encryption key will be sent directly to the email address registered on the user account. Refer to the Encryption key section for further details.
- Language - preferred language for all email reports of the backup user.
- Timezone - time zone of the backup user. Timezone information will be automatically updated when the user logs in the client backup agent, such as AhsayOBM and AhsayACB, or perform backup job to avoid the false alarm of missed backup job.
- Notes - field to add notes for the backup user.
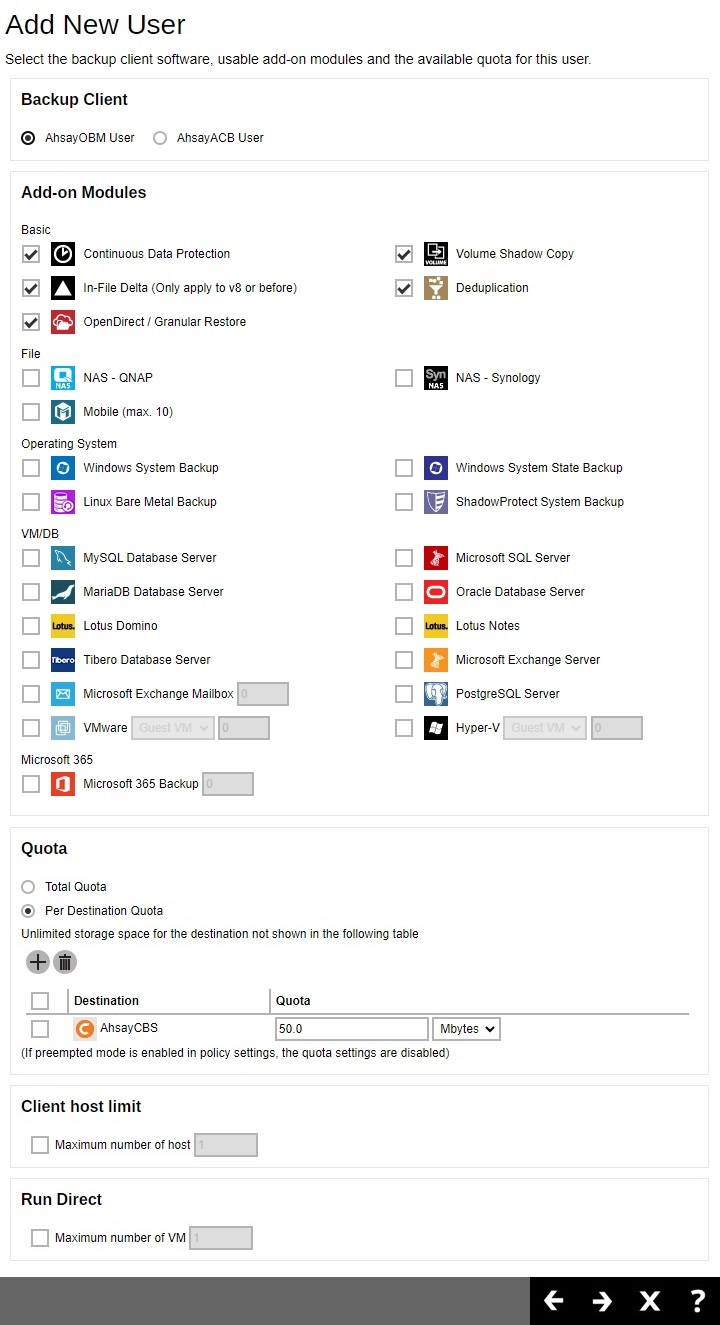
Configure the following. Click Next to proceed when done with the settings.
AHSAYOBM USER ACCOUNT
AHSAYACB USER ACCOUNT
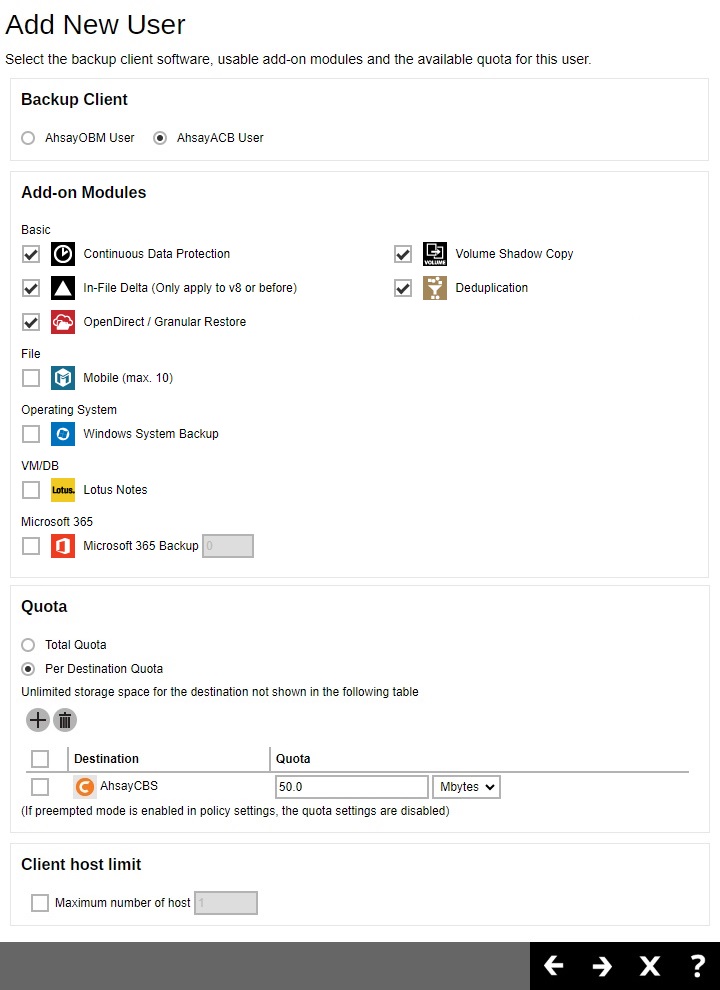
- Backup Client - if the backup client machine requires to backup files only, such as a desktop computer or a notebook, then you can simply create an AhsayACB backup account. Otherwise, you will need to setup AhsayOBM, because it comes with backup modules to perform Windows system backup, database backup and virtual machine backup. By default AhsayACB backup account is selected.
- Add-on Modules - select which add-on module to enable for the backup user. Some add-on modules has a text field after its name. For example, the number after Microsoft Exchange Mailbox defines the number of Exchange mailboxes that are allowed to be backed up under this user account.
- Quota - the backup quota of each destination for the user account. Refer to the User Settings section for details.
- Clien host limit - this is to limit the maximum number of hosts allowed in a client’s backup account, i.e. the number of devices that they can install AhsayOBM/AhsayACB on. Refer to the User Settings section for details.
- Run Direct (for AhsayOBM only) - set the maximum number of VMs for VM Run Direct restore on AhsayCBS for this user. Refer to the Run Direct section for details.
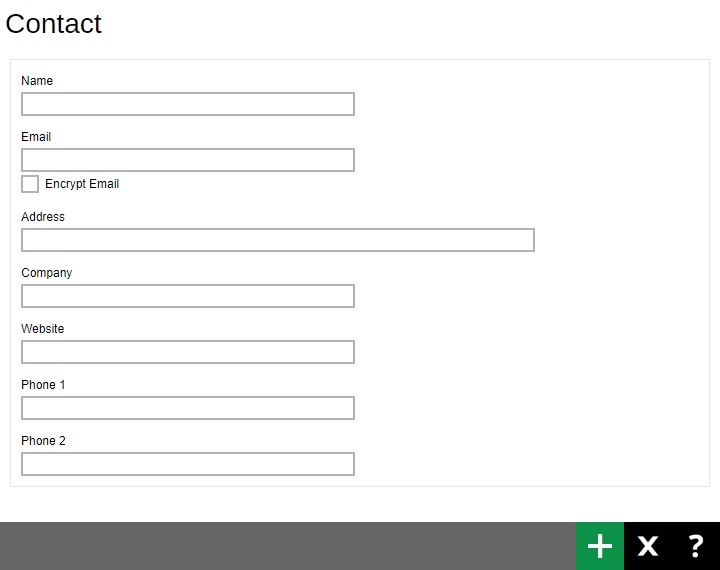
Click Create to add new contact information.
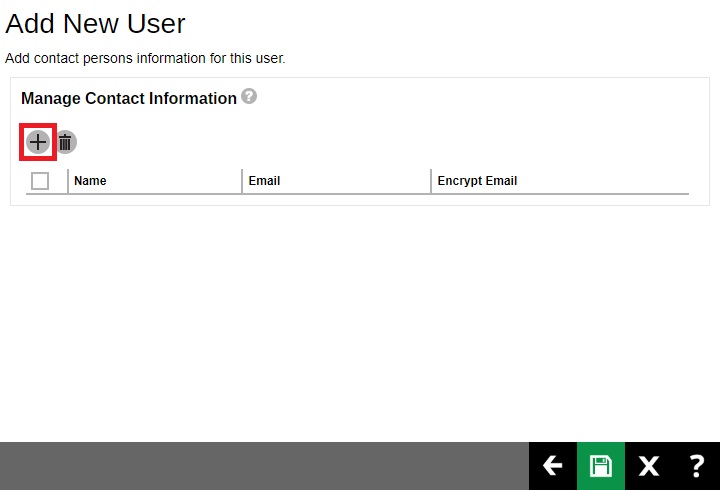
Enter the contact information such as “Name”, “Email”, “Address”, etc. Click Add to proceed when you are done with the settings.
- Click Save to save the backup user.
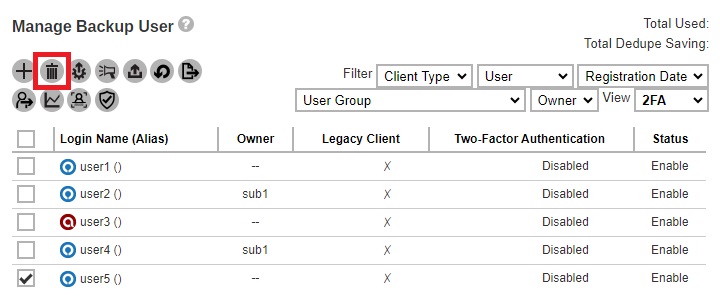
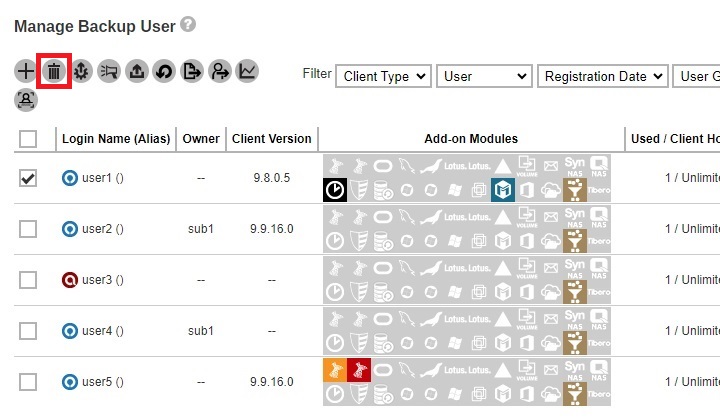
Delete a backup user
Used to delete an existing backup user account.
To delete an existing user, select the user you want to delete, then click the Delete button.
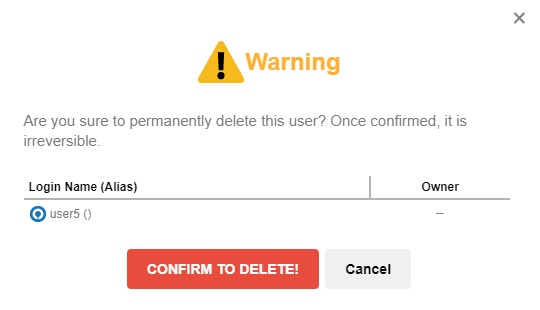
You will be prompted to confirm deleting the selected user, click CONFIRM TO DELETE! to confirm.
When you remove a backup user account, all the backup sets and backup data on AhsayCBS or predefined destinations, as well as the backup user profile on the AhsayCBS will be removed.
For the backup data residing on local destinations on the AhsayOBM/AhsayACB machine or on customers personal cloud storage accounts, SFTP/FTP servers will not be deleted.
Remind clients to uninstall the software (AhsayOBM/AhsayACB) from their device to avoid receiving failed login reports for deleted accounts. You can use the Broadcast feature before the account is deleted to inform the client.
Auto Update
The automatic upgrading of AhsayOBM/AhsayACB clients to the latest version is performed using the Auto Update function. To perform a successful auto upgrade of the AhsayOBM/ AhsayACB clients need to connect to the AhsayCBS backup server.
The AhsayOBM / AhsayACB client backup machine:
- must be powered on.
- must be connected to the Internet.
- scheduler services must be running.
- user account status must be Enable. (Auto Update will not work if the user account is suspended or locked.)
- application GUI must be closed.
- antivirus or firewall must allow the binaries to complete the download.
- network connection with the AhsayCBS server must be stable.
- AhsayACB must not run on Server OS.
- on Linux/FreeBSD machines, the GNU C or GLIBC library must be installed, version must at least be 2.14.
- on Linux/FreeBSD machines, the psmisc package which contains the fuser components must be installed fro Auto Update to work properly.
- on FreeBSD machines, OpenJDK 8 must be installed.
For v6 clients, it requires 720 minutes or whenever auto update agent restarts, AhsayOBM / AhsayACB will check with your AhsayCBS for any available updates when a scheduled backup job runs. While for v7 or above, it checks every 15 minutes or whenever the client agent service restarts. If any auto update instructions were found on the AhsayCBS, the update progress will be started.
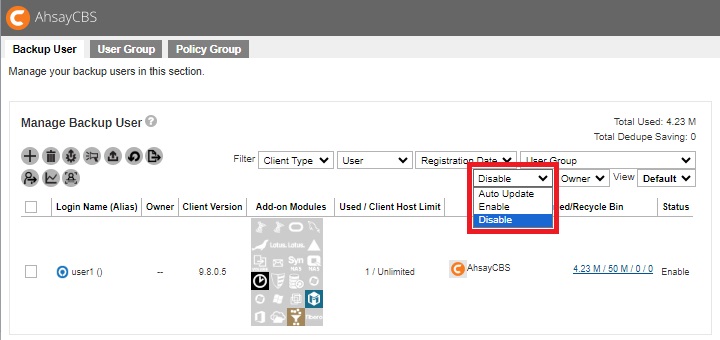
- To determine if a backup user account has Auto Update enabled, there are two (2) ways to view this:
One is by using the filter, in the Auto Update filter you can choose between Enable or Disable. The backup user account will be listed according to the selected filter criterion. In the example below, the listed backup user accounts have auto update Disabled.
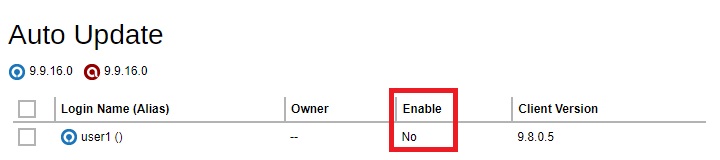
Another is by selecting a specific account. Select a specific account then click the Auto Update button.
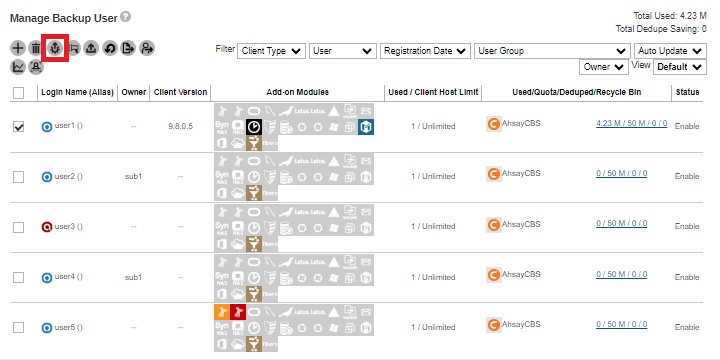
You will see under “Enable” that auto update is not yet enabled.
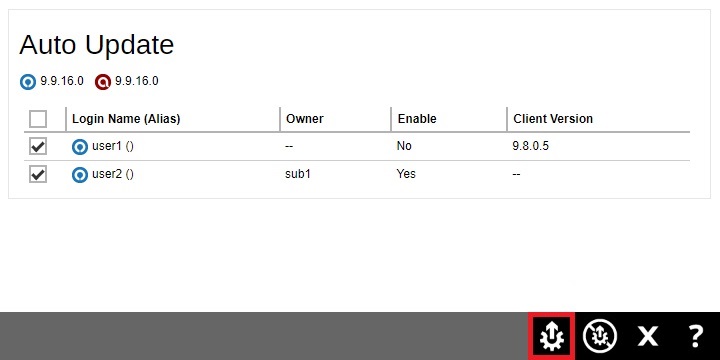
If you want to enable auto update, select the desired user(s) then click AutoUpdate.
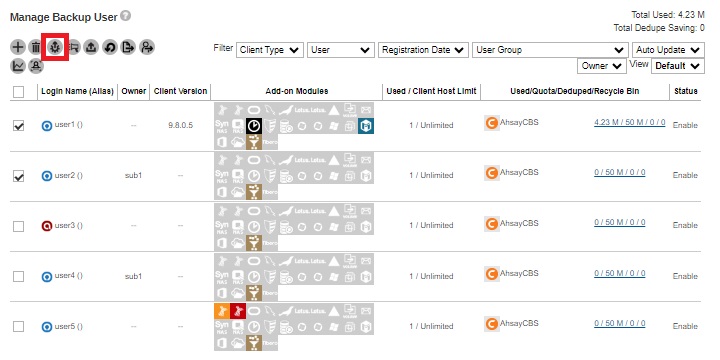
Select the user(s) then click the AutoUpdate button to start.
- To check if auto update was successful, you can check it through:
the latest backup report.
or on the AhsayCBS web console, Manage Backup User > Login Name, check the "Client Version".

Broadcast
Used to send messages to AhsayOBM/AhsayACB user account. Message will be sent to the email address that was provided in the contacts for each user account. This is very useful when there is an announcement that must be sent to users, i.e. backup server system maintenance, applied latest patch or some promotion offers to your users.
After you selected a list of users for broadcast, you will be able to send a broadcast message to the selected users.
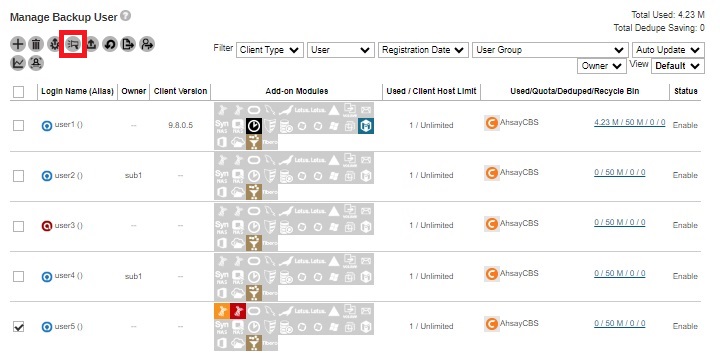
To broadcast a message to users, select the desired users then click the Broadcast button.
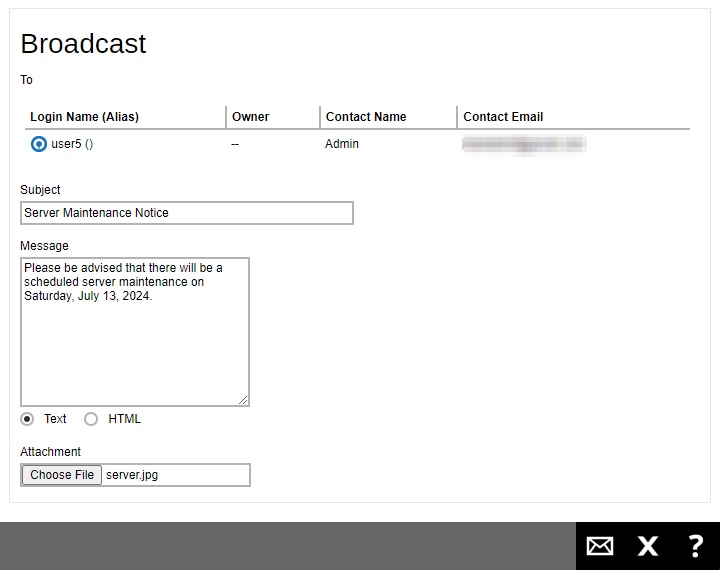
Edit the broadcast message by entering your subject and message. The message can be sent in text or html format. You may also include attachments. Once done, click the Send button to send the message.
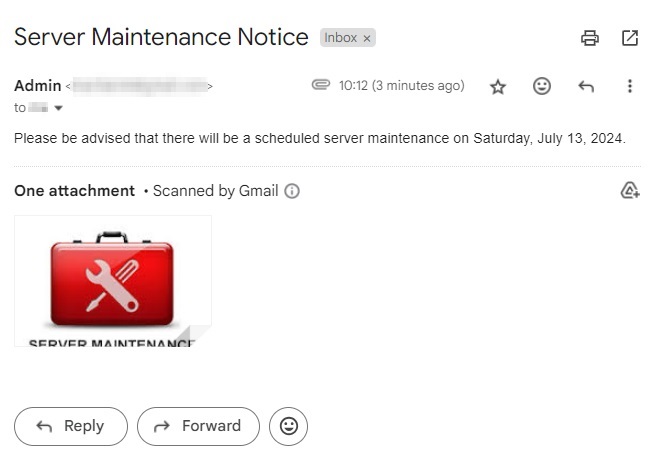
Here is an example of a message received in the users' mailbox.
Using Text with attachment
Using HTML
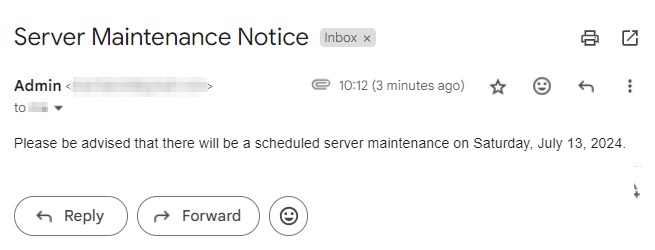
The message will be sent to the email address that was provided in the Contact Information of the user.
Initiate Backup Job
This feature allows the AhsayCBS server administrator to start a backup job on a client’s machine remotely without the need to log in to the client machine or even if they do not have access to the client machine. This feature relies on the AhsayOBM/AhsayACB scheduler service to receive and process the start backup command.
Once a remote backup is triggered on the AhsayCBS web console, the backup job should be started within 5 minutes, as the AhsayOBM/AhsayACB scheduler on the client machine will connect to the AhsayCBS server every 5 minutes to retrieve any update information. When the scheduler connects to the AhsayCBS server, it will receive the start backup command and start the backup job.
A remotely started backup will work as long as the AhsayOBM/AhsayACB client backup machine:
- is powered on.
- is connected to the Internet.
- scheduler service is running.
- is connecting to the AhsayCBS server using the latest login credentials.
- backup schedule must be enabled on the related backup set.
- has no active backup job runnng. If there is an active backup job running, the received start backup command will be ignored.
Select the desired backup user then click the Initiate Backup Job button.
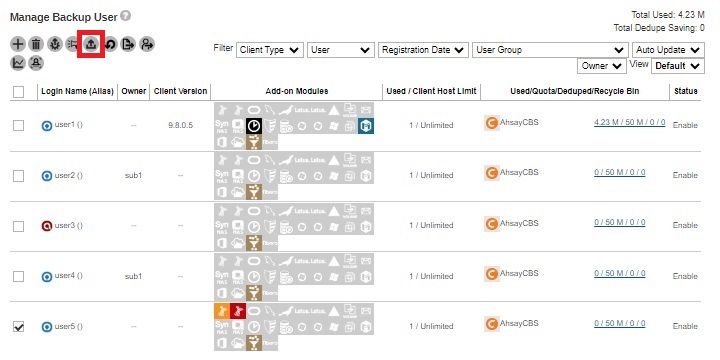
Select the backup set you would like to start a backup on and select the “Backup Type” when available. Click the Initiate Backup Job button to trigger a backup.
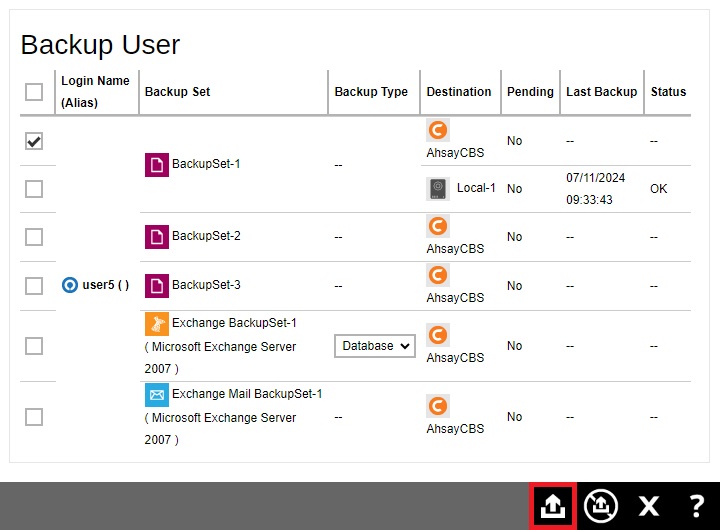
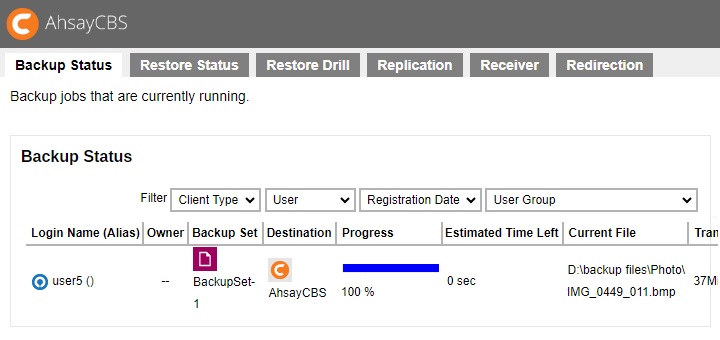
The backup will start shortly and you can monitor the progress using the Live Activities feature.
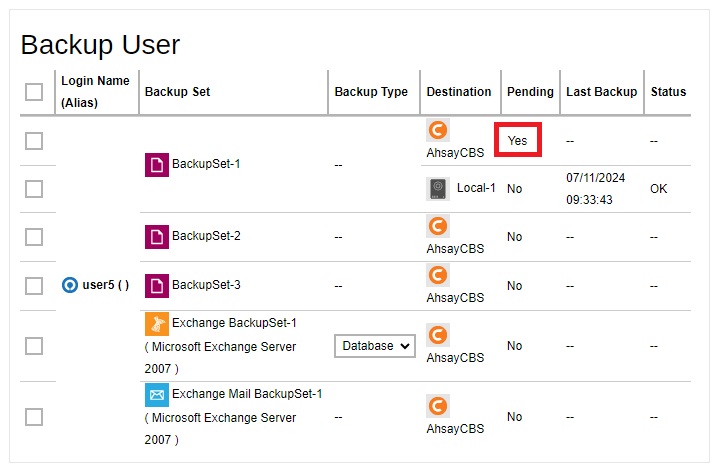
You can also check the status of the server if it initiates backup through Manage Backup User > Login Name > Backup User, check “Pending”. In the first screenshot below, after initiating the backup, you can see under the “Pending” column that the backup has not started yet.
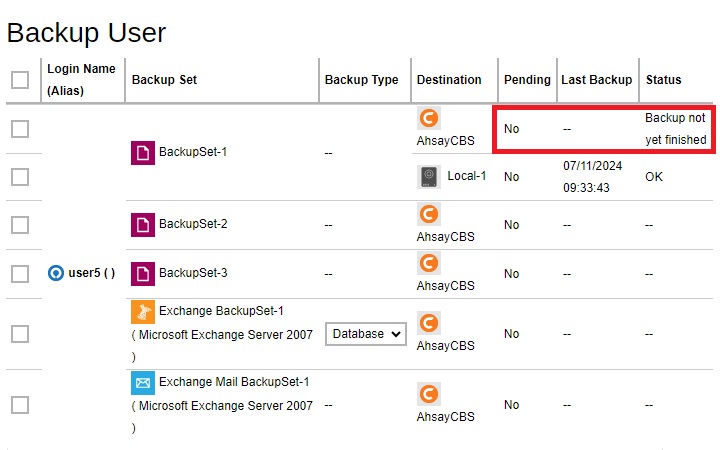
Once the start backup command is initiated, you can see under the “Pending” column that the backup job is not pending anymore because it has started and its “Status” will be changed to “Backup not yet finished”.
Run Restore Drill
The restore drill is a routine job which can be set to check for corrupted files every 6, 12 or 24 months. This feature ensures that backup data are always restorable by sending an email (depends on the settings in Backup / Restore > Users, Groups & Policies > Policy Group > %Policy Group Name% > User Settings > Email Reports) to the user to inform them if there are corrupted files in the backup data. In turn, the user should fix this by running a backup to replace the corrupted files.
But with the addition of this function, users can now manually run the restore drill to check for corrupted files whenever they want. They do not have to wait for the scheduled restore drill to find out if there are corrupted files in their backup data.
The restore drill can be manually triggered as long as the AhsayOBM/AhsayACB backup set:
- has been previously backed up.
- restore drill setting is enabled.
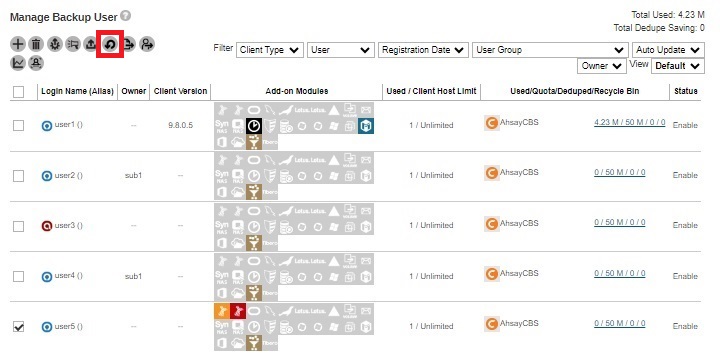
Select the user who owns the backup set that you want to check, then click the Run Restore Drill button.
Select the backup set then click the Run Restore Drill button to run the restore drill.
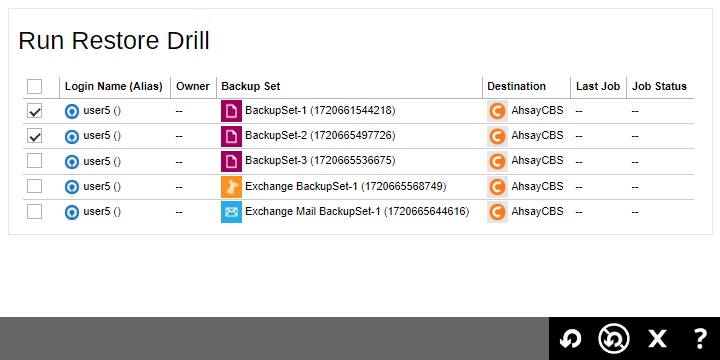
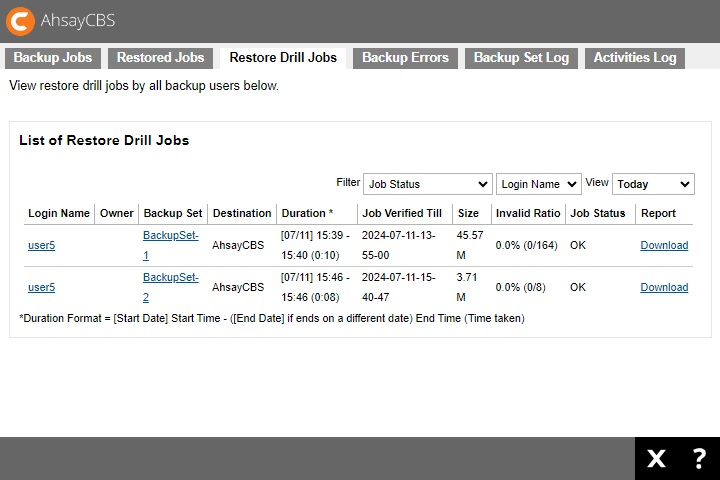
The restore drill status will be displayed in the “Job Status” column.
 You can still stop the restore drill when the job status is not “Completed”. You can do this by selecting the backup set then clicking the Stop Restore Drill ` button in the Run Restore Drill screen.
You can also check it from Monitoring > Backup / Restore Logs > Restore Drill Jobs.
Export Users' Usage Statistics to CSV
You can export the usage of your selected user(s) to a CSV (Comma Separated Value) file. This format can be imported into spreadsheets or other applications for further analysis or billing purposes.
To export usage of users to CSV, select the desired users then click the Export Users' Usage Statistics To CSV button.
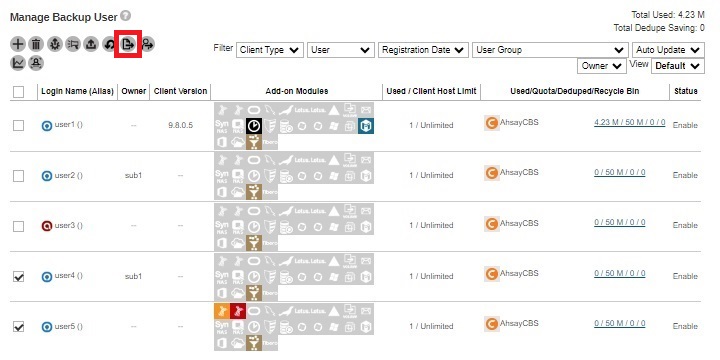
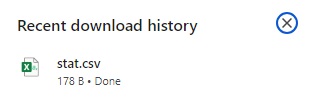
You will see a .csv file being downloaded.
When you open it, it will display the Login Name, Alias, Owner, Destination, Usage in bytes, Quota in bytes, Effective Policy, Remark, Client Type, Client Host Used and Quota, Microsoft Exchange Mailbox Used and Quota, VMware Guest VM Used and Quota, VMware Socket Used and Quota, Hyper-V Guest VM Used and Quota, Hyper-V Socket Used and Quota and Microsoft 365 Backup Used and Quota.
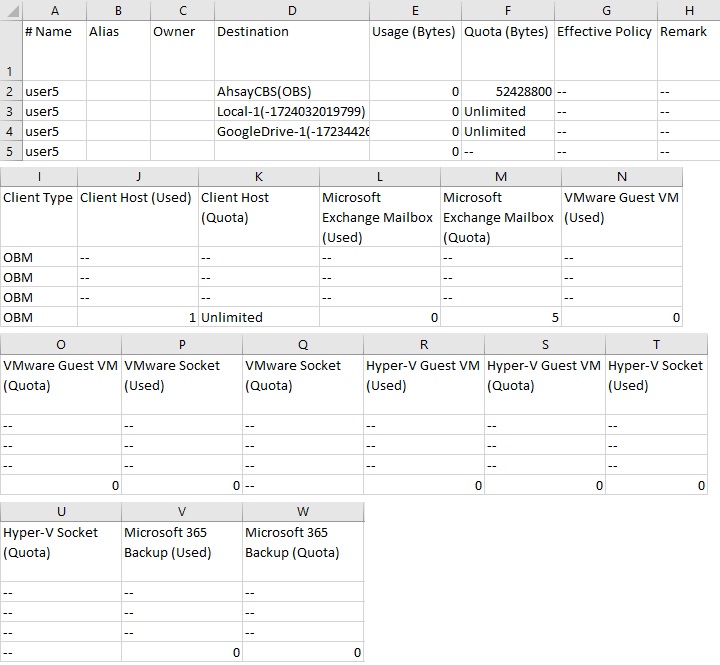
Below is a screenshot of the Statistics Usage Page, you can access this by going to Backup / Restore > Users, Groups & Policies > Backup User Tab > Login Name > Statistics > Usage.

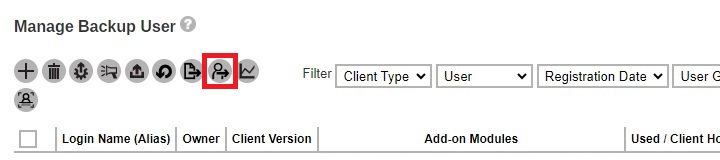
Move / Import / Export Users
This function can be used to export users to a zip file and import users from a zip file.
You can also use this function to migrate users from one AhsayCBS server to another AhsayCBS server, or to migrate users from their current user home to another user home on the same server. You can also move users from one owner to another. This function is limited to system user with admin role.
Select the desired user, and then click the Move / Import / Export Users button.
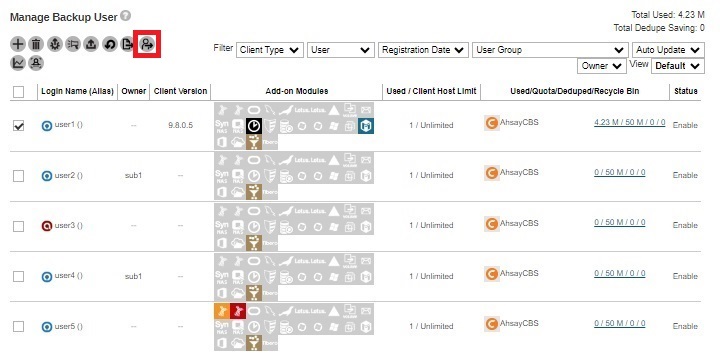
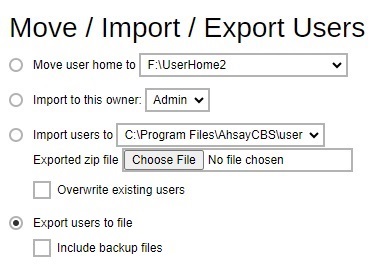
The following screen appears:
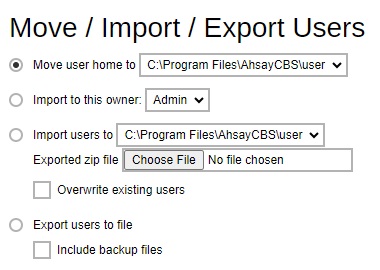
- Move user home to – Export user from a user home to another user home on the same AhsayCBS server.
- Import to this owner – Import user from one owner to another owner on the same AhsayCBS server.
- Import users to – Import a previously exported user to the selected user home.
- Export users to file – Export user profile and backup files to a zip file format.
- Please schedule a time with the backup user before migrating a user to another user home / to another AhsayCBS. Ensure that the AhsayOBM / AhsayACB client interface is closed, and that no backup / restore job is performed during the migration.
- It is highly recommended to temporarily suspend the backup user during the export / import procedure.
- It is not supported to import users that belong to AhsayCBS v9.1.0.0 or above to an old version of AhsayCBS server.
Since the migration of a backup user to another user home / AhsayCBS may involve export of the user profile and backup data, for user with a large amount of backup data, the time required for the export may take a while. During the export, please do not restart the AhsayCBS service or the server. In case of power failure or server shutdown, the export of the user will fail.
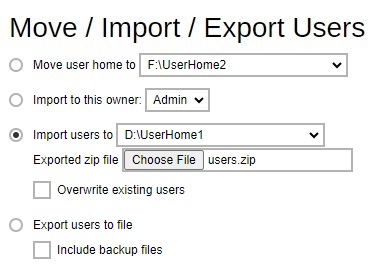
MIGRATE USERS FROM ONE USER HOME IN D: DRIVE TO ANOTHER USER HOME IN F: DRIVE WITHIN THE SAME AHSAYCBS
Assumptions
- The backup users to be moved only have small amount of backup files.
- These users are located in D:\UserHome1 to be moved to F:\UserHome2.
Steps
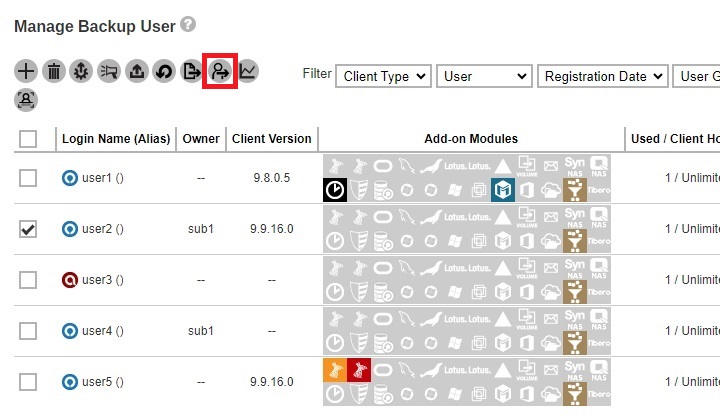
Select the user(s) to be migrated then click the Move / Import / Export Users button.

Make sure the radio button of “Move user home to” is selected and choose F:\UserHome2 from the dropdown box next to it.
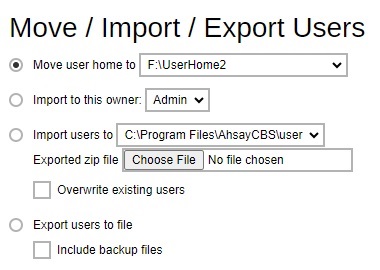
- Click OK to proceed.
MIGRATE USERS FROM ONE OWNER TO ANOTHER OWNER WITHIN THE SAME AHSAYCBS
Assumptions
- The backup users to be moved is owned by sub1.
- The ownership of the backup user will be changed to sub2.
Steps
Select the user(s) to be migrated then click the Move / Import / Export Users button.
Make sure the radio button of “Import to this owner” is selected and choose sub2 from the dropdown box next to it.
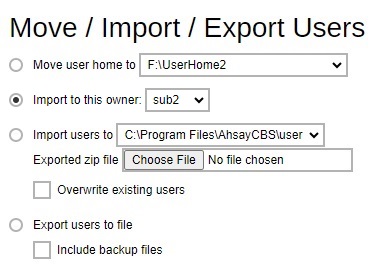
- Click OK to proceed.
MIGRATE USERS FROM ONE AHSAYCBS SERVER TO ANOTHER AHSAYCBS SERVER
There are two ways to do this:
Method 1: Export users including the backup files to a zip file.
Method 2: Export the user profile only to a zip file. Then manually copy the backup files later directly to the destination AhsayCBS server.
Limitations
- Migrating data on cloud storage or pre-defined destination is not supported.
- Exporting and importing user profile and large amount of data.
Suggestions
- Perform the export and import procedure for one user at a time, if exporting and importing user profile and backup files.
- Suspend the user during the export and import procedures to ensure that no backup / restore job is performed during the migration.
- If the exported “users.zip” file is not saved to a local destination, ensure that the network between the AhsayCBS server and the save destination remain stable throughout the export process.
- For best result (performance and stability wise), it is recommended that:
- The export and import operation of the backup user is performed directly on the corresponding AhsayCBS server, or in the same LAN environment.
- The exported “users.zip” files are copied directly onto the destination AhsayCBS server, or a network drive in the same LAN environment.
- For backup user with large amount of data, migrate the user by using Method 2. Perform the user data export at a time when the resource usage is low on the AhsayCBS server.
Assumptions
- The user to be exported is located on AhsayCBS1, to be moved to AhsayCBS2.
- Before importing the user to AhsayCBS2, make sure that there is no backup user with the same username on AhsayCBS2.
- Backup data are stored directly on the AhsayCBS server.
- The user should be removed on the original server (e.g. AhsayCBS1) after exporting the user to the new AhsayCBS server. This is especially important if these AhsayCBS servers are under the same Redirector setup.
Please refer to the following article for further details about migration of users between different AhsayCBS under the same Redirector setup: Transfer backup users between AhsayCBS servers.
It is best to use Method 1 when exporting a user that has only a relatively small amount of backup data (i.e. like a few MB/GB) since this will be saved in a zip file. Otherwise, use Method 2.
- Method 1
- Method 2
Method 1
Export a user (including data) from one AhsayCBS and import to another AhsayCBS
Select the user you need to export and click the Move / Import / Export Users button.
Click the Export users to file radio button and tick the Include backup files check box to export the backup user data.
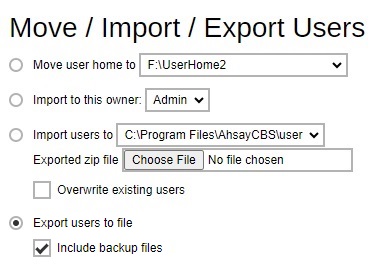
- Click OK to proceed. The system will prompt you to save the file (users.zip) in your local machine. You need to have enough disk space to save the zip file. If the user account has large backup sets, it is expected to wait for a long time
- After the exporting process, click Cancel to go back to the Backup User Tab page.
Log in to AhsayCBS2 and go to Backup/Restore > Users, Groups & Policies. Click the Move / Import / Export Users button.
Click the Import users to radio button and select the destination user home on the AhsayCBS2 from the dropdown list. Then click the Choose File button to select your previously exported zip file.
If the overwrite option is selected, the user account on the AhsayCBS2 which has the same username in the users.zip will be overwritten.

Click OK to proceed.
Restart the AhsayCBS service and log in to AhsayCBS2 to check the newly imported user in the “Backup User” page.
After the entire migration process is completed, delete the original backup account on AhsayCBS1. On the AhsayCBS web console of AhsayCBS1, under “Backup User” tab, select the migrated user account and click on the Deletebutton to delete it.
Method 2
Export a user from one AhsayCBS and import to another AhsayCBS, afterwards manually copy the backup files to the destination AhsayCBS server
While it is advisable to use Method 2 when exporting a user which has a large amount of backup data. In this option only the user profile will be saved in a zip file and the backup data will be manually transferred to the destination AhsayCBS server.
Select the user you need to export and click the Move / Import / Export Users button.
Click the Export users to file radio button and make sure the Include backup files check box is not ticked.
- Click OK to proceed. The system will prompt you to save the file (users.zip) in your local machine. You need to have enough disk space to save the zip file.
- After the exporting process, click Cancel to go back to the Backup User Tab page.
Log in to AhsayCBS2 and go to Backup/Restore > Users, Groups & Policies. Click the Move / Import / Export Users button.
Click the Import users to radio button and select the destination user home on the AhsayCBS2 from the dropdown list. Then click the Choose File button to select your previously exported zip file.
If the overwrite option is selected, the user account on the AhsayCBS2 which has the same username in the users.zip will be overwritten.
Click OK to proceed.
Go to the source AhsayCBS1 server and copy the backup files then paste to the destination AhsayCBS2 server. The backup files are located in %UserHome%\%username%. Copy the entire content to the destination AhsayCBS2 server using the same location.
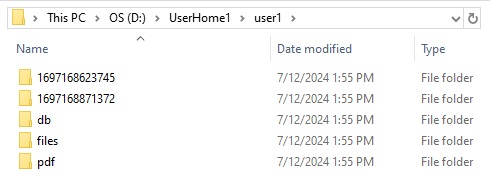 For backup files that has a large amount of data, it is advisable to compress the files first before copying to the destination AhsayCBS server. Or you may also use a third-party application (i.e. WinSCP) to transfer files.
- Restart the AhsayCBS service and log in to AhsayCBS2 to check the newly imported user in the “Backup User” page.
- After the entire migration process is completed, delete the original backup account on AhsayCBS1. On the AhsayCBS web console of AhsayCBS1, under “Backup User” tab, select the migrated user account and click on the Delete button to delete it.
Post-migration Check
Check if the user has been copied to the destination AhsayCBS server by going to Backup / Restore > Users, Groups & Policies > Backup User.
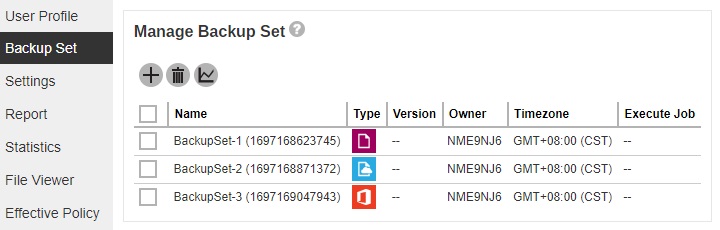
Also check if the backup sets were migrated by clicking on the Backup User Login Name > Backup Set.
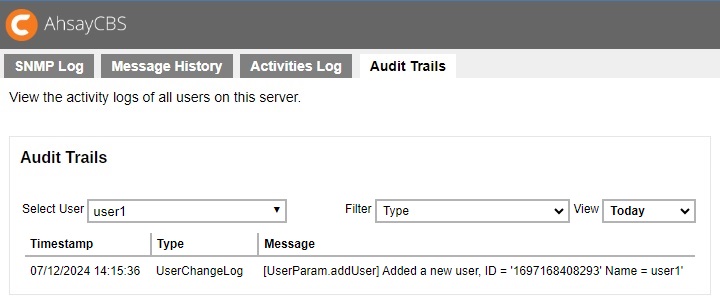
Also check from the Audit Trail if the user and backup were added. Go to Monitoring > Administration Logs > Audit Trails, select the login name from the Filter.
Rebuild Storage Statistics
This option can only rebuild legacy backup sets created in version 6, which have not been migrated to v9 block storage format. The option is used to enhance the accuracy of storage statistics for the backup set created in version 6.
The time taken to complete a rebuild depends on a number of factors such as the number of files / folders in the backup set(s), the number of backup sets, the hardware specifications of your AhsayCBS server such as the disk I/O and CPU performance, and if there are other resource intensive jobs running.
To rebuild legacy backup set, click the Rebuild Storage Statistics button.
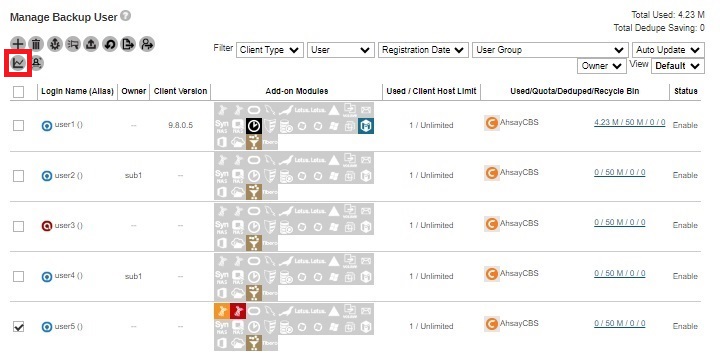
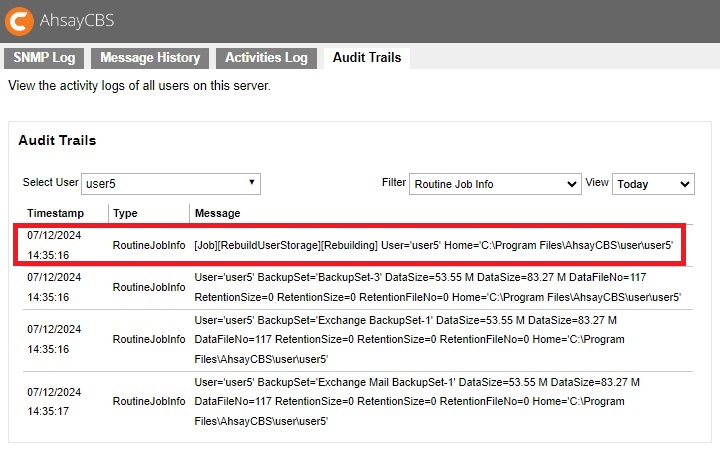
To check the progress or status of the Rebuild Storage Statistics job, go to Monitoring > Administration Logs > Audit Trails, select the backup user from the “Select User” dropdown and use the “Filter” Routine Job Info.
Rescan all user home directories
The feature ensures the status of all user home is updated so that the backup sets under available user home should be shown in the selected list for Admin user account to exclude while the backup sets under unavailable user home should not be listed during backup data migration. And also if the user home is offline, the backup and restore job cannot be run properly, so the feature helps confirm applicable backup and restore job.
The feature will be applied in the following 3 conditions:
- Startup AhsayCBS service.
- Click the Rescan All User Home Directories button.
Run routine job (HourlyJob).
If there is a user home offline, which may be caused by disk temporary unavailable, user home directory rename, network drive disconnected or disk corrupted, a message will pop up as shown in the following screen shot.
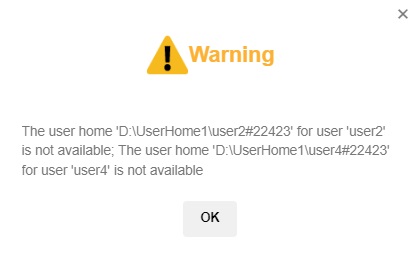
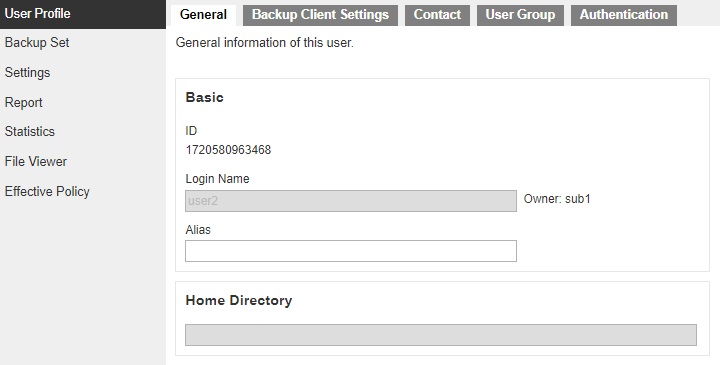
After clicking the according user account, “Home Directory” will be blank.
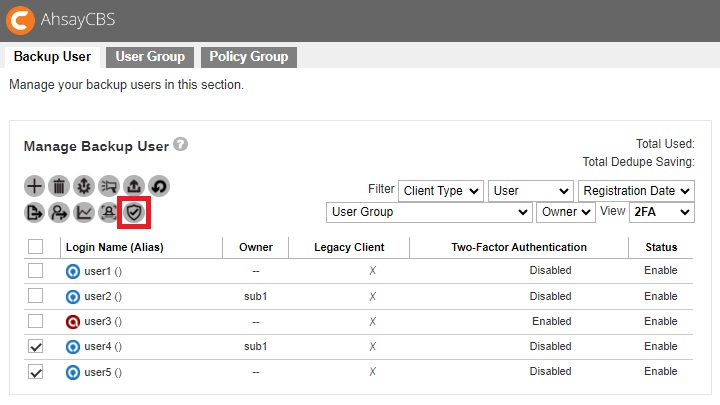
Enable / Disable Two-Factor Authentication
You can enable or disable the 2FA for several users using this feature. The Enable / Disable Two Factor Authentication button will only be available once 2FA is selected in the “View” filter. This feature is helpful when you want to enable or disable the 2FA of many users at once and not do it per backup user. For more information, please refer to Two-Factor Authentication in the System Settings part.
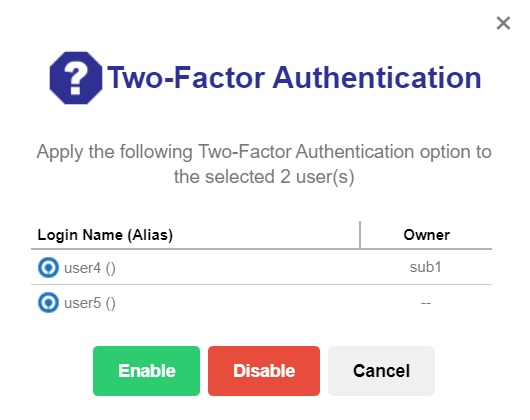
Select the backup user that you want to enable 2FA. Then click the Enable / Disable Two-Factor Authentication button.
Click Enable to enable 2FA for the selected backup users.
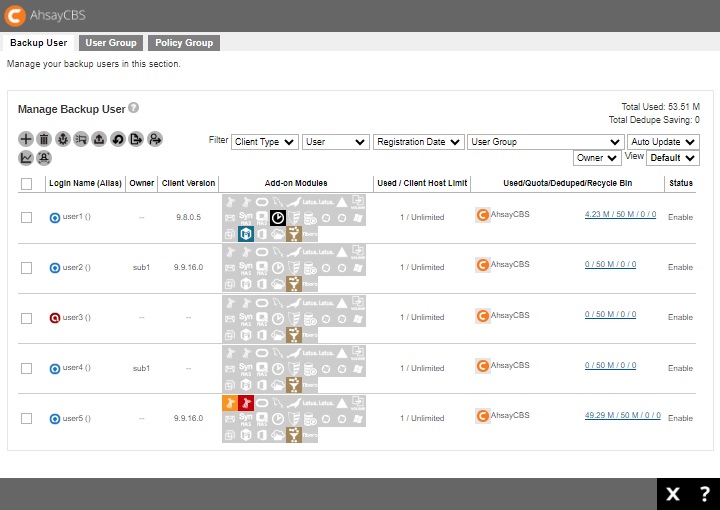
Aside from the functions, there are 7 filters that can be used to narrow down the results and change the displayed information of the backup user:

- Client type - backup users can be filtered based on type, either AhsayOBM or AhsayACB client. By default, it displays backup users belonging to all client types.
- User - backup users can also be filtered based on the first letter of its login name. It can also be based on subscription type which is Paid or Trial. It can also be based on status which is Enable, Suspended or Locked. Additional criteria are Others and Inactive. By default, the backup users are displayed alphabetically.
- Registration Date - backup users can be filtered based on the date they were registered. The choices are Today, Last 7 days, Last 30 days and Last 100 days. By default, it displays all backup users created.
- User Group - backup users can be filtered based on the user group it belongs to. By default, it displays all backup users belonging to all user groups.
- Auto Update - backup users can be filtered based on the status of its auto update if it is Enabled or Disabled. By default, all backup users are displayed. This is only available in Default view.
- Owner - backup users can be filtered based on the owner of the user account. By default, all backup users are displayed.
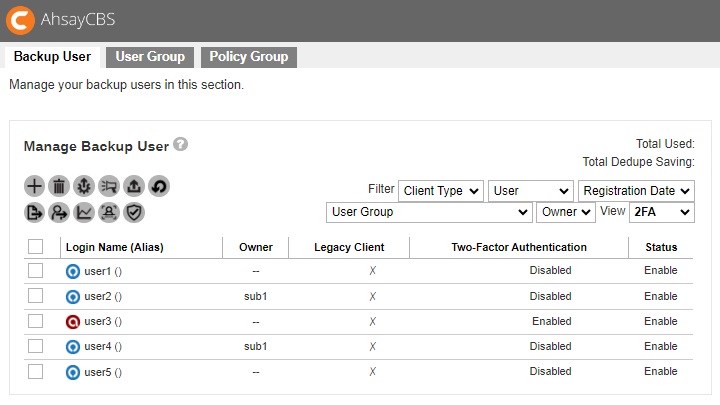
- View - the information displayed regarding the backup user may be changed by changing the view. There are two (2) views available which are Default and 2FA. The 2FA view is only visible if Two-Factor Authentication has been enabled and setup in System Settings > Basic > Two-Factor Authentication (2FA) tab. By default, the Default view is displayed.
Manage Backup User
After you have created a backup user, you can perform the following operation for your users such as:
- Customize backup users profile settings
- Customize subscribed modules
- Create backup sets
- View backup/restore reports
- View usage statistics
- Manage the policies applied to a user
- Update client software via the auto update agent
- Send broadcast message to users
- Export usage to a CSV file
- Export users
- Rebuild storage statistics (applicable only for v6 backup sets)
- Enable two-factor authentication
Access the Backup User
Click the login name of the backup user account you want to manage from the “Backup User” tab.
The backup user account opens. You will see seven (7) categories, each of which is described in detail below.
User Profile
The User Profile tab contains user backup account settings information, subscribed modules, backup quota, subscription type, contact information, user group information and security settings. It is located under Users, Groups & Policies > Backup User. It is sub divided into six (6) tabs, as described below.
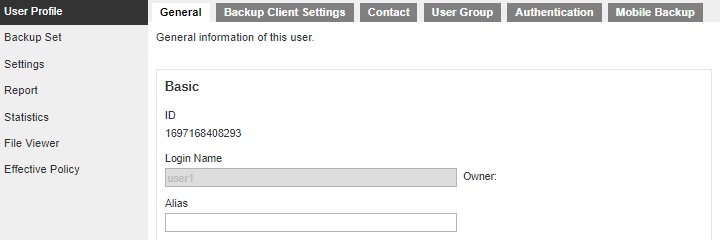
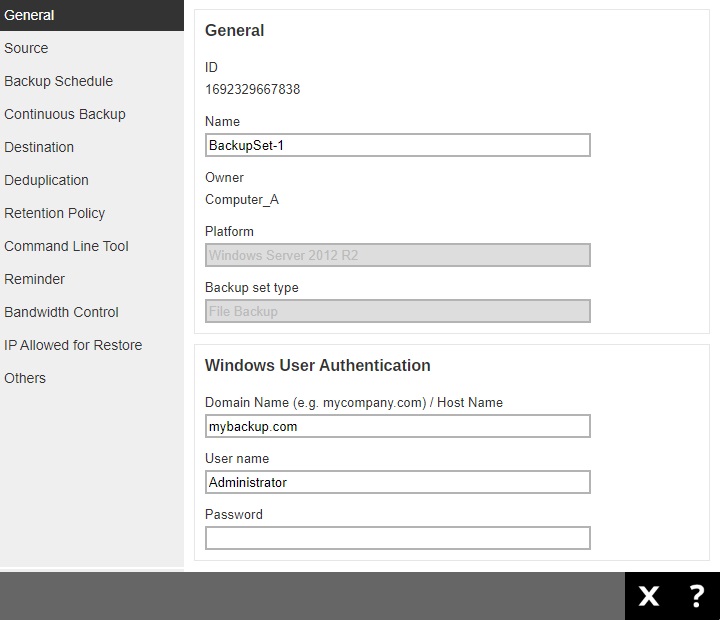
General
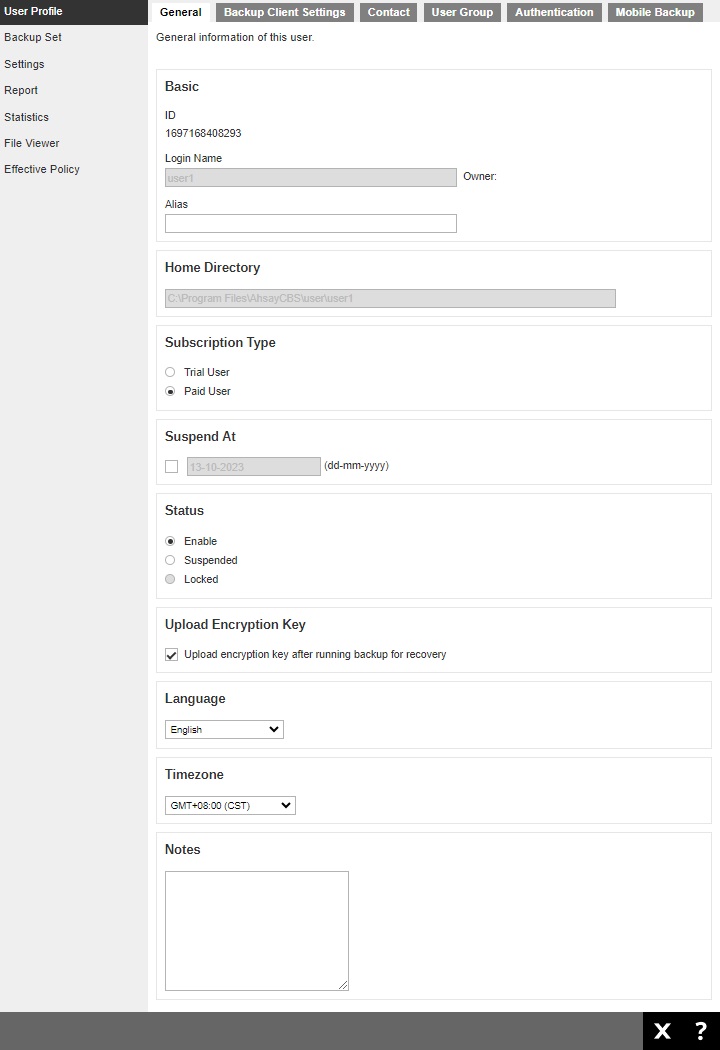
- ID - machine generated numerical ID of the backup user.
- Login Name - name of the user used for logging in, cannot be modified.
- Owner - the owner of the backup user, cannot be modified from here. To change the owner, please refer to Move / Import / Export Users for more information.
- Alias - another name for the user.
- Home Directory - path where user backup setting, reports and uploaded AhsayOBM/AhsayACB client logs are stored, cannot be modified.
- Subscription Type - type can be changed from Trial User to a Paid User, for example after a user subscribes to backup service after a trial.
- Suspend At -scheduled date to suspend the user account.
- Status - suspend or enable locked accounts.
- Upload Encryption Key - enable or disable the "Upload Encryption Key" feature.
- Language - preferred language for all email reports of the backup user.
- Timezone - time zone of the backup user.
- Notes - additional note about the user.
Backup Client Settings
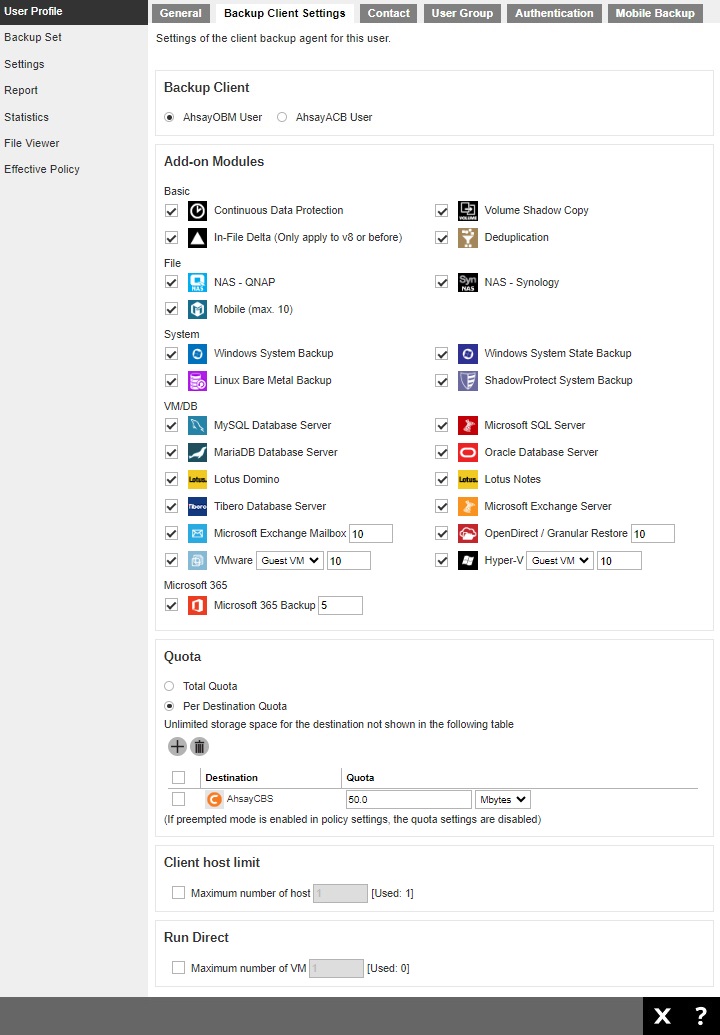
- Backup Client - type of backup user account, AhsayOBM or AhsayACB. In case you need to change the backup client type, it is better to check if there are existing backup sets in the backup account. For example, if you have an AhsayOBM user account with Exchange backup set and you change the account type to AhsayACB, the Exchange backup set will not be run due to the backup client type does not match.
Add-on Modules - type of module that user may back up and restore.
For IBM Lotus Domino/Notes, and StorageCraft ShadowProtect modules, starting from version v8, software development work related to these modules will be discontinued.
There will be no further enhancements or bug fixes for these modules. However, to allow existing users to continue using them after upgrading to version v9, these modules will still be available in AhsayOBM’s backup set type option list. Ahsay support team will continue to provide best effort support for these modules until further notice.
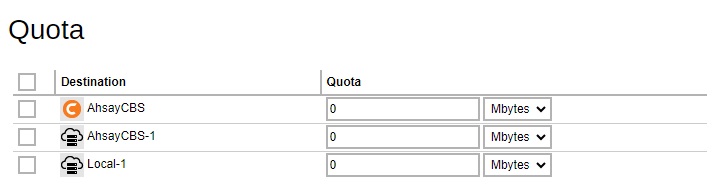
Quota - the total quota storage or list all the predefined destinations and AhsayCBS associated with the user account and the backup quota of each destination for the user account.
Quota management for individual predefined destination is available for AhsayCBS. For previous version, only a total quota storage can be set and you cannot configure individual quota for predefined destination, which is shown as following.
If your AhsayCBS was upgraded from a previous version to 9.1.0.0 or above, for users with pre-existing predefined destinations and AhsayCBS, the quota settings for each predefined destination and AhsayCBS will be set according to different situation.
Example
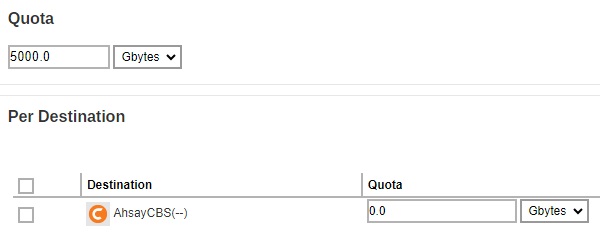
Situation 1: The previous total quota setting is 5000Gbytes, and the quota storage setting for AhsayCBS was default setting.
After the upgrade, the new quota setting for AhsayCBS will bee 5000 Gbytes.

Situation 2: The previous total quota setting is 5000 Gbytes, and the quota storage setting for AhsayCBS was 100 Gbytes.
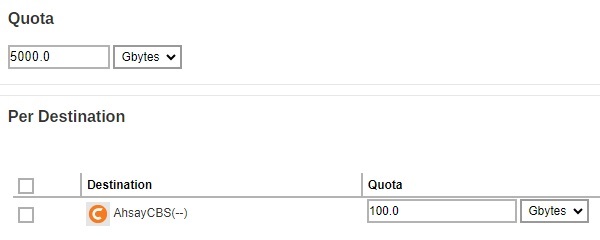
After the upgrade, the quota setting for AhsayCBS will remain to be 100 Gbytes.
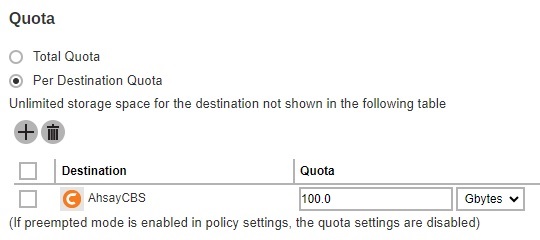
For the destination not shown in the Quota table, the storage space is unlimited. If you want to limit storage space according to destination, please ensure to add the destination here and assign the quota appropriately.
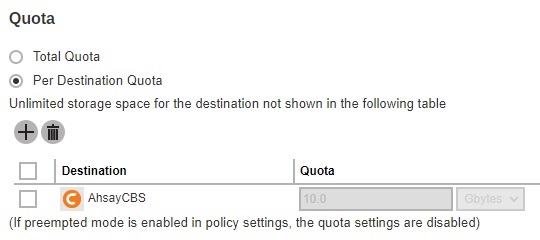
Only the destinations already defined by the backup sets can be shown and added to be the backup destination for the backup user.If preempted mode is enabled in Backup/ Restore > Users, Groups & Policies > Policy Group > %policygroup% > User Settings > User Quota, the quota settings here will be disabled and cannot be modified.
 The backup quota of a VMware VDDK backup set should be set to a value that is higher than the provision size. Even if the backup only upload the actual usage, if the quota is smaller than the provision size, the backup would fail with quota exceeded.
- Client Host Limit - the maximum number of host machine or devices the backup user can install AhsayOBM/AhsayACB on.
- Run Direct - the maximum number of VMs for VM Run Direct restore on AhsayCBS for the user.
Contact
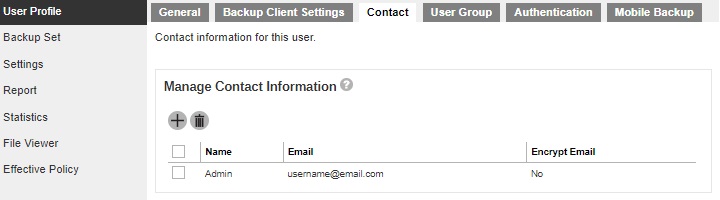
You can configure the client contact here for them to receive backup and restore reports.
User Group
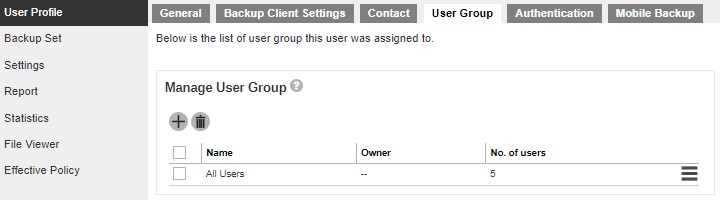
You can assign the user to an existing/assigned user group. When you drag the user group with the side button, it will affect the sequence of the policy rules that will apply to the user.
Authentication
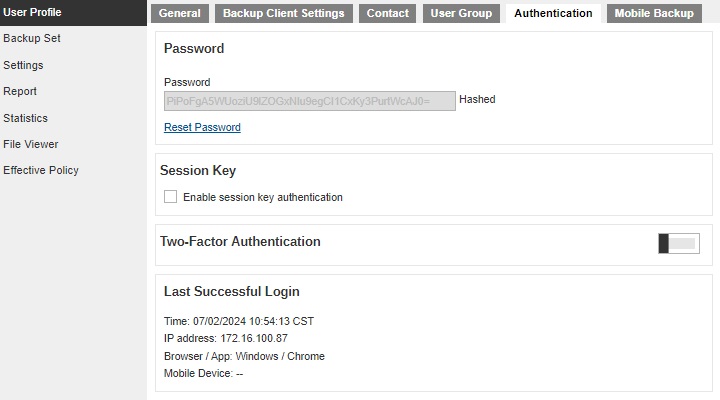
- Password - shows the password of the user in hashed format. The password can also be reset here in case the user forgot the current password.
- Click Reset Password to reset the password.
Enter the new password and confirm the password.
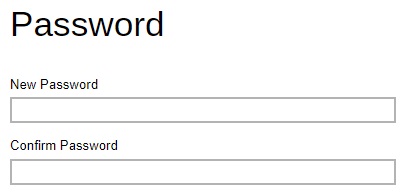
- Click Save to save.
Session Key - uses session key to make API requests on profile changes and server side file updates on behalf of the user.
Tick the "Enable session key authentication" checkbox to enable.

Two-Factor Authentication - add another layer of security for the account by enabling the two-factor authentication here for the user. Aside from the password, they will be required to approve the login request in the Ahsay Mobile app or enter the one-time passcode that is generated in the third-party TOTP Authenticator app.
Slide the switch to the right to enable Two-Factor Authentication. Then click Save to save.
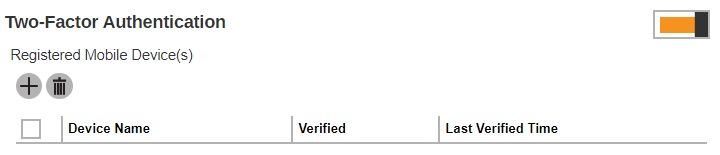
The backup user will be required to register a device for 2FA on their next log in. For more information on how to register a device please refer to Register Device.
The Two-Factor Authentication settings will only be available if the Two-Factor Authentication feature is switched on in System Settings > Basic > Two-Factor Authentication (2FA). Adding the device will be done by the backup user, it will be automatically added once the user’s device has been paired with the backup user account upon log in. For more details please read Two-Factor Authentication.- Last Successful Login - shows the date and time the user last logged in. Also shows the IP address, browser or application used during log in and mobile device used in 2FA (if enabled). This changes everytime the user logs in.
For old backup accounts using Twilio, this will be the screen displayed.
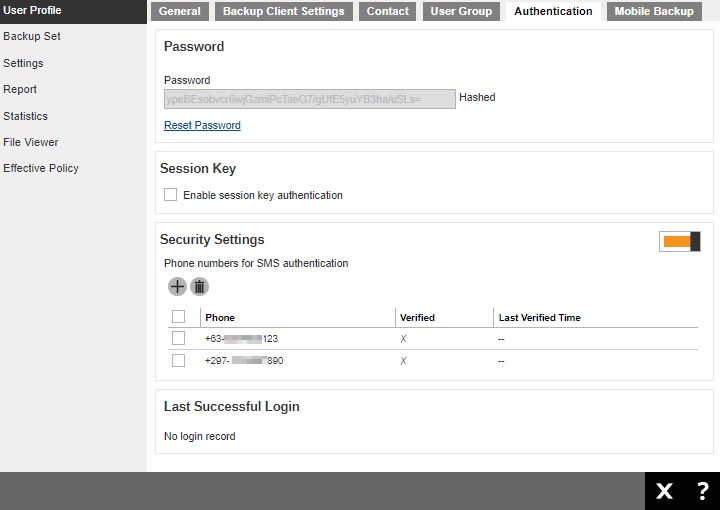
Security Settings - they will be required to enter a passcode that will be sent to them through SMS.
Click Add to add a phone number where the passcode will be sent.
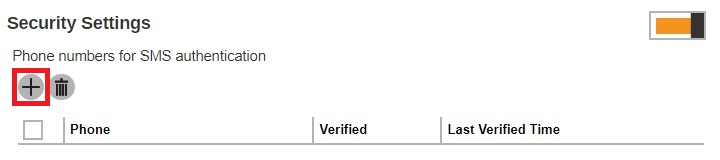
Select the "Country Code" and enter the phone number.
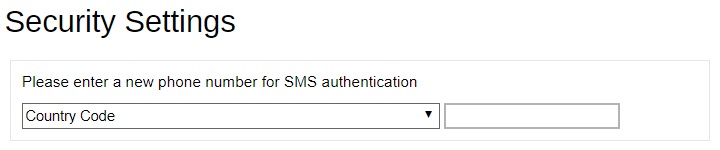
- Click OK to save.
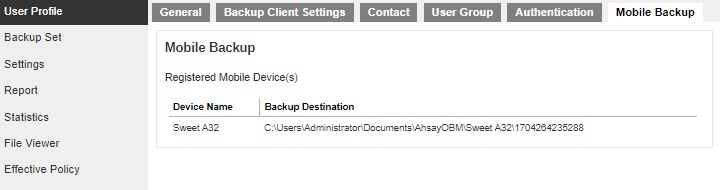
Moble Backup
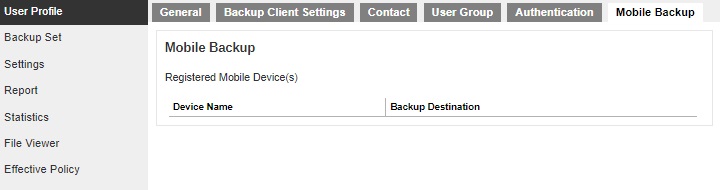
The “Mobile Backup” tab will only be displayed if the Mobile add-on module is enabled for the backup account. It will display the name of the mobile device(s) registered for backup with the corresponding backup destination.
Backup Set
This function is used to create backup sets for this user account. In some cases, you may need to create backup sets first before you install a backup client on the client machine, or it may be an alternative option for administrator to create/modify a backup set for Linux users with no graphical interface, or there may be access restrictions for administrator to access the backup machine again after the backup client installed.
The following shows the Backup Set tab under Users, Groups & Policies > Backup User.

Timezone information will be automatically updated when the user logs in to the client backup agent, such as AhsayOBM and AhsayACB, or perform backup job to avoid the false alarm of missed backup job.
Access the backup set
Click the backup set name of the user account you want to manage from the “Backup Set” tab. It is sub divided into the following tabs:
- General
- Source
- Backup Schedule
- Continuous Backup
- Destination
- Deduplication
- Retention Policy
- Command Line Tool
- Reminder
- Bandwidth Control
- IP Allowed for Restore
- Others
For more information on the different features of the backup set, refer to the Overview part.
Recovering encryption key via AhsayCBS web console
It is possible to engage the AhsayCBS Encryption Key Recovery Service via the AhsayCBS web console under the “Others” menu of this section. Click here for details on the scope of this professional service.
Required Permission
Only system user with Admin role has the right to access the Recover Encryption Key feature via the AhsayCBS web console.
Required Settings
Encryption key is recoverable only if the following three settings are ENABLED:
- The Upload Encryption Key feature in the Encryption Key section under the Users, Group & Policies > Policy Group > %Policy Group Name % > User Settings menu which applies to the corresponding backup set.
- The Encryption Recovery feature under the Profile > Encryption Recovery menu in your AhsayOBM or AhsayACB.
- The Upload Encryption Key feature under the Users, Group & Policies > Backup User > %User Name % > User Profile of the backup user requesting for key recovery.
With these three features on, encryption keys will be uploaded to the backup server during the backup process, so as to make recovery possible.
Preparation Before Getting Started
Make sure the following items are valid before getting started with the encryption key recovery process.
- Valid login credentials to log on to the Ahsay Shopping Centre.
- Valid maintenance. For inquiries about maintenance, please contact our Sales Team at partners-kb@ahsay.com.
If your AhsayCBS is branded, the Recover Encryption Key feature is HIDDEN by default. This measure is enforced to prevent backup users from accessing the Ahsay Shopping Centre directly after clicking the Recover Encryption Key button under a branded environment.
Your AhsayCBS is considered “branded” when the following criteria are met:
Under the System Settings > Basic > Administrative Access > %system user% > Rebrand Web Console > User Interface page in the web management console, if any one of the following parameters is not empty or not holding default image:
- Title
- Product Name
- User Interface logo
- Report logo
- AhsayCBS logo
- AhsayOBM logo
- AhsayACB logo
The Recover Encryption Key button can be forced to show by enabling the debug option as shown below in the cbs.opt file under the %CBS_INSTALL%\conf folder. This debug option will make the Recover Encryption Key button visible to backup users even if the AhsayCBS is branded. com.ahsay.cbs.system.config.accounts.editSysUserBean.ShowRecoveryEncryptionKeyBtn.debug=true
Recovery Steps
Follow the steps below to submit an encryption key recovery request.
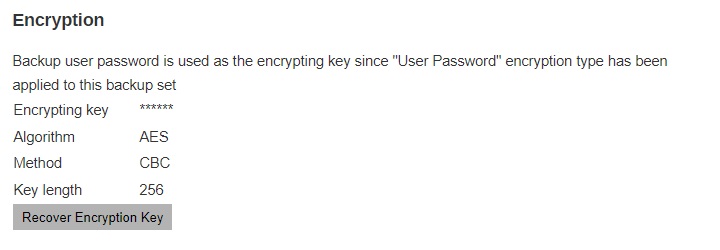
Click on the backup set, which you wish to recover the encryption key for, under the “Manage Backup Set” section.
Navigate to the Others tab.
Look for the Encryption sub-section on this page and click on the Recover Encryption Key button.
You will be prompted to log in to the Ahsay Partner Portal as shown below, if you have not done so yet.
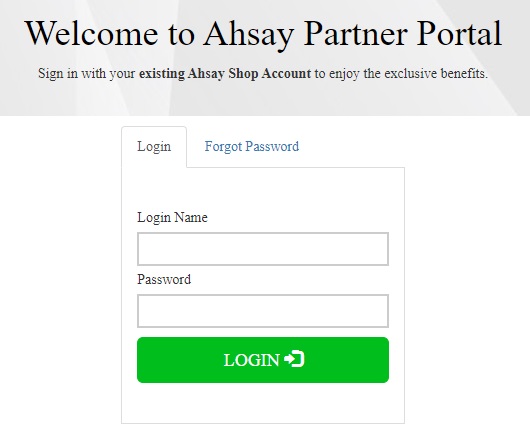
- Upon successful login, you will be re-directed to the Ahsay Shopping Centre to proceed with the encryption key recovery process. You will see a page with your User ID, license information and backup set name listed.
In the “Recipient” drop-down menu, the backup user’s email will be selected as the primary recipient of the decrypted key by default, provided that the backup user has provided an email in his/her user profile. Otherwise, the decrypted key will be sent to you instead, where you can choose to deliver to either your Primary or Alternative Email registered under your account.
Click Generate Now when you are ready to proceed.
- You will then be taken to the Invoice page where you can confirm the details of the Encryption Key Recovery Service and the service price. Click the Pay Now button when you are ready to proceed with payment.
- Select the desired payment method on this page. You are strongly recommended to pay by Credit Card so that the payment can be confirmed immediately in order to expedite the recovery process. Click OK when you are ready to proceed.
- Depending on the payment method you have selected, you will be taken to the corresponding page to process your payment. Follow the relevant on-screen instructions to confirm the payment.
When the payment is processed successfully, you will be re-directed to the Invoice page again with the green icon labeled “Paid”.
The Encryption Key Recovery request process is now completed.
- The decrypted key will be delivered to the selected email within 15 minutes after the payment has been confirmed.
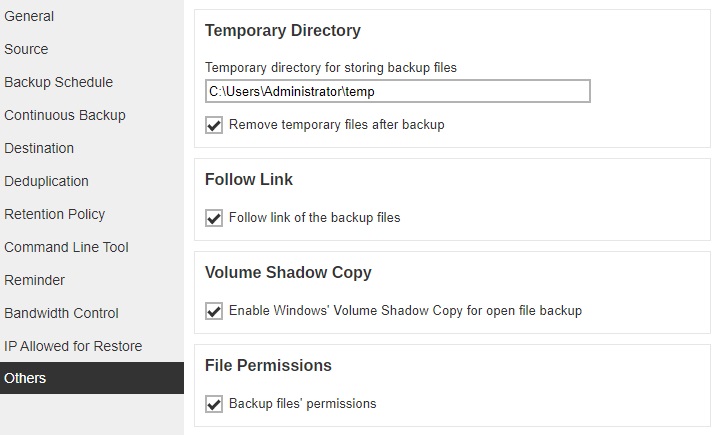
Settings
The Settings tab allows user to backup client to log the optional events, besides AhsayOBM/ AhsayACB logs, to the Windows event log. This feature is supported on AhsayOBM/AhsayACB clients installed on Windows platform only.
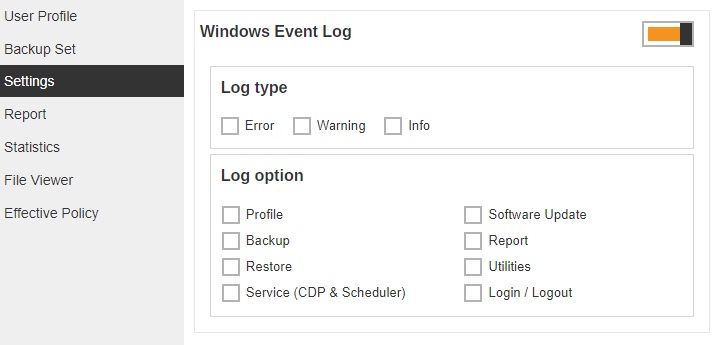
- Log type - there are 3 log types: Error, Warning and Info. Select any of the 3 log types, they will be logged in the Windows event log.
- Log option - there are 8 different log options: Profile, Backup, Restore, Service (CDP & Scheduler), Software Update, Report, Utilities, Login/ Logout.
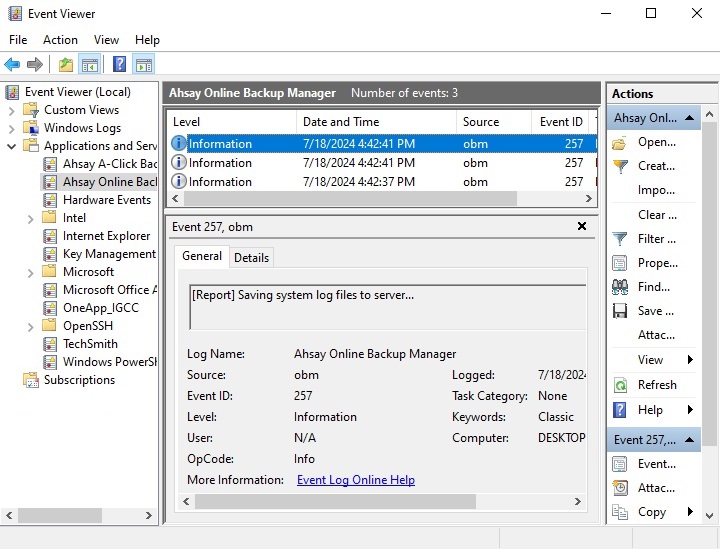
The events are logged in the Windows event log and can be viewed from the Windows Event Viewer.
Report
The Report tab allows you to check the backup, restore and restore drill reports for the backup user.
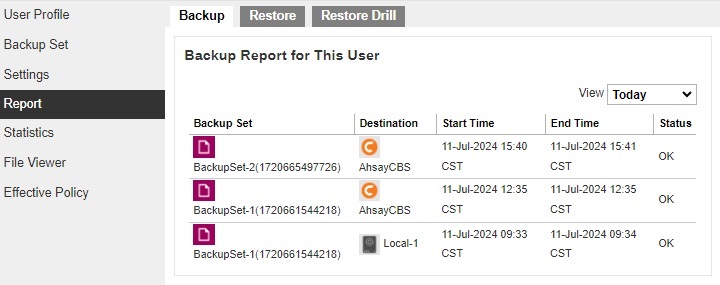
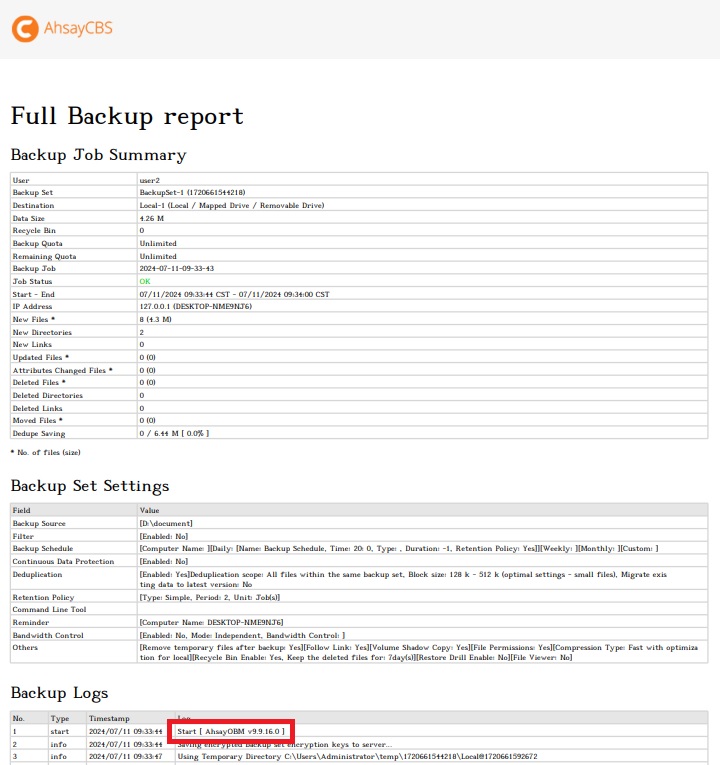
Click the report to see the details. Below is an example of a backup report.
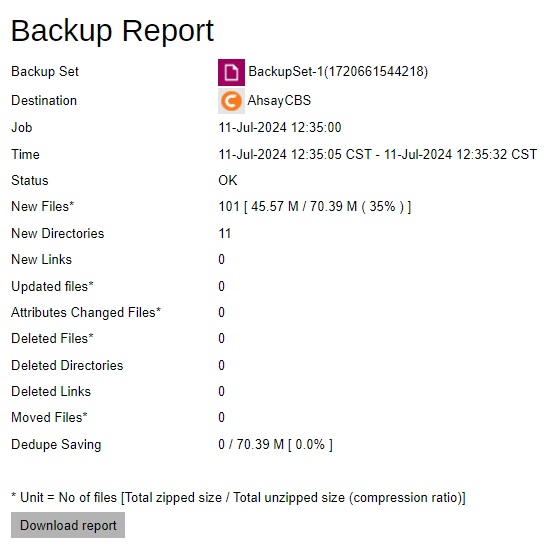
Click the Download report button at the bottom of the "Backup Report" page to download the complete report in PDF format. The report contains the following information in detail.
- Backup Job Summary
- Backup Set Settings
- Backup Logs
- Backup Files
The Download report button should be visible around 20 minutes after the backup job has completed.
OpenDirect restore of file backup sets or granular restore of files from VMware and Hyper-V backup sets performed using Windows File Explorer will NOT generate any restore reports on AhsayCBS. Restore reports are only available when the restore is performed directly through AhsayOBM/ AhsayACB/ AhsayOBR or AhsayCBS User Web Console.
Statistics
The Statistics tab allows you to generate a graph of storage statistics for the user by modifying a few factors such as the backup destination, backup set and the period of the backup. The statistics shows the storage capacity of different backup sets on different dates.
- Only the restorable files in the data and retention area for each backup set is included in the calculation of storage statistics.
- The following items are excluded from the calculation of storage statistics:
- Uploaded AhsayOBM/AhsayACB client log files
- Backup and restore reports in PDF file format
- Audit log files
- Index files
- The storage statistics of a backup set are updated every time the following functions are run:
- Backup job
- Data Integrity Check (DIC)
- Periodic Data Integrity Check (PDIC)
- Space Freeing Up
- Delete Backup Data
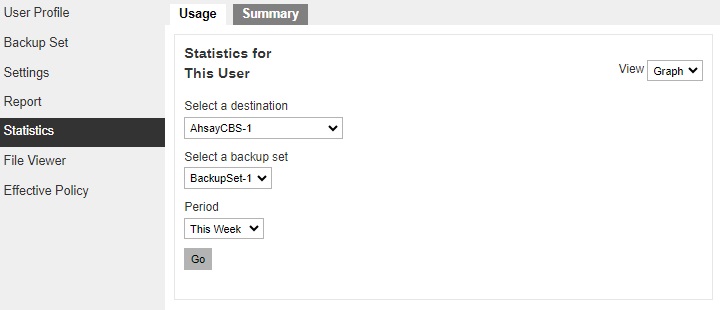
Usage
The following options are configurable for generating statistics in your desired view.
- Select a destination – select the backup destination of your choice
- Select a backup set – you can choose a specific backup set or all backup sets
- Period – select the period of time during which backups were performed
- View – you can choose a view, graph or table
Graph View
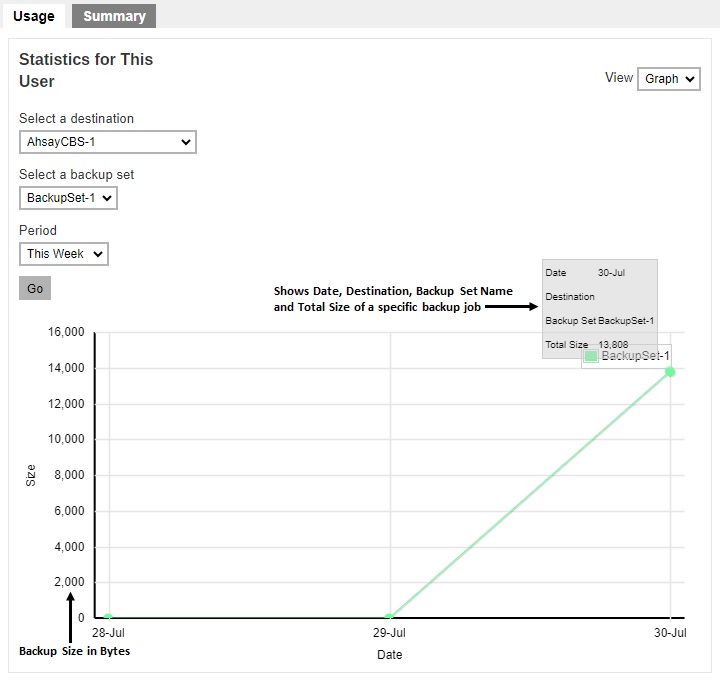
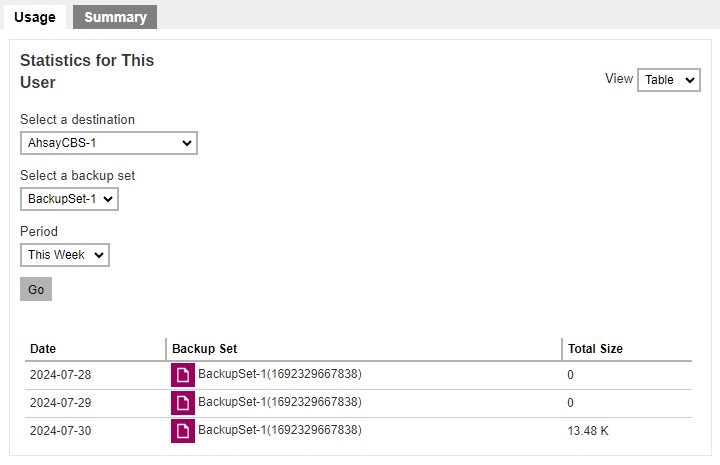
Table View
Summary
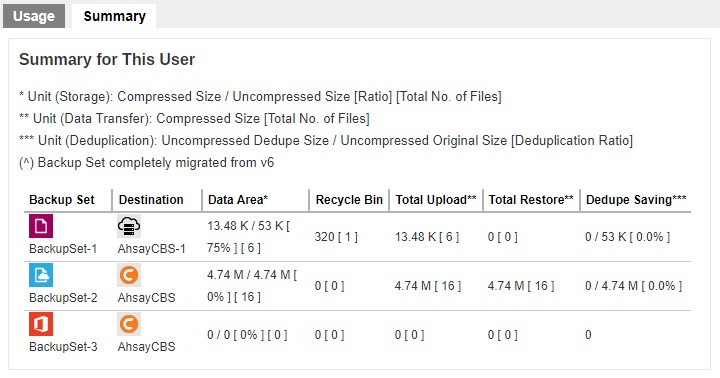
There are five (5) columns showing the following information of each backup set.
Data Area
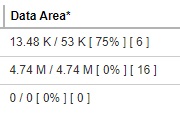
Format:
[Compressed Size] / [Uncompressed Size] [Compression Ratio in %] [Number of files]
Example: 3.71 M / 6.44 M [ 43%] [ 3 ]
The Data Area also include files that are in the Retention Area. The data interpreted as the backup set has 3 restorable files in the Data Area that is within the Retention Policy period; the files compressed and uncompressed sizes are 3.71 M and 6.44 M respectively; the compression ratio is 43%.
Recycle Bin
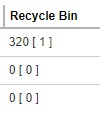
Format:
[Compressed Size] / [Total number of files]
Example: 2.6 M [ 2 ]
The data interpreted as the backup set has 2 files in the Recycle Bin with a compressed size of 2.6 M.
Total Upload
Format:
[Compressed Size] / [Total number of files]
Example: 3.71 M [ 8 ]
There are a total of 8 files with the size of 3.71 M uploaded for this backup set.
Total Restore
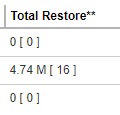
Format:
[Compressed Size] / [Total number of files]
Example: 1.7 M [ 4 ]
There are a total of 4 files with the size of 1.7 M restored from this backup set.
Dedupe Saving
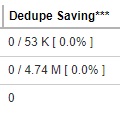
Format:
[Dedupe Size] / [Original Size][Deduplication Ratio in %]
Example: 5.53 M / 11.96 M [ 46.2% ]
The files dedupe size and original size are 5.53 M and 11.96 M respectively, the dedupe saving for this backup set is 46.2%.
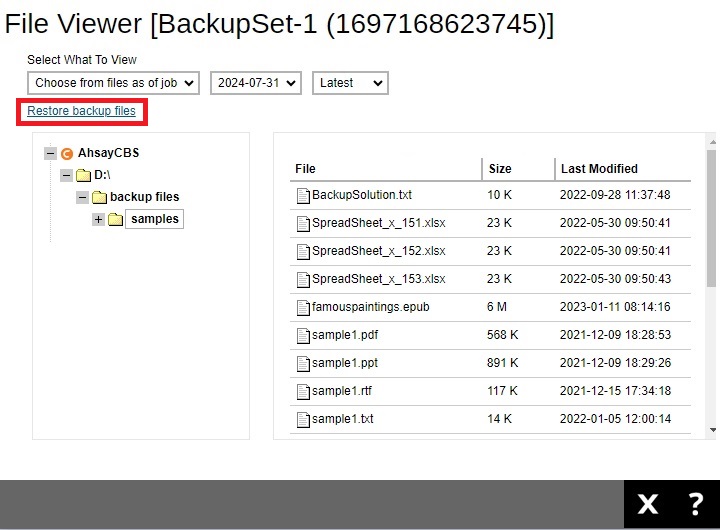
File Viewer
The File Viewer tab is a new feature which allows administrators to view the backup set file list. This will list the backup sets of each user. Here the administrator may view the files that were backed up for each backup set only if the backup destination used is AhsayCBS. Also, this can only be used for viewing of backup files, if you decided that you want to restore a file, a link to the Ahsay Restorer is provided.
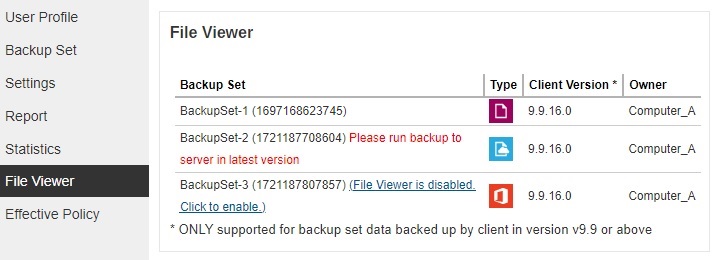
Make sure that the “Enable viewing list of backed up files on backup server without encryption key” checkbox is ticked.

You can access this by clicking the link provided or go to Backup / Restore > Users, Groups & Policies > Backup User > %Backup User Name% > Backup Set > %Backup Set Name% > Others > File Viewer on Backup Server.
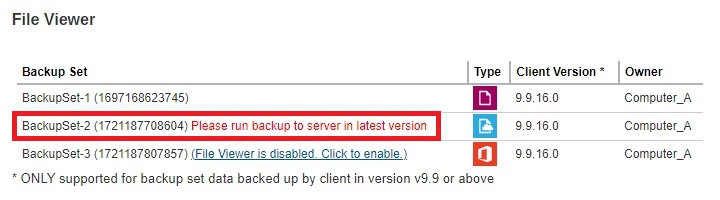
After ticking the checkbox, run a backup job to access the backed up files and avoid getting this message “Please run backup to server in latest version”. This message will also be displayed if the backup destination used for the backup set is not AhsayCBS.
Click on the backup set to view the backed up files.
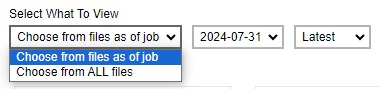
You can select what to view from Choose from files as of job or Choose from ALL files, just like when you are performing a restore.
Click the file tree to expand and display the backed up files.
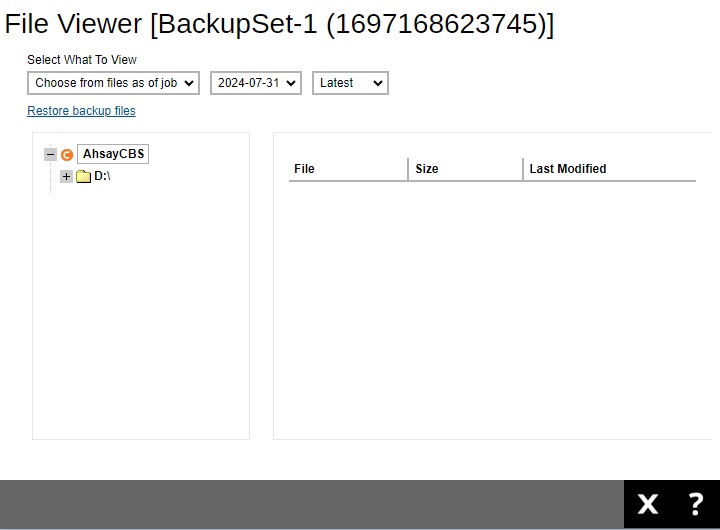
A “Restore backup files” link is provided which you can click to download the Ahsay Restorer. You need to install it in order to restore your files, for more information please refer to the Restore User Guide.
Effective Policy
The Effective Policy tab shows the details of all policies and settings which applies to the backup user account. The Effective Policy tab is located under Users, Groups & Policies > Backup User. It can be hidden by unchecking the box of View for “Effective Policy” under Users, Groups & Policies > Policy Group > Default settings > GUI Settings.
It is subdivided into 6 tabs, each of which is described below.
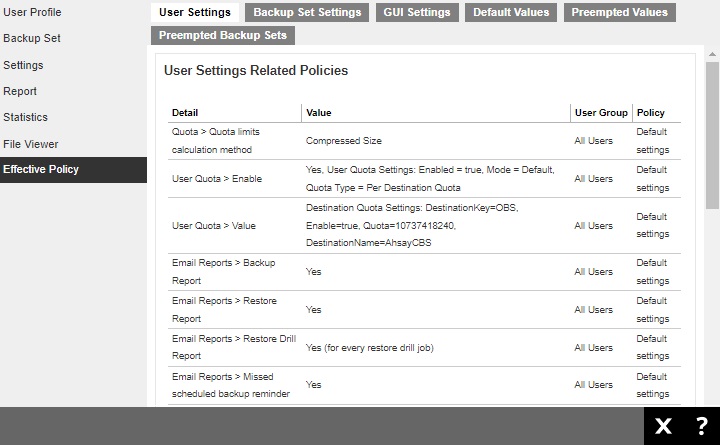
User Settings
You can see the effective policy on user settings for this user on the User Settings tab.
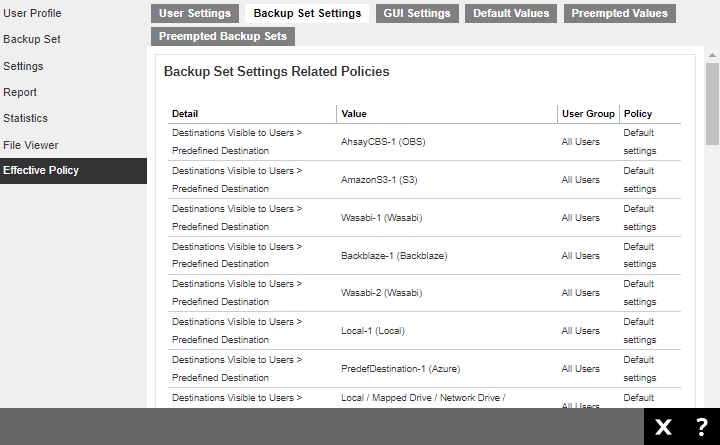
Backup Set Settings
You can see the effective policy on backup set settings for this user on the Backup Set Settings tab.
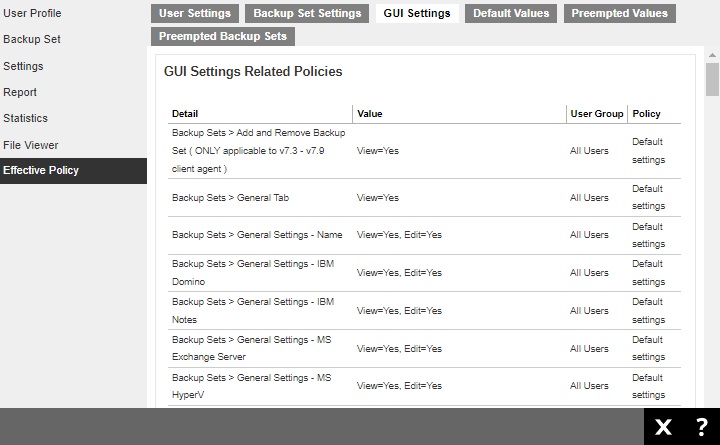
GUI Settings
You can see the effective policy on AhsayOBM or AhsayACB GUI settings for this user on the GUI Settings tab.
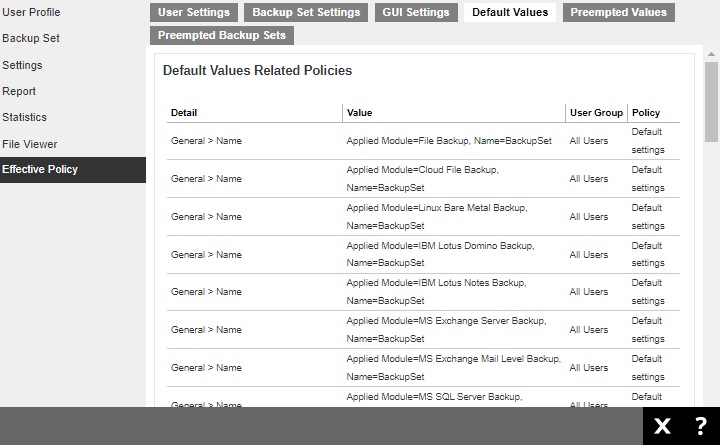
Default Values
You can see the effective policy on default values for this user on the Default Values tab.
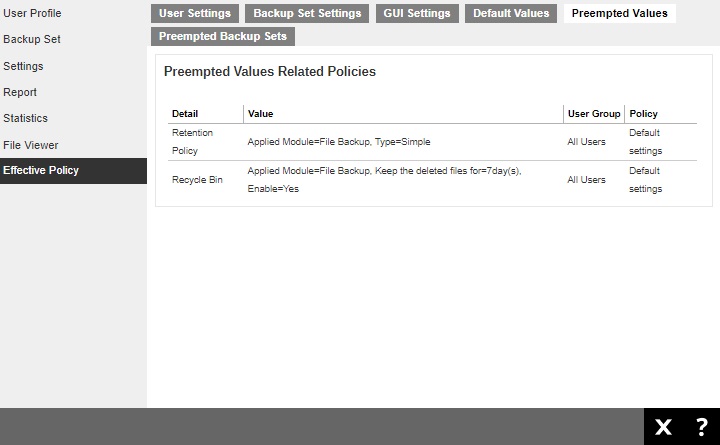
Preempted Values
You can see the effective policy on preempted values for this user on the Preempted Values tab.
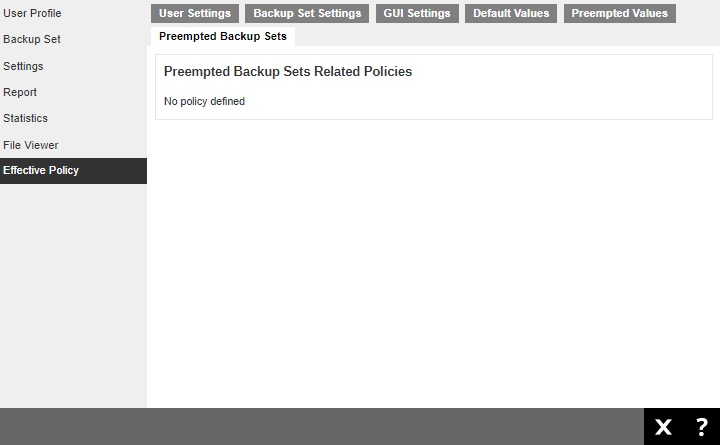
Preempted Backup Sets
You can see the effective policy on preempted backup sets for this user on the Preempted Backup Sets tab.
User Group
User Group is used in conjunction with Group Policies (see the next tab Policy Group for details) for governing the behavior of client backup agent and the AhsayCBS.
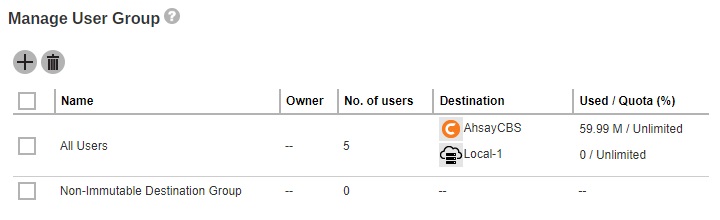
The following shows the “User Group” tab under Backup / Restore > Users, Groups & Policies.
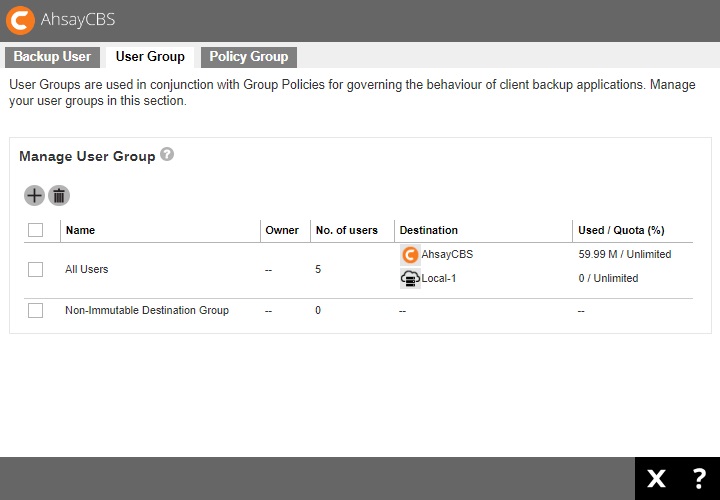
The default User Group
By default, there are two user groups created, namely: “All Users” and “Non-Immutable Destination Group”. All backup users will be put under the “All Users” user group by default after the user account has been created. When you click on one of the user groups, you will be able to see the following:

- General Information – It shows the information of the user group, ownership and type of user.
- Assigned User – A list of users assigned to the group.
- Assigned Policy – It shows a list of assigned policies to the user group. As the order of the policy would affect the actual applied to the user group, i.e. the policy on the top would probably overwrite the policy at the bottom of the list. If you want to arrange the order of the policies, you can simply drag the policy up and down.
For the All Users user group, it has a predefined policy called “Default settings”.
While the Non-Immutable Destination Group user group has a predefined policy called “Non Immutable Destination Settings”. This user group is for backup users created before v9.7, the administrator must add them to this user group once they setup an immutable destination to avoid errors during backup and restore.

To add backup user to a User Group
Backup user cannot be added to a user group in this menu. To do so, you can either:
Add a user to a user group when you first create the user account, refer to Create a new backup user for further instructions.
OR
- You can add a user to a user group after the account has been created, refer to User Profile for further instructions.
To add a new Policy Group to a User Group
Follow the steps below to either add an additional policy group to an existing user group or add a policy group to a newly created user group.
Click the user group which you wish to add a policy group to.
Click the Add button under the “Assigned Policy” section.
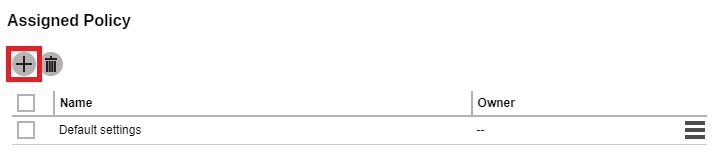
You will see a list of policy groups available for selection.

- Select the desired policy group by ticking the box beside the policy, then click Add to add, and then click Save to confirm.
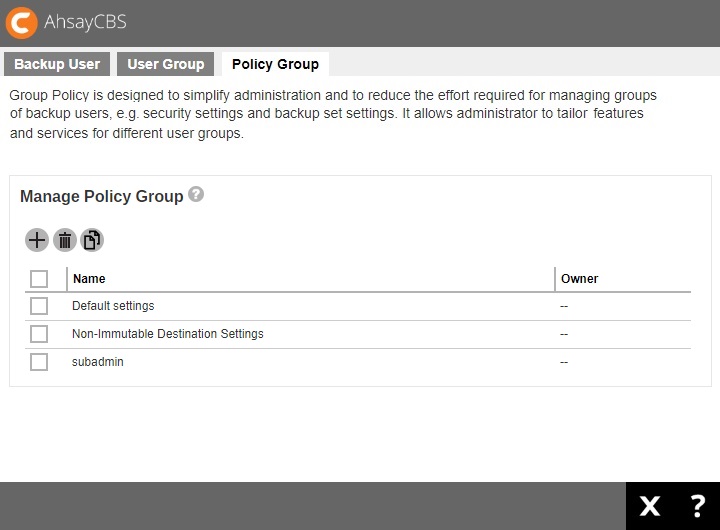
Policy Group
The following shows the “Policy Group” tab under Backup / Restore > Users, Groups & Policies.
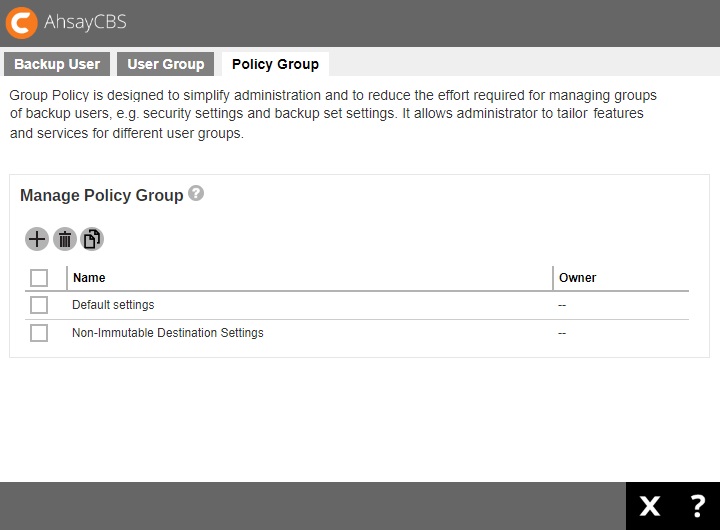
Policy Group is designed to simplify administration and to reduce the effort required for managing groups of backup users, e.g. security settings and backup set settings. It allows administrator to tailor features and services for different user groups. On a fresh AhsayCBS installation, there are two policy groups which are: Default settings policy group which is assigned to the “All users” user group and Non-Immutable Destination Settings policy group assigned to the “Non-Immutable Destination Group” user group.
In case you need to work on the policy settings for a group of users based on the default policy group settings, you can consider the following:
- Duplicate the “Default settings” policy group. Refer to the steps in Duplicate a policy group for details.
- Create a user group for your selected users and apply the duplicated policy group to this new user group. Refer to the steps in Create a new policy group for details.
Create a new Policy Group
- Click the Add button under the “Manage Policy Group” section.
Enter a name for the policy group.
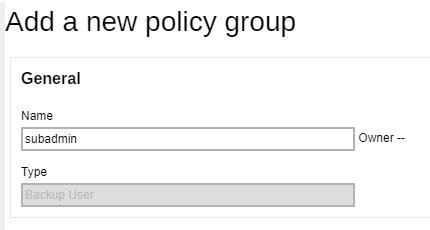
- Click Save.
Go back to the Policy Group tab under Backup / Restore > Users, Groups & Policies, and you should be able to see the policy group name you have just created.
- Click on the policy group for configuration. The configuration items are subdivided into 7 sections, each of which is described in the Configure a policy group section below.
Modify a Policy Group
Navigate to the Policy Group tab under Backup / Restore > Users, Groups & Policies.
- Click on the policy group you wish to modify, then follow the steps in the Configure a policy group section below for further instructions on modifying the configurations.
Delete a Policy Group
Navigate to the Policy Group tab under Backup / Restore > Users, Groups & Policies.
- Tick the box of the policy group you wish to delete, then click the Delete button.
- Click OK to confirm.
Duplicate a Policy Group
This is useful when you wish to apply the same configurations from a policy group to a group of users.
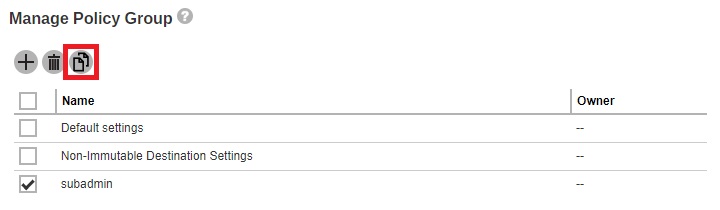
Navigate to the Policy Group tab under Backup / Restore > Users, Groups & Policies.
Tick the box of the policy group you wish to duplicate, then click the Duplicate button.
You will immediately see the policy group is being duplicated, with the suffix “Cloned at YYYY-MM-DD HH:MM:SS” in the duplicated group policy’s name.
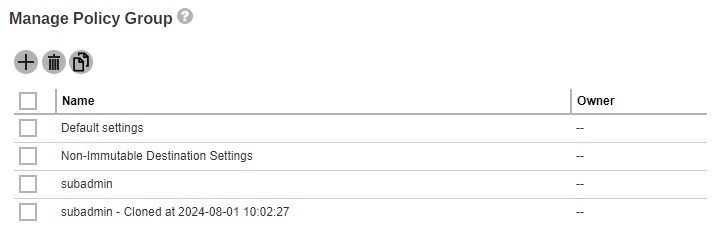
- If you need to configure the duplicated policy group, follow the steps in the Configure a policy group section below for details.
Configure a Policy Group
There are 7 sections that can be configured for the policy group:
- General
- User Settings
- Backup Set Settings
- GUI Settings
- Default Values
- Preempted Values
- Preempted Backup Sets
General
This is the general settings of the policy group page, and the user group is a list of user group which has applied this policy.
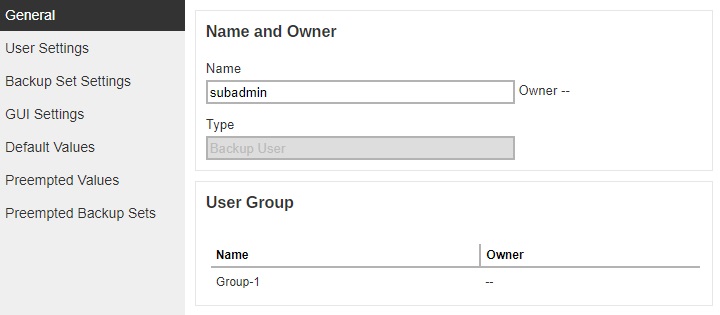
- Name - the name of the policy group. The name is configurable.
- Type - predefined as Backup User.
- User Group - displays the user group(s) with this policy group applied.
If you have changed the policy group name, click Save to save.
To add backup user to a Policy Group
Backup users cannot be added to a policy group directly in this setting menu. To do so, you have to:
- Add the user to a user group first by following the steps in either case below:
Add a user to a user group when you first create the user account, refer to Create a new backup user for further instructions.
OR
- You can add a user to a user group after the account has been created, refer to User Group under User Profile for further instructions.
- Assign the desired policy group to the user group by following the steps in To add a new policy group to a user group.
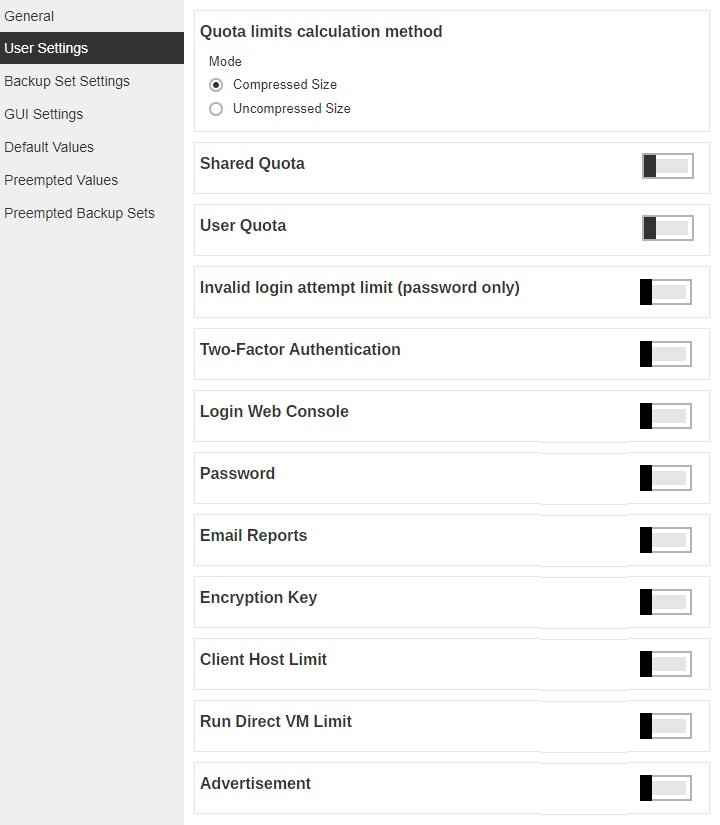
User Settings
This section allows you to manage user settings such as Quota, Invalid Login Attempt Limit, Two-Factor Authentication, Login Web Console, Password, Email Reports, Encryption Key, Client Host Limit, Run Direct VM Limit and Advertisement.
Quota
Administrators can set a group storage quota to a user group.
The following items can be set:
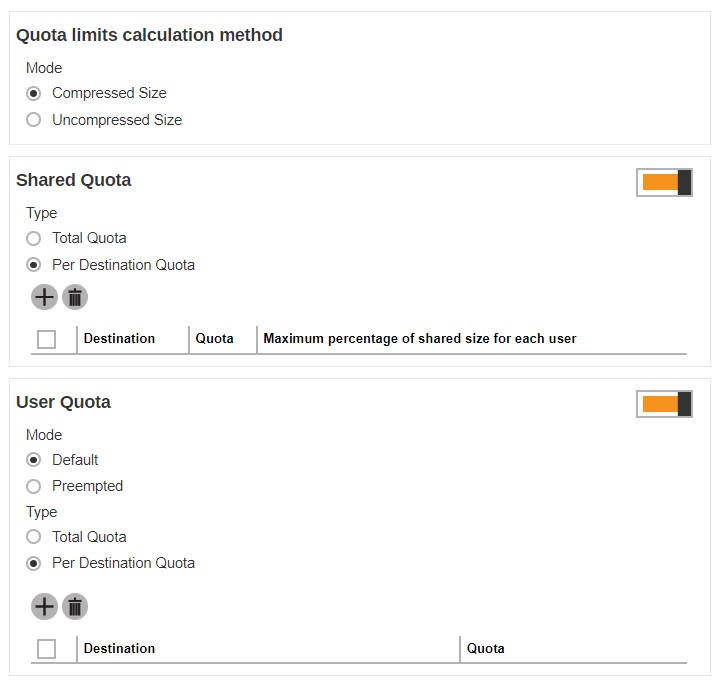
- Quota limits calculation method – this defines if the quota limit is calculated by Compressed Size or Uncompressed Size.
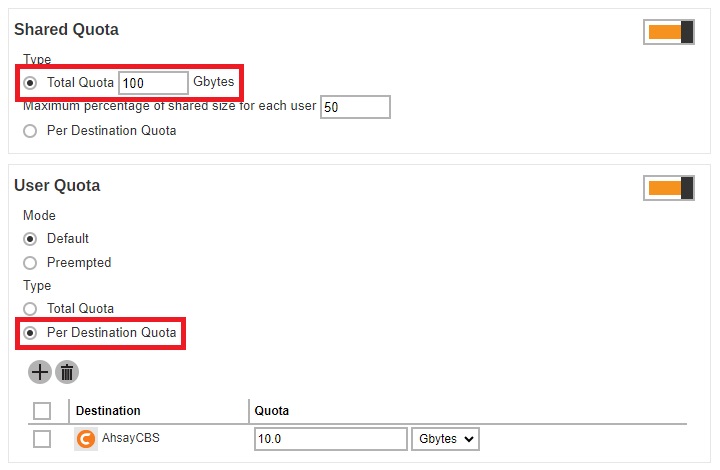
Shared Quota defines the storage quota that will be shared by the user, whether in total or per destination.
- For new AhsayCBS installation, the Default Settings policy will have Shared Quota policy disabled, new backup user will inherit whatever policy is assigned to the user.
- For the user migrated from pre-v8.1, Shared Quota will be same with the previous setting.
This feature is enabled by sliding the switch to the right.
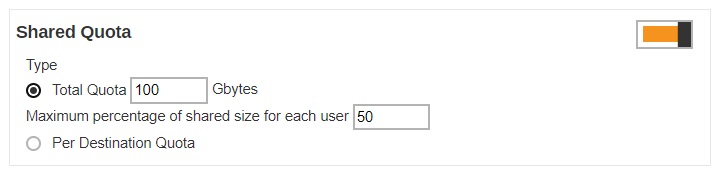
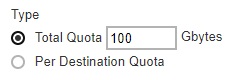
If Total Quota is selected, you can specify the total quota and maximum percentage of shared size for each user.
If Per Destination Quota is selected, click Add to add the shared quota option per destination, and the destination storage quota will be shared by all users within the user group.
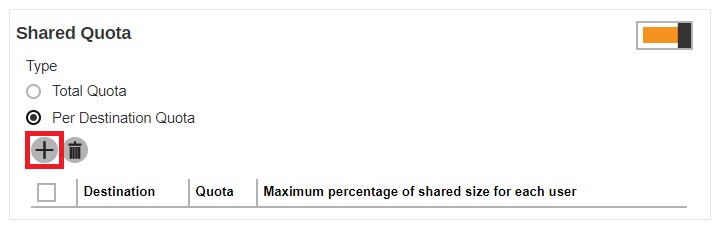
Select the destination then configure the following settings:
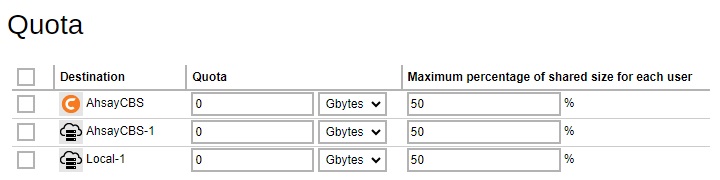
- Quota - this defines the storage quota allowed for the user group.
- Maximum percentage of shared size for each user - defines the maximum percentage of shared storage allowed for each user. For example, setting 50% means all users in the user group can occupy up to 50% of the assigned storage quota. If 100GB is the assigned storage, each user can store up to 50GB of the assigned storage quota. If the value is set to 100%, all users can fully utilize the storage until the assigned storage quota is full.
The shared storage quota is allocated to users on a first-come-first-serve basis. If the shared storage quota remains unchanged when the number of backup user grows or there is a change on the maximum percentage of shared size for each user, it may cause issue like the one mentioned below.
Example
Settings: The shared storage quota is 100GB shared by 2 users with a maximum percentage of 50% of each user. In other words, each user is entitled to a maximum of 50GB of storage.
Current usage: Now, one of the users has used up 45GB of capacity.
New setting: The maximum percentage of shared size for each user has adjusted to 30%.
Impact: In that case, that backup user has exceeded the new maximum percentage allowed for each user, which is 30GB. The backed up data will remain on the backup destination but that user will no longer be allowed to perform any new backup.
Best Practice: System administrator should consider upgrading the shared storage quota as the number of backup users in the user group grows or there is a change on the maximum percentage of shared size for each user.
User Quota - this defines the destination and quota storage for the newly added backup user.
If the feature is disabled by sliding the switch to the left, the backup user quota for newly-added user will be default quota setting, AhsayCBS with 50MB, but you can configure the quota setting as required.
When this feature is enabled, this defines if the user quota mode is Default or Preempted. If you select Preempted mode, you can configure the quota settings in Backup/ Restore > Users, Groups & Policies > Backup User > %backup user% > User Profile > Backup Client Settings.
This will also define if the user quota type is Total Quota or Per Destination Quota.
If you select Total Quota, enter the total storage quota in Gbytes.
If Per Destination Quota is selected, click Add to add predefined destination for the user as backup destination. Configure the quota storage setting per destination.
- For new AhsayCBS installation, User Quota will be Default mode, Per Destination Quota type and Destination contains AhsayCBS with default quota setting, 50MB.
- For the user migrated from pre-v8.1, User Quota will be Default mode, Per Destination Quota type and Destination contains AhsayCBS with default setting, 50MB. If the policy group enable quota setting, the predefined destination will also be displayed.
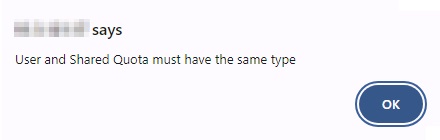
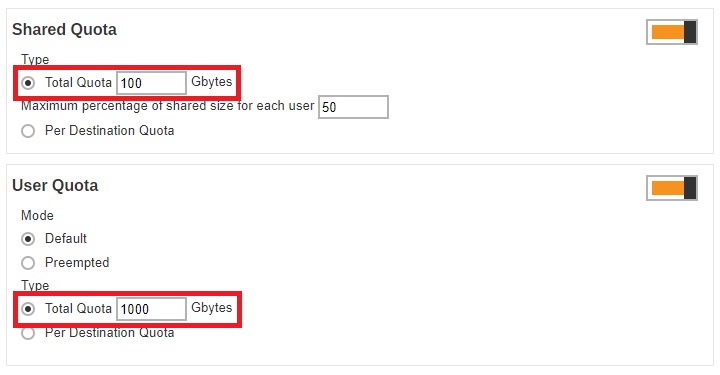
The Shared Quota and User Quota type should be the same. If different types are selected, for example Shared Quota type is Total Quota while User Quota type is Per Destination Quota.
This message will be displayed once you try to save the settings.
In situations where the Shared Quota and the User Quota have different values, the lower value will be followed. For example, Share Quota value is 100 Gb while User Quota value is 1000 Gb, then the Shared Quota value will be followed.
Invald login attempt limit
This setting allows administrator to apply conditions for the number of invalid login attempt allowed to the user group. The following conditions can be set after you slide the switch to the right.

- Maximum number of invalid login attempts allowed within specified period – this defines the maximum number of attempts allowed for invalid login within the set period time. The backup user account will be blocked after the set number of invalid login attempts have been reached.
- Specified period (minutes) – this defines the period of time during which the set maximum number of invalid login attempt is allowed before the invalid login counter resets.
- Blocking period for IP address and user that exceed the maximum allowed invalid login attempts – this defines the period of time during when the IP address and user that has exceeded the invalid login attempts will be blocked from logging in again.
Example
If the following settings are applied:
- Maximum number of invalid login attempts allowed – 3
- Specific period – 30 minutes
- Blocking period for IP address and user – 60 minutes
That means the backup user can only enter a maximum of 3 times of invalid login within 30 minutes since the first attempt. If invalid login is made for the 4th time within that 30 minute duration, the user account will be blocked for 60 minutes.
Two-Factor Authentication
Once you enable the two-factor authentication option, users will be required to either enter a one-time password generated in an authenticator app or accept the log in request in the Ahsay Mobile app to log in to AhsayOBM/AhsayACB.
Slide the switch to the right and then make sure the check box “Require Two-Factor Authentication for user logon” is ticked for this feature to work.

Login Web Console
This setting allows administrator to determine if a backup user will be allowed to login to the AhsayCBS user web console. This switch is enabled by default with ticked “Allow login web console” checkbox.

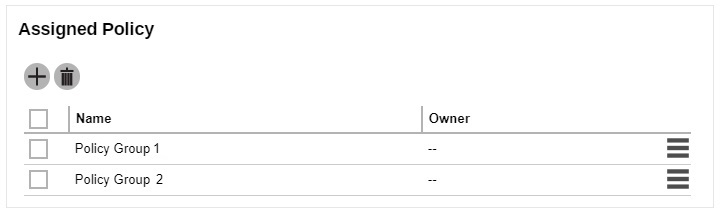
If there are several policies assigned to the user, these are the conditions that needs to be considered on which policy will take effect:
- This policy setting will be followed if the switch is enabled and skipped if the switch is off.
Next condition, consider the order of the assigned policy (of all the User Groups assigned to the user). The first policy with the setting switch enabled will be followed.
Please refer to the table below for examples on policy combination and result:
| Policy Combination | Result |
|---|---|
| Policy Group 1 has Login Web Console enabled and Allow login web console ticked. Policy Group 2 has Login Web Console enabled and Allow login web console unticked. | Log in is allowed, it will follow Policy Group 1. |
| Policy Group 1 has Login Web Console disabled. Policy Group 2 has Login Web Console enabled and Allow login web console unticked. | Log in is not allowed, it will follow Policy Group 2. |
| Policy Group 1 has Login Web Console enabled and Allow login web console unticked. Policy Group 2 has Login Web Console enabled and Allow login web console ticked. | Log in is not allowed, it will follow Policy Group 1. |
| Policy Group 1 has Login Web Console disabled. Policy Group 2 has Login Web Console enabled and Allow login web console ticked. | Log in is allowed, it will follow Policy Group 2. |
| Policy Group 1 has Login Web Console enabled and Allow login web console unticked. Policy Group 2 has Login Web Console disabled. | Log in is not allowed, it will follow Policy Group 1. |
| Policy Group 1 has Login Web Console enabled and Allow login web console ticked. Policy Group 2 has Login Web Console disabled. | Log in is allowed, it will follow Policy Group 1. |
Password
This setting allows administrator to set up the password policy. The following items can be set after you slide the switch to the right.
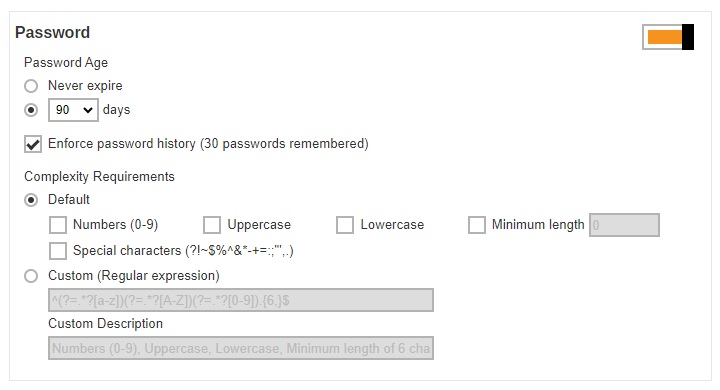
- Password Age – defines the period of time when the login password of a backup user account expires. When the set period of time is reached, backup users will have to change their passwords before they can continue using AhsayCBS.
- Enforce password history (30 passwords remembered) – when this feature is enabled, the last 30 login passwords of each user are recorded and cannot be used again when users change their password.
- Complexity Requirements – you can customize the complexity requirements for the password to provide better protection for the users. Under the Default option, the selected item(s) will be the mandatory element(s) when backup users create their passwords. While the Custom option, will allow you to specify the “Regular expression” and/or “Custom Description” that can be used to create their passwords./li>
Email Reports
This menu allows administrator to select what email reports to be sent to the users of a user group. Slide the switch to the right then select the desired email report(s) to send. By default, almost all email reports are selected after you turn on this feature except for “Restore Drill Report” and “Email me inactive backup report when my backup set hasn’t run for this number of days”.
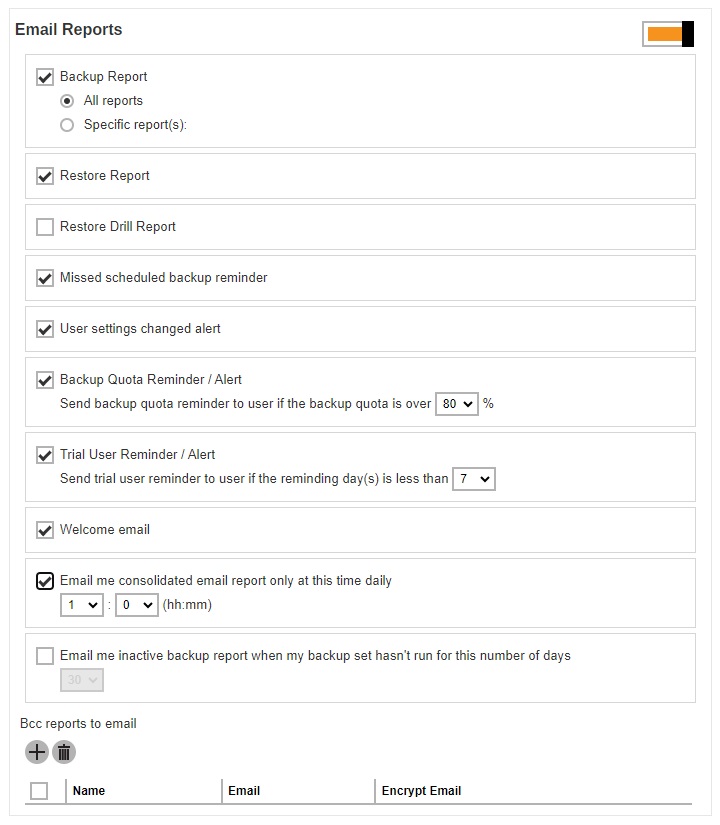
The table below lists out all types of email reports, together with explanation on what the email report is about, when it will be sent and what action the backup user should take. You can also add email recipients in the “Bcc reports to email” section so that the email reports will be sent to them as well.
| Backup Report |
|---|
What is this email about? A backup report in PDF format, there is a choice if it will include all the reports or just specific reports. The default setting for new installation is “All reports”. It will be the same with upgrades, from v6, v7, pre-8.5.0.0 to v8.5.0.0 and onwards. If All reports is selected, the following backup reports will be received: Backup Errors, Backup Quota Exceeded, Backup Warnings and Backup Successful. If Specific report(s) is selected, the user has an option to select specific backup report(s) that will be sent thru email. These are organized in four different categories:
|
When will you receive it? Backup Report is generated and sent to backup user every 15 mins (every :00, :15, :30 and :45 of an hour). Depending on the backup size and backup finish time, the actual report sending time may be longer than 15 mins. |
What action should you take? Download the backup report attached with the email or click on the download link provided to download the backup report. |
| Restore Report |
|---|
What is this email about? A restore report in PDF format, showing the Restore Job Summary, Restore Logs and Restore Files. |
When will you receive it? Restore Report is generated and sent to backup user every 15 mins (every :00, :15, :30 and :45 of an hour). Depending on the restore size and restore finish time, the actual report sending time may be longer than 15 mins. |
What action should you take? Download the restore report attached with the email or click on the download link provided to download the restore report. |
| Restore Drill Report |
|---|
What is this email about? A restore drill report showing the details of the backup set, indicating if there are invalid and/or unverifiable data found in the backup. |
When will you receive it? Restore Drill Report is generated and sent to backup user every 15 mins (every :00, :15, :30 and :45 of an hour). Depending on the restore drill size and restore drill finish time, the actual report sending time may be longer than 15 mins. |
What action should you take? Review the restore drill summary, if there are no invalid/unverifiable data found, no action needs to be taken. However, if there are invalid/unverifiable data found, perform a backup job to fix the corrupted data. |
| Missed schedule backup reminder |
|---|
What is this email about? A reminder to alert the backup user about a scheduled backup failure. Any backups that have failed to start 6 hours after the scheduled backup time will be considered as missed schedule backup. |
When will you receive it? The report is generated and sent to backup users at the next :00 after it is classified as missed scheduled backup (6 hours after backup failure). |
Common causes for missed scheduled backups The following highlights some of the common reasons causing missed scheduled backups or scheduled backups not running according to schedule. The cause of missed backups can be related to either server side issues (AhsayCBS or Redirector) or client side issues (AhsayOBM/AhsayACB client machine setup). Server Side Issues
Client Side Issues
|
What action should you take? You may have to check for the causes of the missed scheduled backup. That could be caused by, for example, incorrect login credentials of the client backup application, Internet connection problem, time zone settings, etc. |
| User settings changed alert |
|---|
What is this email about? A summary report showing the user settings that have been changed in detail, with the old values and new values of the changed settings shown. |
When will you receive it? User Settings Changed Alert Report is generated and sent to backup user every 15 mins (every :00, :15, :30 and :45 of an hour). |
What action should you take? The purpose of this email is to allow user to confirm the changes that have been made, and alert user for unauthorized access if they have not made those changes. In the latter case, user should change their login password and correct the settings as soon as possible. |
| Backup Quota Reminder / Alert |
|---|
What is this email about? A reminder to alert backup users about the backup quota has exceeded the set percentage. User can configure the percentage where the reminder/alert email is triggered when it is reached. By default, this percentage is preset as 80% when this feature is enabled. |
When will you receive it? The backup quota reminder / alert email is generated and sent to backup user at 6:00am daily. |
What action should you take? The backup quota is going to exceed its storage quota. Contact your backup service provider to increase the capacity. Alternatively, consider cleaning up the existing backup sets that you are no longer using, or reviewing the retention policy. |
| Trial User Reminder / Alert |
|---|
What is this email about? A reminder to alert trial backup users that their account is about to expire in the set number of days. By default, the preset value of this setting is 7 when this feature is enabled. |
When will you receive it? The trial user reminder / alert email is generated and sent to backup user at 6:00am daily. |
What action should you take? In order to continue using your account for backup and restore, contact your backup service provider to subscribe to the paid backup service. |
| Welcome Email |
|---|
What is this email about? A welcome message generated by the AhsayCBS to confirm a backup account has been created. |
When will you receive it? Shortly after a Backup User account has been created. |
What action should you take? You can click on the link in the email to download the client backup application if you have not done so. |
Daily User Report (appears as: Email me consolidated email report only at this time daily) |
|---|
What is this email about? A consolidated report in PDF format, showing the following categories of information:
|
When will you receive it? The daily user report is generated and sent to backup user at the time defined by the system administrator in this menu. |
What action should you take? Click on the attachment in the email to get re-directed to the consolidated report page. The report is in interactive format which allows you to click on different tabs/sections for the corresponding report data. |
Inactive Backup Report (appears as: Email me inactive backup report when my backup set hasn't run for this number of days) |
|---|
What is this email about? A report showing all backup sets under this backup user account that have not been run in the set number of day. |
When will you receive it? Inactive Backup Report is generated and sent to backup user every 15 mins (every :00, :15, :30 and :45 of an hour). |
What action should you take? You may have to check for the causes for the backup sets, especially scheduled backup sets that are not running. That could be caused by, for example, incorrect login credentials of the client backup application, Internet connection problem, etc. |
BCC Reports to Email
You can add email recipients in this section so that they will receive a blind carbon copy (bcc) of the email reports as well.
Click the Add button under the “Bcc reports to email” section.

Enter the name of the recipient, email address and other details if necessary.
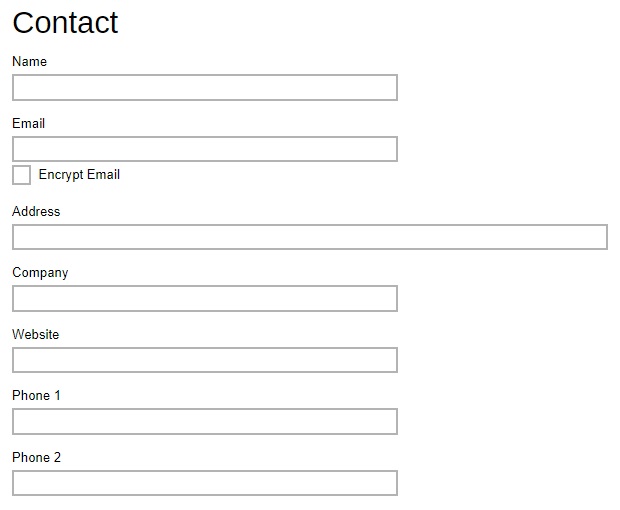
If you wish to encrypt the email, tick the “Encrypt Email” box. You will be re-directed to another page to upload the Digital Certificate. Click the Choose File button to upload the digital certificate, then click the OK button at the bottom of the page to confirm.

- Click Add when you are done with the settings.
- Click Save to save the setting.
ENCRYPTION KEY
Once you enabled the encryption recovery option. The encryption key file will be uploaded to the Backup Server. In case user has forgotten the encryption key, you can still contact us to recover the key.
Slide the switch to the right and then make sure the check box “Upload encryption key after running backup for recovery” is ticked for this feature to work.

It is possible to submit an encryption key recovery request via the AhsayCBS web console. Refer to the Recovering Encryption Key via AhsayCBS Web Console section for detailed instructions.
Client Host Limit
Administrator is able to set the maximum number of host machine for a backup users account.
Slide the switch to the right and then enter the “Maximum number of host”.

Run Direct VM Limit
The administrator can set the maximum number of VM for Run Direct restore.
Slide the switch to the right and then enter the “Maximum number of VM”.

Advertisement
The administrator can customize the advertising banner on the AhsayOBM/AhsayACB interface. AhsayCBS supports both GIF and SWF formats at the size of (830 x 102 px). It can be found in this area:
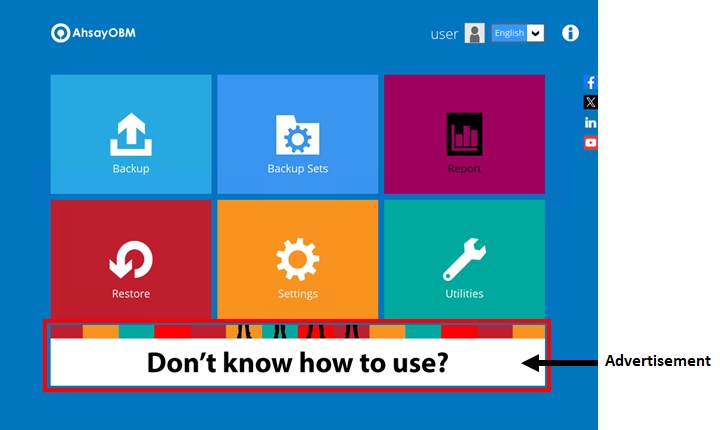
Slide the switch to the right to turn on this feature.
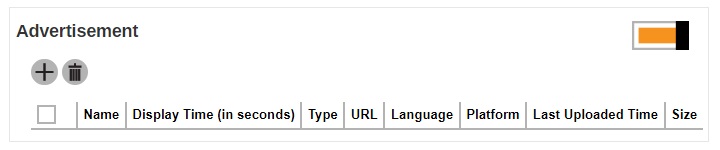
- Click Add to add the advertisement.
Enter the details in the following fields below:
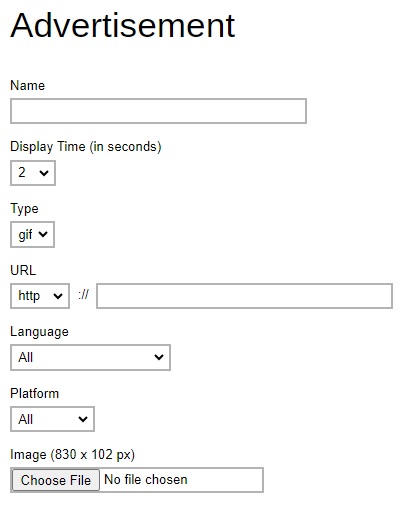
- Name – name of the advertisement banner.
- Display Time (in seconds) – period of time for the advertisement to be shown before it rotates to the next one.
- Type – format of the banner, whether it is in gif or swf format.
- URL - the click through URL of the gif type banner. For flash banner, the click through URL should be coded inside the flash banner.
- Language – select in which language setting in AhsayOBM/AhsayACB will the banner be shown. If All is selected, the banner shows no matter what language is selected in the AhsayOBM/AhsayACB.
- Platform - select on which platform (Windows, Mac & Linux) AhsayOBM/AhsayACB is used for the banner to show. If All is selected, the banner shows no matter what platform the AhsayOBM/AhsayACB is running on.
- Image (830 x 102 px) – click Choose File to upload the banner.
- Click Add when you are done with the settings.
- Click Save to save.
Backup Set Settings
This section allows administrator to set up backup exclusion, backup destination visible to users, backup set type visible to users, cloud file backup source visible to users and Microsoft 365 backup customization.
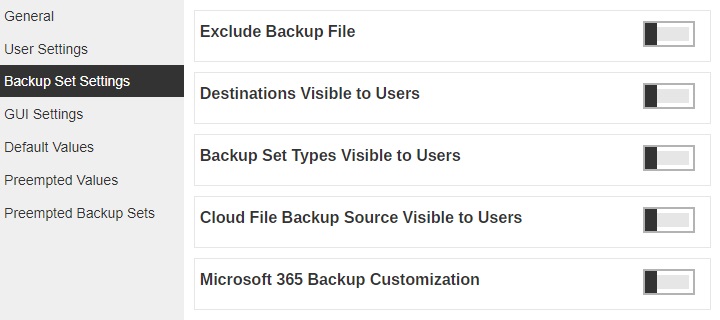
Exclude Backup File
This menu allows you to set filter to exclude files from performing backup job. This feature is disabled by default.
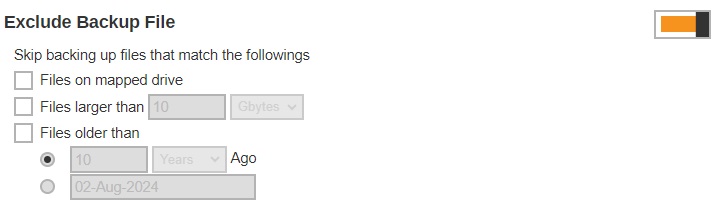
- Files on mapped drive – files from mapped drive will be excluded from backup (applicable only to UNC path on Windows platform). Typical UNC path is in the format of \\drive or IP address\folder name (e.g. \\10.1.0.10\My Documents).
- Files larger than – files larger than the defined size will be excluded from backup.
- Files older than – files created the set period of time ago or before a specific set date will be excluded from backup.
Destinations Visible to Users
There are two kinds of destinations backup users can choose from when creating a backup set, they are the Predefined Destination and Standard Destination. Only the destinations selected in this menu will be available for backup users to choose from when they are creating a backup set. This feature is enabled by default.
Below is a brief explanation on the difference between the Predefined Destination and Standard Destination.
- Predefined Destination - The predefined destination can be a single storage destination on the local drive where AhsayCBS is installed, mapped drive, cloud storage or FTP server, or a destination pool with a mix of storage options mentioned above. Before you can select a predefined destination in this menu, it must first be configured under the System Settings > Backup > Predefined Destinations. Refer to Predefined Destinations Tab and Backup User Settings Tab for details on configuration.
- Standard Destination - Except for the AhsayCBS storage option, all other storage options under the Standard Destination belong to the backup users, whether it could be a single storage destination on the mapped drive, cloud storage or FTP server, or a destination pool with a mix of storage options mentioned above.
Slide the switch to the right under “Destinations Visible to Users” section.
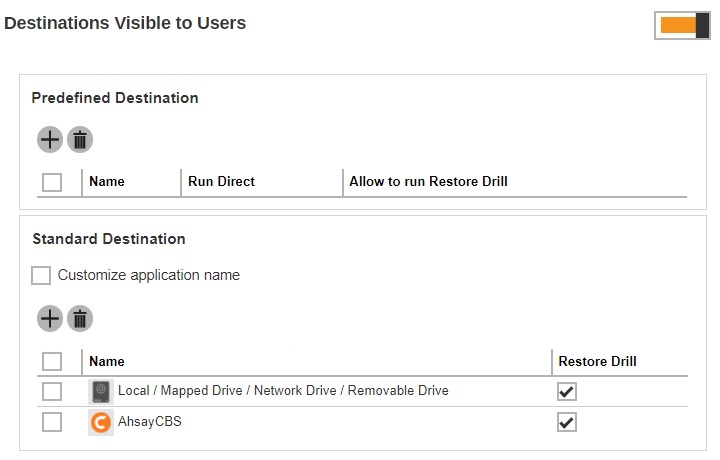
- Click Add under “Predefined Destination” and/or “Standard Destination” to add a destination.
- Select the desired storage option.
- Click Add to confirm adding the destination.
- If you have multiple destinations to add, repeat steps 2 - 4 until all desired destinations have been selected.
- Click Save to save.
Backup Set Types Visible to Users
AhsayCBS supports a wide range of backup set types for backup and restore. This menu allows the administrator to select the backup set types to be displayed for backup users to choose from when they are creating a backup set on AhsayCBS, AhsayOBM or AhsayACB. This feature is disabled by default.
Slide the switch to the right under “Backup Set Types Visible to Users” section.

- Click Add.
Select the “Backup Set Type” you wish to add from the drop-down menu.
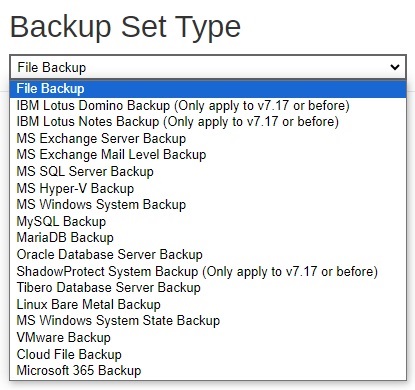
- Click Add to add the selected backup set type.
- If you have multiple backup set types to add, repeat steps 2 - 4 until all options have been selected.
- Click Save to save.
Cloud File Backup Source Visible to Users
This menu allows the administrator to select specific cloud file backup source(s) to be visible to backup users when they are creating a Cloud File Backup Set. By default, this feature is on with all cloud file backup sources pre-selected.
Slide the switch to the right under “Cloud File Backup Source Visible to Users section.

- Click Add.
Select the “Cloud File Backup Source” you wish to add from the drop-down menu.
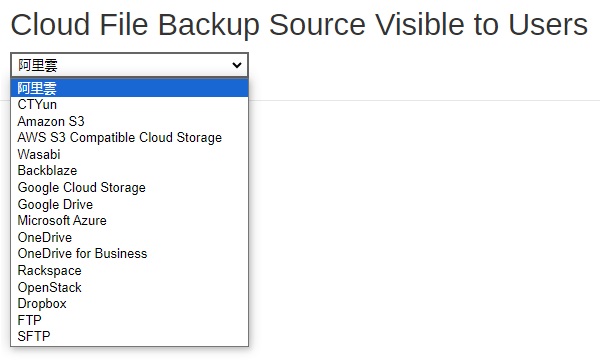
- Click Add to add the selected cloud file backup source.
- If you have multiple cloud file backup source to add, repeat steps 2 - 4 until all options have been selected.
- Click Save to save.
Microsoft 365 Backup Customization
This setting allows the administrator to customize the Authorization code and Admin consent endpoint screen for Microsoft 365 Global region. By default this feature is turned off, in which case the default Ahsay branded Microsoft 365 Authorization code and Admin consent endpoint screens will be displayed.
To support the customization of Azure AD App for Modern App Authentication, an Azure AD subscription is required, e.g. for Microsoft 365 Apps, Premium P1 and Premium P2 licenses of Azure AD subscriptions.
As the free version of Azure AD does not support granting Admin consent for the Exchange/SharePoint related APIs via New App Registration.
Please refer to Microsoft for details of Azure AD subscription plans.
Slide the switch to the right under “Microsoft 365 Backup Customization” section.

- Tick the checkbox of the region you want to customize.
Enter the following information.
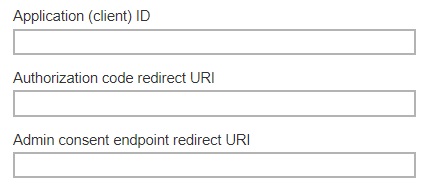
Application (client) ID – application ID used for authentication.
The Application (client) ID can be found on the following location on the MS Azure Dashboard as shown in the following example:

- Authorization code redirect URI – the branded reply URL where authorization server sends the user once granted an authorization code.
Admin consent endpoint redirect URI – the branded URL that sends the user to the Microsoft identity platform admin consent endpoint.
Both the Authorization code redirect URI and Admin consent endpoint redirect URI can be found on the following location on the MS Azure Dashboard as shown in the following example:
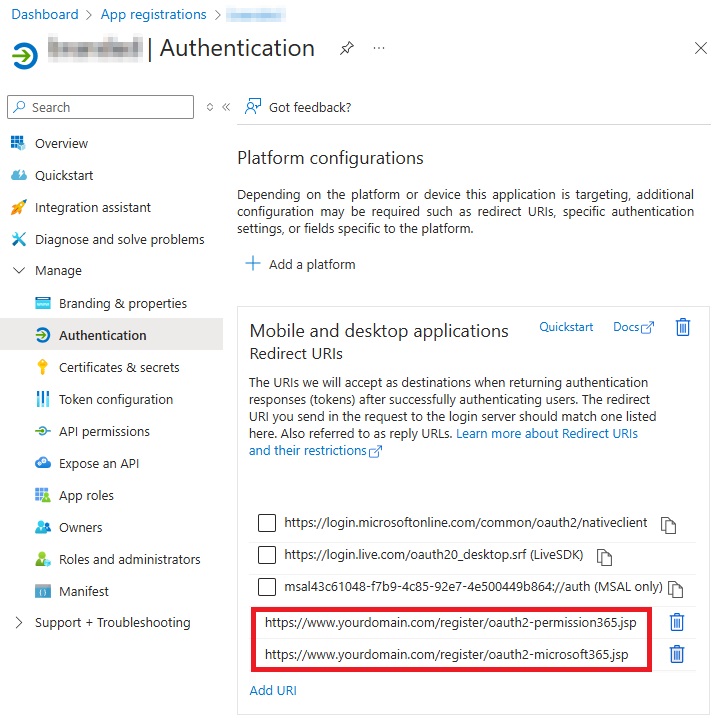 Examples of the oauth2-microsoft365.jsp and oauth2-permission365.jsp files can be downloaded from here.
- Click Save to save.
GUI Settings
In this menu, administrator can configure the GUI elements to be shown on the client backup agent (AhsayOBM or AhsayACB) interface for backup users. The View checkbox allows administrator to decide whether to display the GUI item, and for some items, the Edit checkbox is available to enable backup users to change or access the GUI item(s).
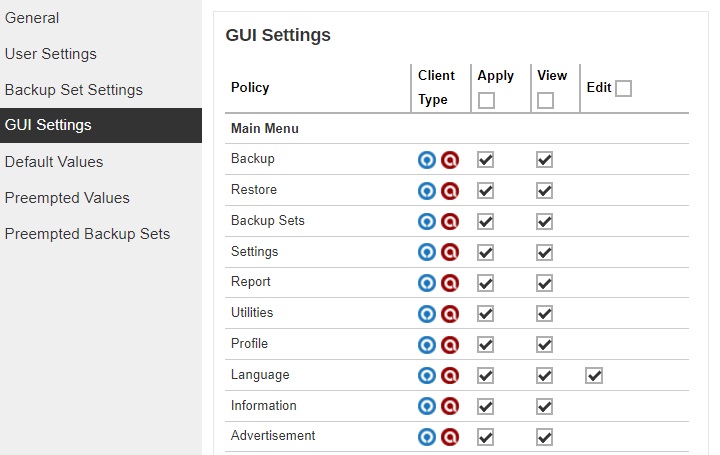
- Policy – the GUI element on AhsayOBM/AhsayACB.
- Client Type – the Client Backup Type (AhsayOBM or AhsayACB ).
- Apply – check this box if you wish to configure the “View” and “Edit” option for the GUI item. If this box is not checked, the GUI item will be shown on AhsayOBM/AhsayACB by default.
- View – enable or disable backup user from viewing the item.
- Edit – enable or disable backup user from editing the item.
Starting with AhsayCBS v9.13, there are three new GUI settings added which are the following: Session Key Settings, Authentication Tab and Authentication Settings. These settings can be configured to show or hide and enable or disable a certain feature.
Session Key Settings
The Session Key will be enabled and can be edited if all three checkboxes are ticked.

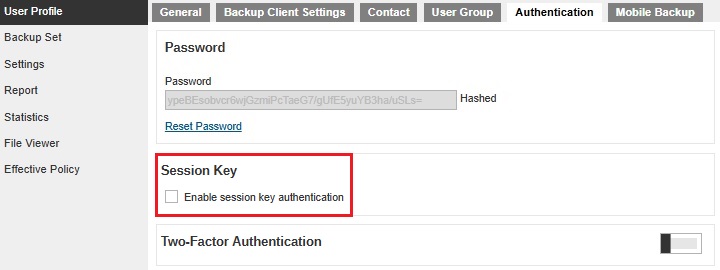
The Session Key will be disabled if the Edit checkbox is not ticked. Once it is disabled, the Enable session key authentication will be grayed out.
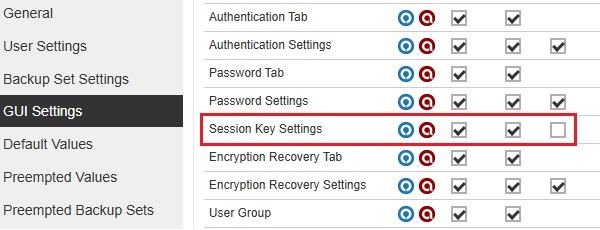
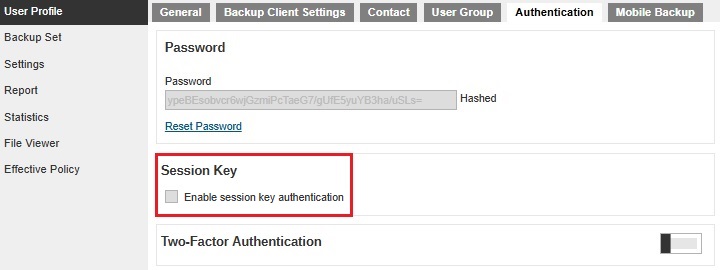
The Session Key will be hidden if the View and Edit checkboxes are not ticked.

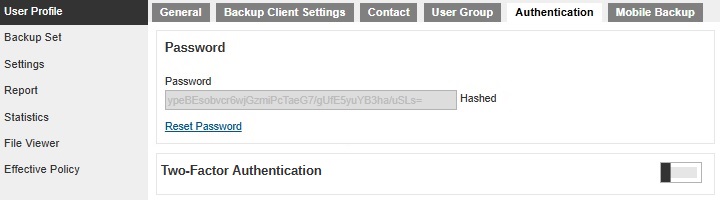
The Session Key will be displayed by default if all the checkboxes are not ticked. Also, the View and Edit checkboxes will not be available.

Authentication Tab
The Authentication Tab and Authentication Settings work together to display or hide the Authentication tab and enable or disable the Reset Password.
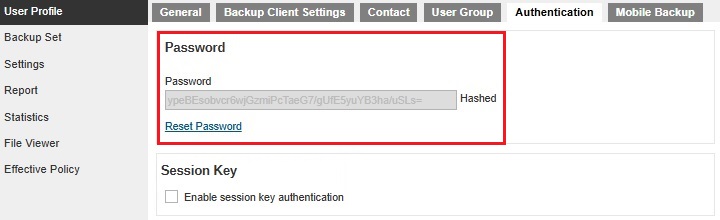
The Authentication tab and Password will be displayed and Password can be reset on the following configurations:
All checkboxes are ticked.

The "Authentication Tab" Apply checkbox is not ticked and all three checkboxes for "Authentication Settings" are ticked.

All checkboxes for "Authentication Tab" are ticked and Apply checkbox for "Authentication Settings" is not ticked.

All checkboxes for "Authentication Tab" and "Authentication Settings" are not ticked.
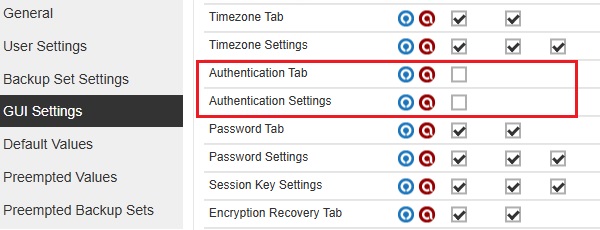
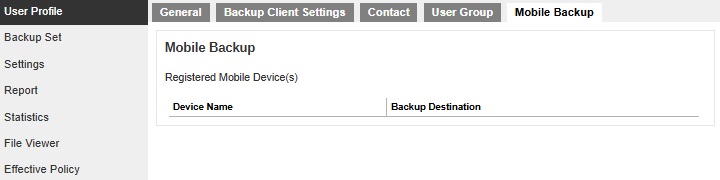
The Authentication tab will be hidden on the following configurations:
The "Authentication Tab" View checkbox is not ticked and all three checkboxes for "Authentication Settings" are ticked.
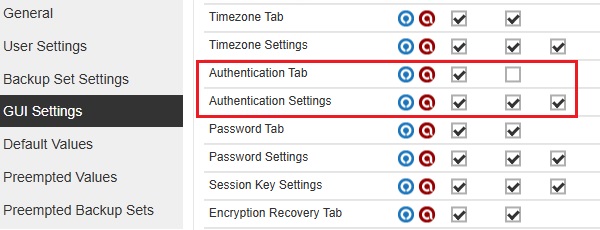
The "Authentication Tab" View checkbox is not ticked and all three checkboxes for "Authentication Settings" are not ticked.
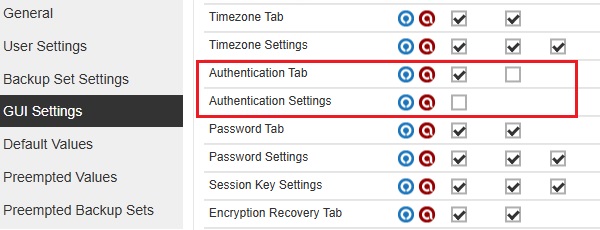
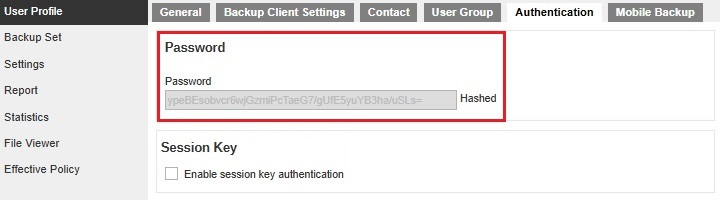
The Authentication tab will be displayed and the Password is not allowed to be reset on the following configurations:
All "Authentication Tab" checkboxes are not ticked and the Edit checkbox is not ticked from "Authentication Settings".

All "Authentication Tab" checkboxes are ticked and only the Edit checkbox for "Authentication Settings" is not ticked.

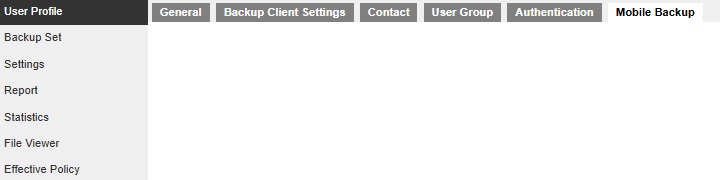
The Authentication tab is available but left blank on the following configurations:
All "Authentication Tab" checkboxes are not ticked and only the Apply checkbox is ticked for "Authentication Settings".

All "Authentication Tab" checkboxes are ticked and only the Apply checkbox for "Authentication Settings" is ticked.

Default Values
This section allows administrator to define the default values for numerous setting items. The default values set under this setting menu will be applied to the backup sets directly. However, users can still override the default values during new backup set creation. As opposed to Preempted Values, which will be introduced later in this chapter, is a set of predefined values by the system administrator where backup users have no right to override the settings.
All setting items under the Default Values tab are enabled by default. The default values of the general setting items may be modified by clicking on the item.
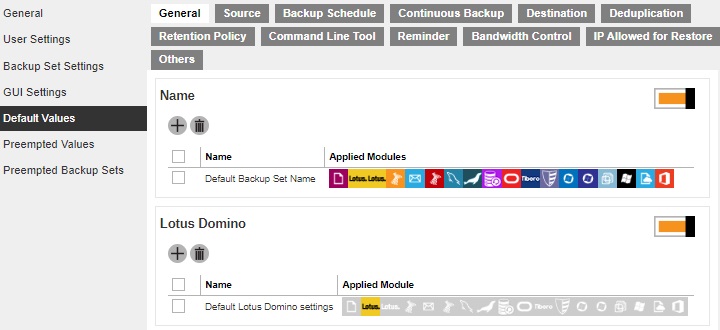
General
This section defines the default values of the following general configuration items:
Name – defines the default backup set name when backup users create a backup set. Multiple settings can be created in this menu if you wish to define different default backup set names for different backup modules.
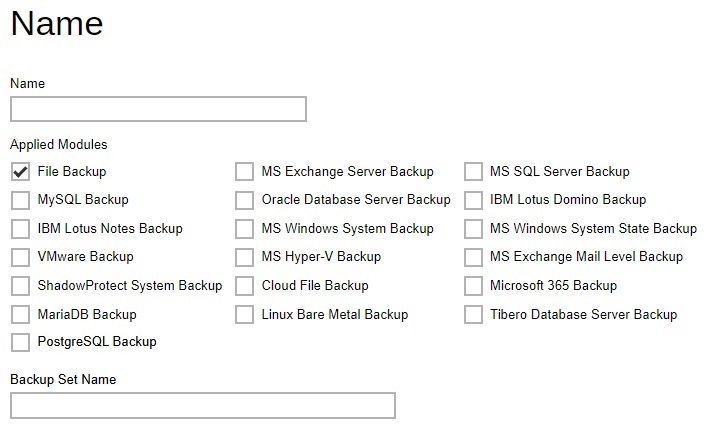
Lotus Domino / Lotus Notes – defines the path to notes.ini. Please exercise extra caution when changing this setting because an accidental or incorrect change of this path may cause unpredictable impact on running the Lotus Domino / Lotus Notes.
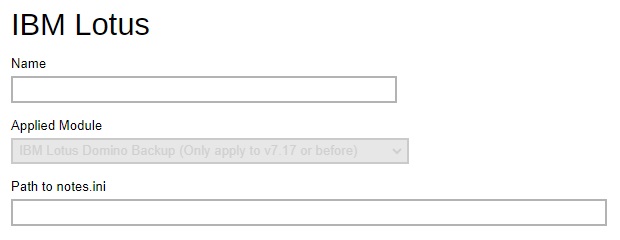
Windows System Backup / Windows System State Backup – defines the default location where you wish to store the system backup for MS Windows System / System State Backup module.
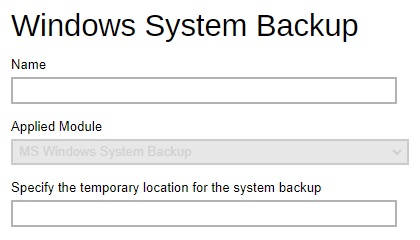
MySQL Server / MariaDB Server – defines the default Login ID, Host name, Port and Path to mysqldump for MySQL / MariaDB server backup module.
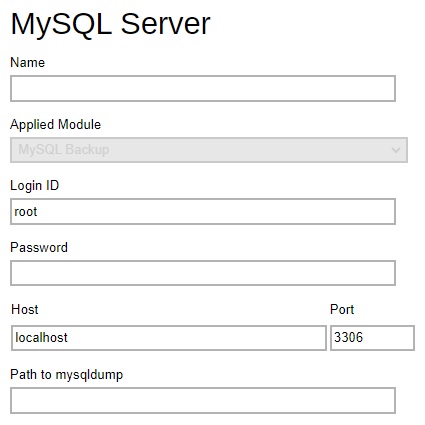
Oracle Database Server / Tibero Database Server – defines the default Login ID, Host name, Port and SID for Oracle / Tibero Database Server module. Also the Tibero Home for Tibero Database Server module.
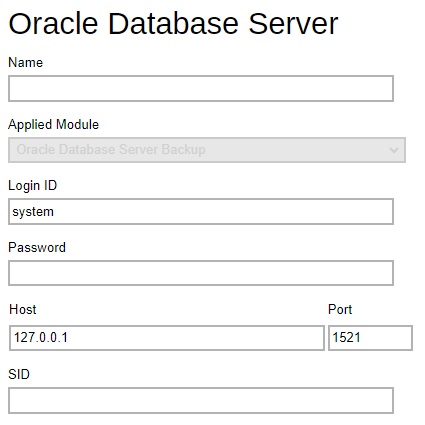
PostgreSQL Server – defines the default Login ID, Host name, Port and Path to pg_dump for PostgreSQL server backup module.
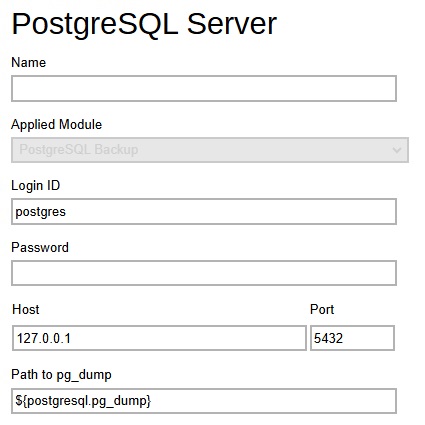
VMware Host - defines the default VMware version, host name, port number and SSH port VMware backup module.
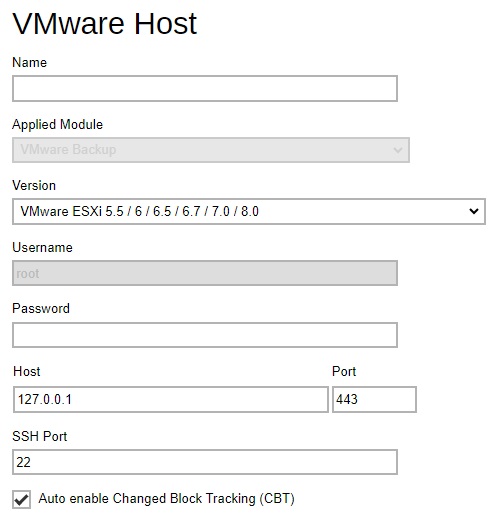
Shadow Protect - defines the default installation path of Shadow Protect and whether to encrypt the image file in the temporary directory.
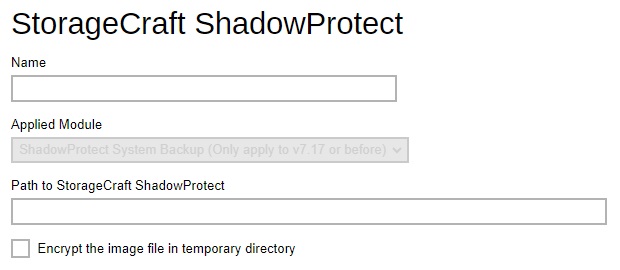
Windows User Authentication - defines the default domain name/host name and user name for backup users to enter the Windows User Authentication details. Multiple settings can be created in this menu if you wish to define different default domain name/host name and user name for different modules.

Source
This section defines the default backup source values of the following:

Shortcut - defines the default common files and folders to be selected when user is creating a backup set for File Backup.
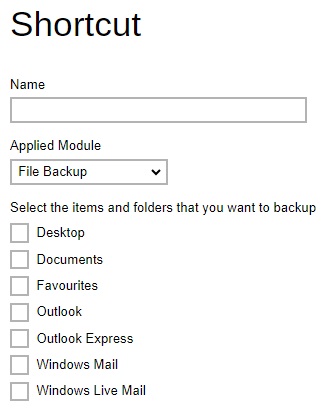
Filter - defines the default filters used to include/exclude files in the backup source from performing backup. This filter applies only to File Backup on Windows platform. Creating multiple filter settings is possible.
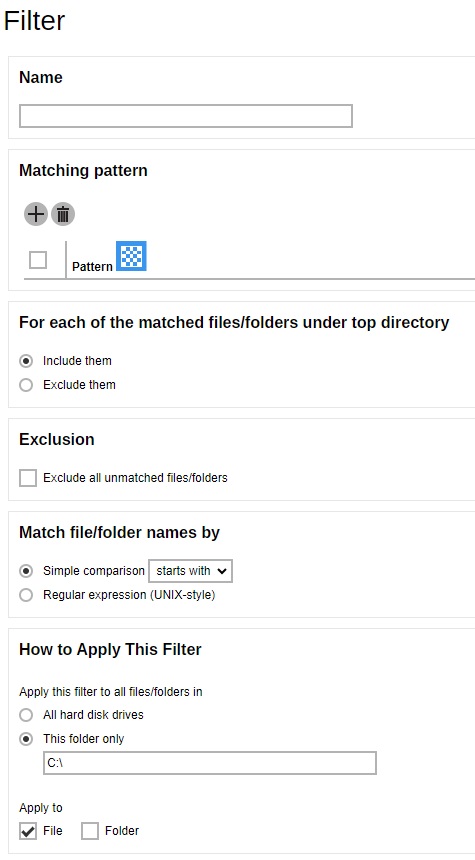
Advanced - defines the default advanced settings, including the platform of the user’s machine, the backup module, selected or deselected source for backup.
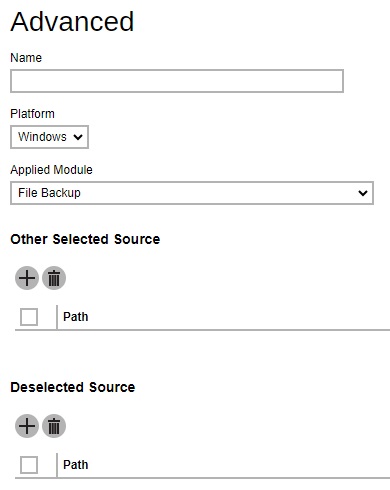
Backup Schedule
Setting up the backup schedule allows backup sets to run automatically at the specified time. This section allows administrator to define the default backup schedule when backup users create a backup set. Multiple settings can be created in this menu if you wish to define different default backup schedule for different backup modules. Within a backup schedule setting, multiple schedules can be added.

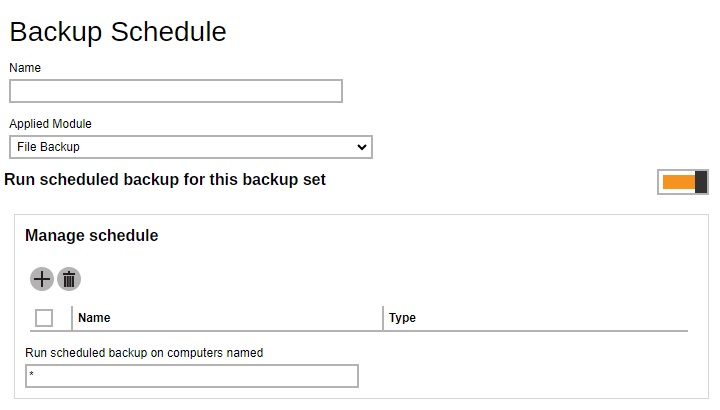
Continuous Backup
When the Continuous Backup feature is enabled, a backup job will be triggered whenever a change is made in the backup source. This section allows administrator to define whether to exclude system files, frequency of running backup when changes are detected, configure the maximum file size allowed for backup and configure filters to exclude files from backup. Continuous Backup is only available on Windows platform.
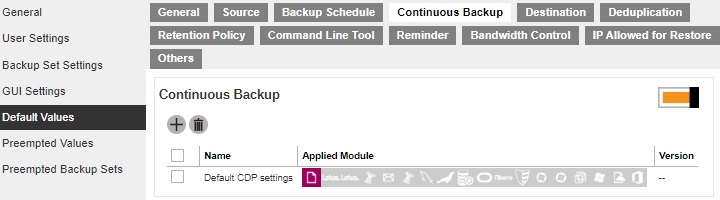
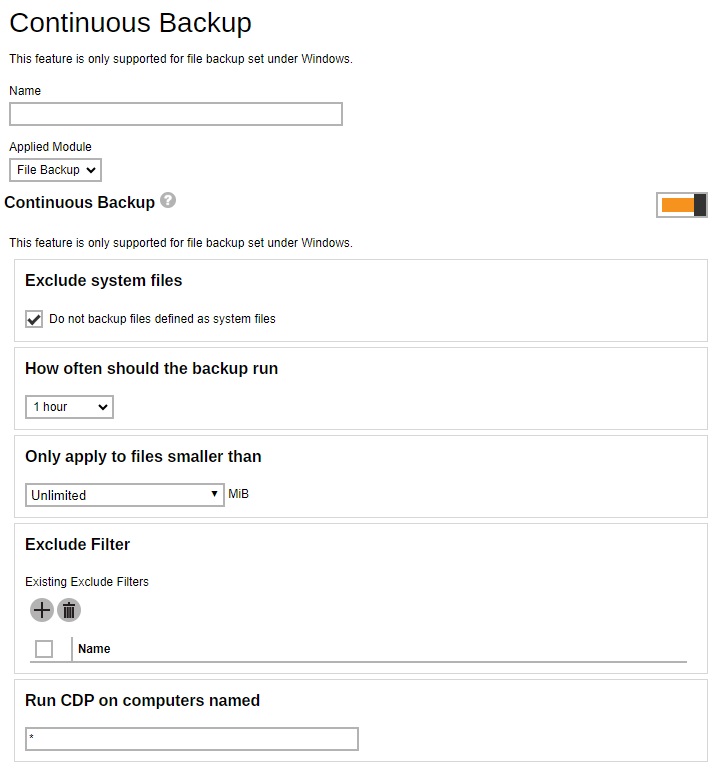
Destination
This section allows administrator to define the default backup destination when backup users create a backup set. Multiple settings can be created in this menu if you wish to define different default destinations for different backup modules.
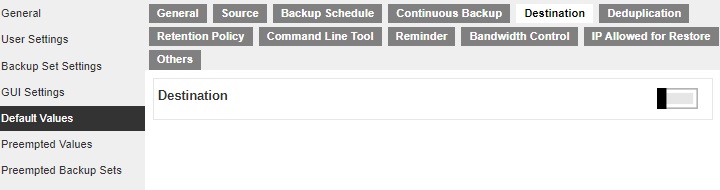
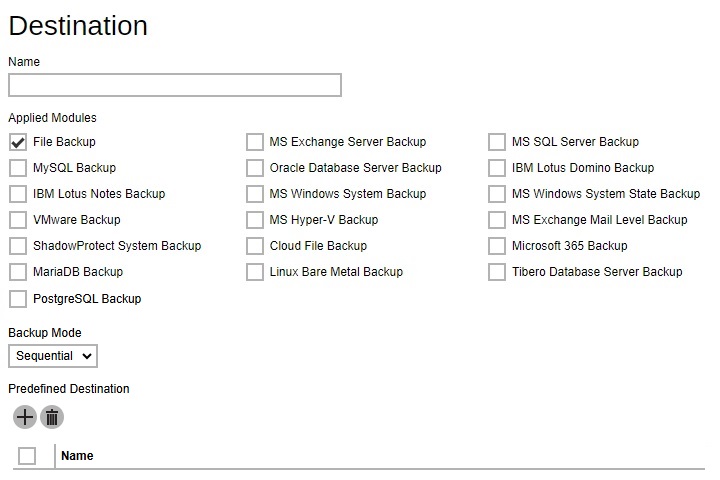
Deduplication
This section allows administrator to define the default deduplication setting when backup users create a backup set. Multiple settings can be created in this menu if you wish to define different deduplication setting for different backup modules.
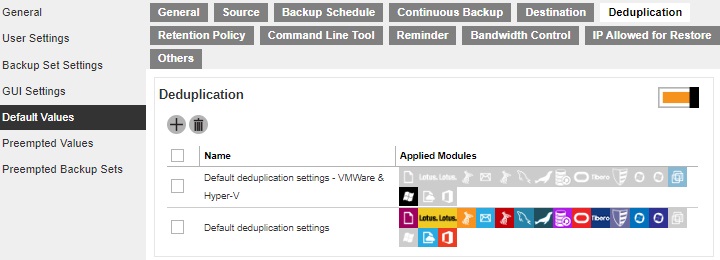
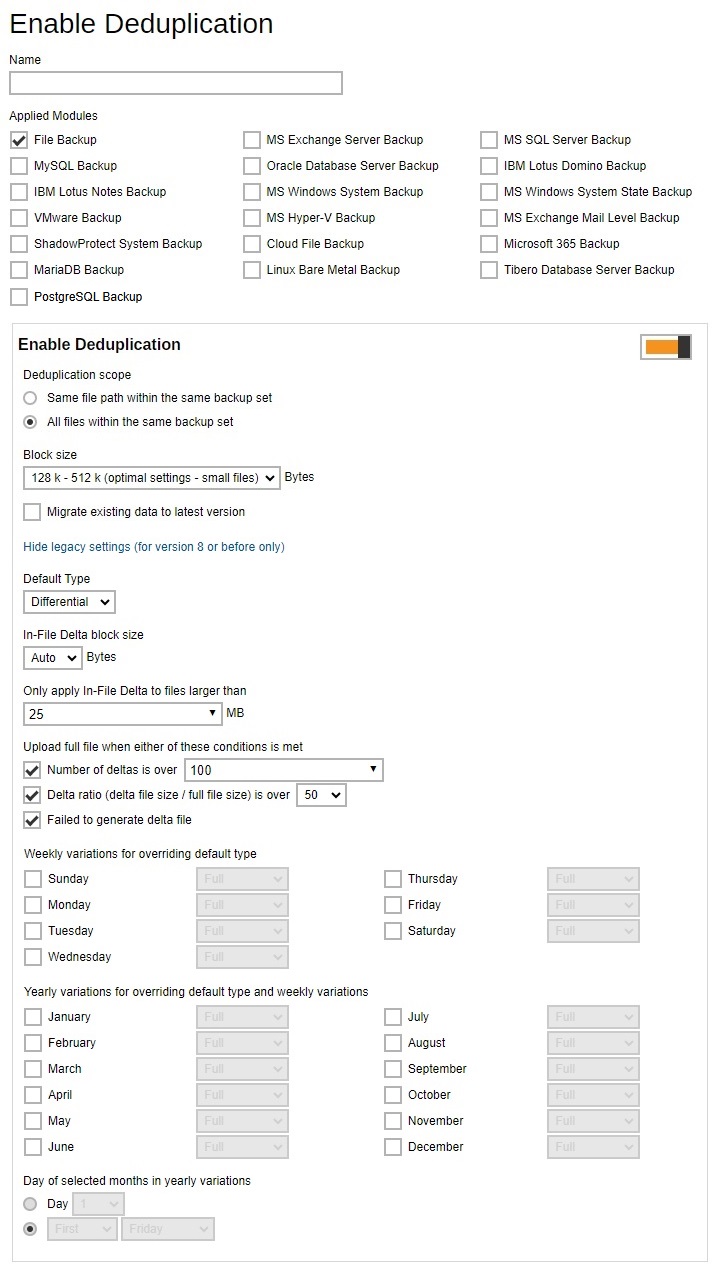
Retention Policy
Retention policy defines the policies of persistent data management for meeting business data archival requirements. When a backup job is performed, for data that are modified or deleted on the client computer, their existing versions on the backup server (backup records) will be moved into retention area, while newly backed up files will be placed in the current data area.
Specifically, retention policy setting defines how long are the backup records kept in the retention area before they are deleted permanently from the backup server.
This section allows administrator to define the default retention policy for backup sets when they are created. Multiple settings can be created in this menu if you wish to define different default retention policy for different backup modules.
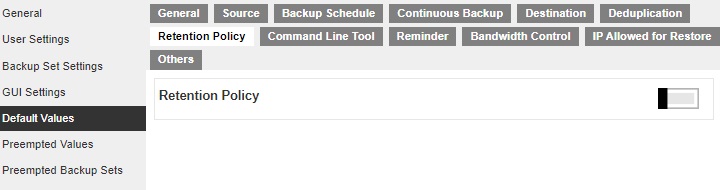

Command Line Tool
This section allows administrator to configure the default Pre-Backup or Post-Backup command to execute. Command such as batch file to stop and start an application before and after a backup job is completed, or other command such as to shut down the computer when a backup job is completed can be configured. Multiple settings can be created in this menu if you wish to define different default command line for different backup modules.
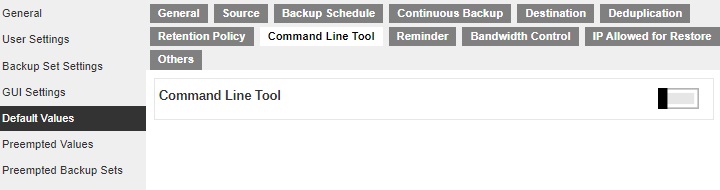
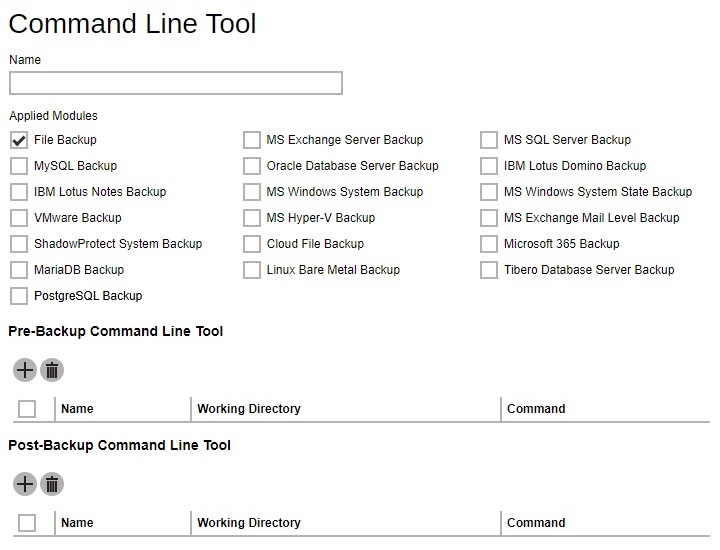
Reminder
This section allows administrator to enable the backup reminder feature where users will be reminded to run a backup job when they log off or shut down their computers and/or when their last backup is over the tolerance period. Multiple settings can be created in this menu if you wish to define different settings for different backup modules. The reminder feature is only available on Windows platform.
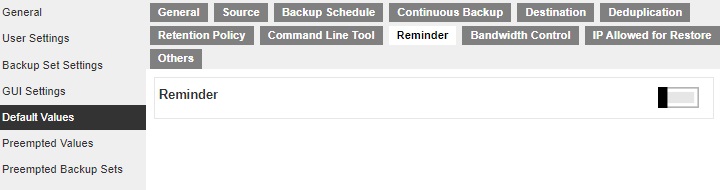
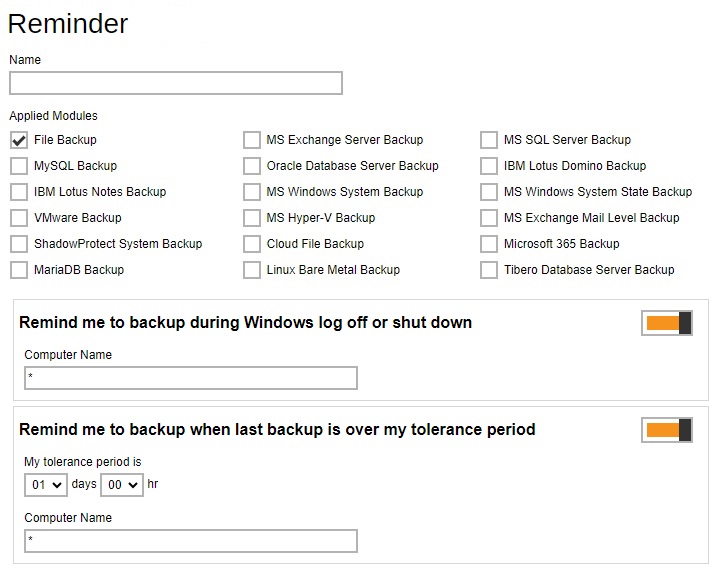
Bandwidth Control
Defines the default settings on limiting the data transfer rate when performing backup and restore jobs. Multiple settings can be created in this menu if you wish to define different settings for different backup modules.
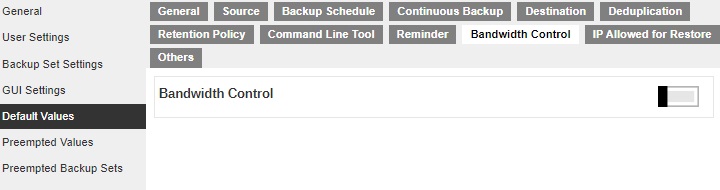
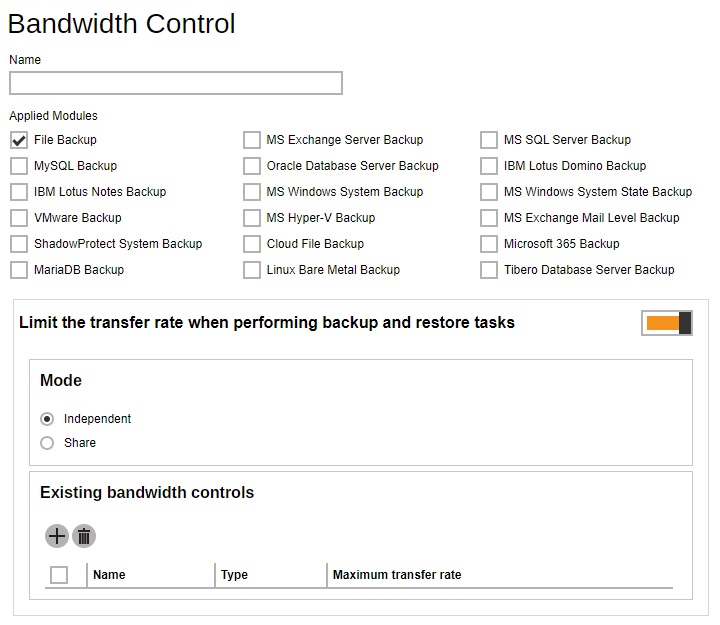
IP Allowed for Restore
This section allows administrator to define IP ranges that are allowed to perform restore. Multiple settings can be created in this menu if you wish to define different settings for different backup modules.
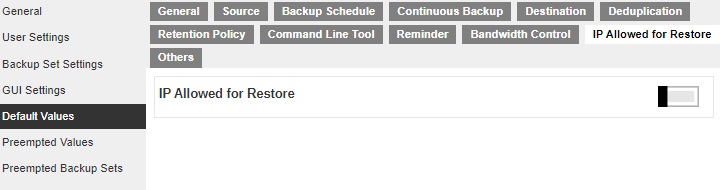
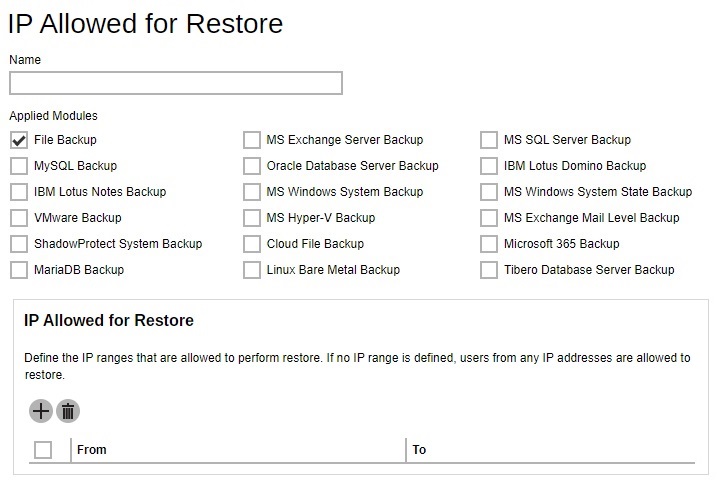
Others
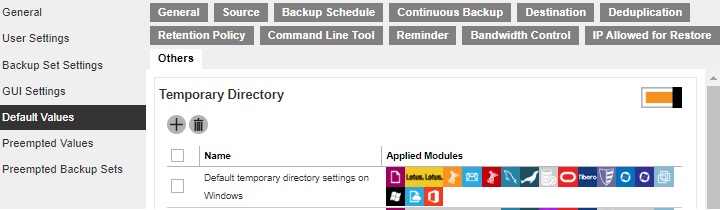
This section allows administrator to configure other default settings like the following:
Temporary Directory - used for various purposes, such as storage of temporary spooled file, remote file list, local file list, temporary delta file and other files of temporary nature. Administrator can define the default location of the temporary directory. Multiple settings can be created in this menu if you wish to define different temporary directory locations for different backup modules.
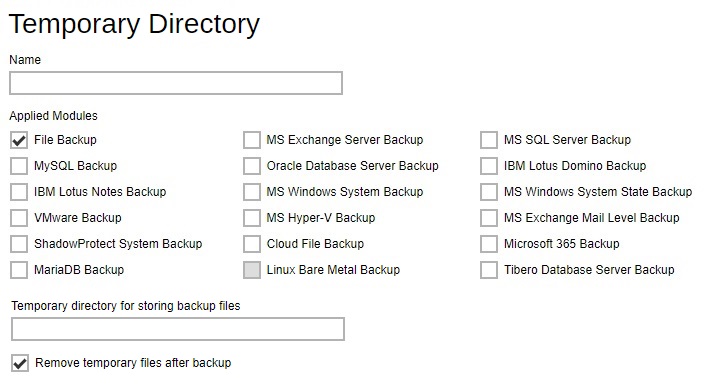
Follow Link - define whether to turn on the Follow Link feature by default. When this feature is on, not only the symbolic link or junction point will be restored, the directories and files that the symbolic link or junction point links to will also be restored. This feature is only applicable to File Backup module.
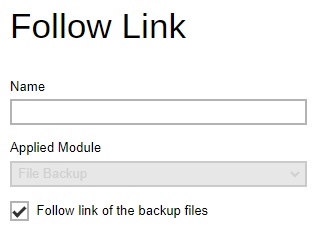
Volume Shadow Copy - enabling the Volume Shadow Copy option will allow backup of local files that are exclusively opened during the backup process (e.g. Outlook PST file). Administrator can define whether to turn on the Volume Shadow Copy feature by default. This feature is only applicable to File Backup module.
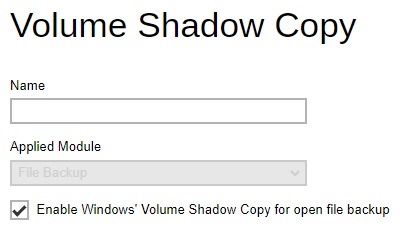
File Permissions - enabling the File Permissions option will back up the file permissions of the operating system. File permission defines, for example, the right to view or change a file by the system owner/group/individual. Administrator can define whether to turn on the backup of File Permissions by default. This feature is only applicable to File Backup module.
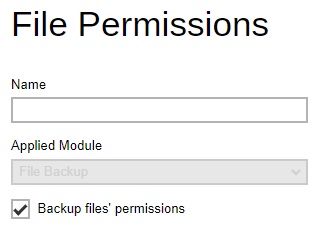
Archived Log Deletion - defines whether the archived log files will be deleted after backup by default. This feature is only applicable to Oracle Database Server Backup module.
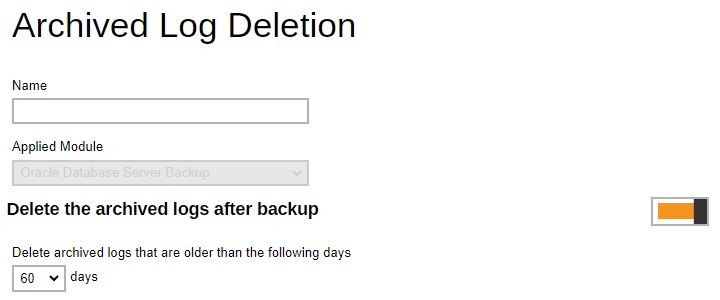
OpenDirect - enabling the OpenDirect setting for Windows File backup sets on AhsayOBM and AhsayACB will support restoring of selected files/folder within a compressed or image file without the need to restore the compressed or image file first.
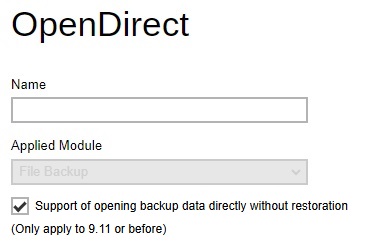
Granular Restore - enabling the Granular Restore setting for VMware ESXi/vCenter and Hyper-V guest VM backup sets will support restoring of selected files/folder within a virtual disk of a guest VM without the need to restore the guest VM file first.
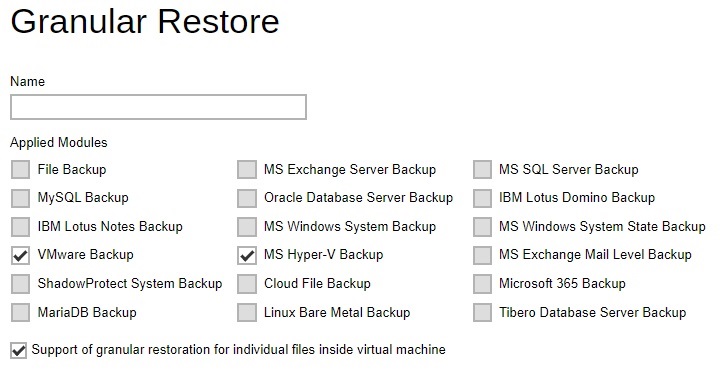
Compressions - compressing data before they are backed up brings faster backup and restore time and save storage space on the backup destination. Compression does not apply on Run direct backup sets for Hyper-V and VMware even if this feature is on. Administrator can define the default compression type for backup set. Multiple settings can be created in this menu if you wish to define different default compression types for different backup modules.
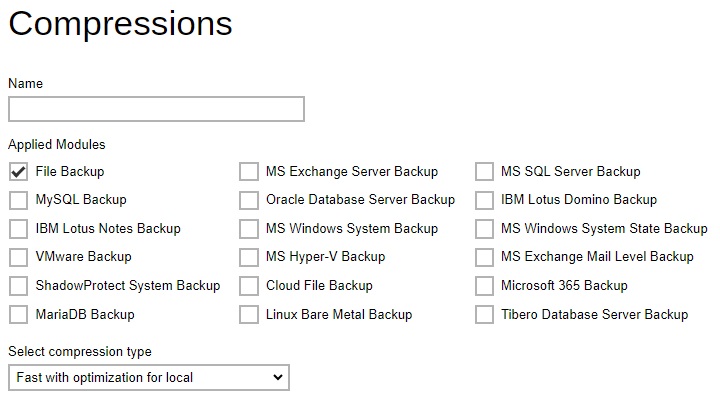
Encryption - for better security reason, backup users can choose to encrypt their backup data with an algorithm, mode and key of their choice. Encryption does not apply on Run direct backup sets for Hyper-V and VMware even this feature is on. Administrator can define the default encryption setting for backup set. Multiple settings can be created in this menu if you wish to define different default encryption settings for different backup modules.
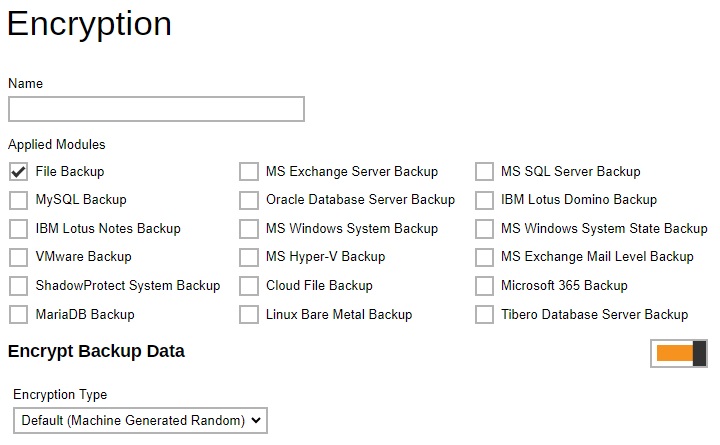
Recycle Bin - once BAK files are deleted based on Retention Policy or Data Integrity Check there is no way to retrieve it, by enabling the Recycle Bin users can ensure that the file will be kept for a specified period as added protection. Administrator can define the default Recycle Bin settings for the backup set. Multiple settings can be created in this menu if you wish to define different default Recycle Bin settings for different backup modules.
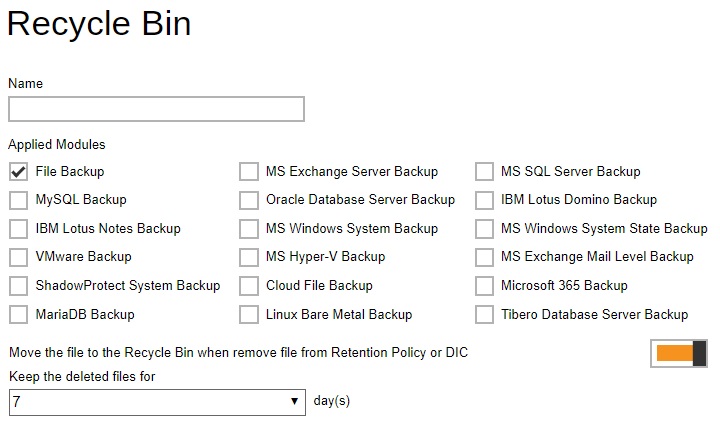
Restore Drill - used to run a trial restore to check if there are corrupted files in the backup job. Administrator can define the default setting for the restore drill. Multiple settings can be created in this menu if you wish to define different restore drill settings for different backup modules.
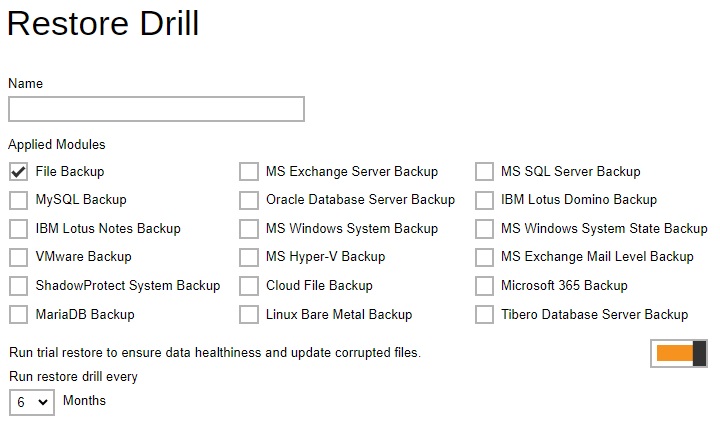
File Viewer - allows viewing of backed up files on the backup server. Administrator can define the default File Viewer settings for the backup set. Multiple settings can be created in this menu if you wish to define different File Viewer settings for different backup modules.
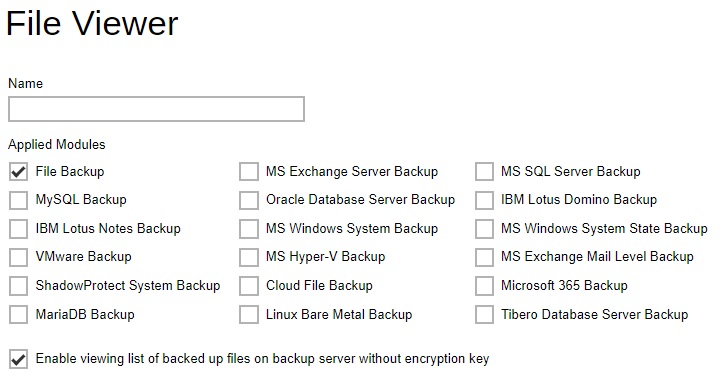
Preempted Values
This section allows administrator to define the predefined values for backup users’ backup sets. The preempted values set under this setting menu will be applied to the backup sets directly. Backup users can add additional values on top of the preempted values when creating a backup set but CANNOT remove the preempted values preset by the system administrator.
All setting items under the Preempted Values tab are disabled by default. Slide the switch to the right of each setting item to enable them. Then refer to the Default Values for the discussion on the configurable values.
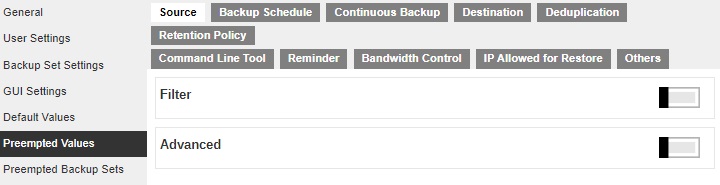
In all the setting items in the Preempted Values section, there is a Mode setting item that contains three options on how these preempted values are applied to user defined settings.
- Prepend – the preempted values will be applied as the first user defined settings.
- Append – the preempted values will be applied as the last user defined settings.
- Override - override all user defined settings.
There is an additional setting in the Destination tab which is Immutable. This will define the preempted immutable predefined destination that will be available to backup users when they create a backup set. Multiple settings can be created in this menu if you wish to define different preempted immutable predefined destinations for all backup modules.
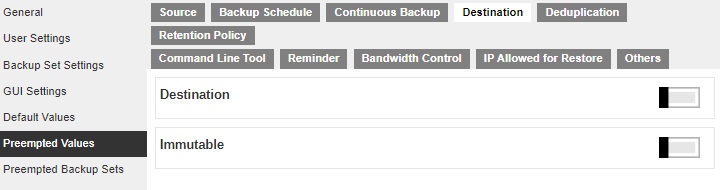
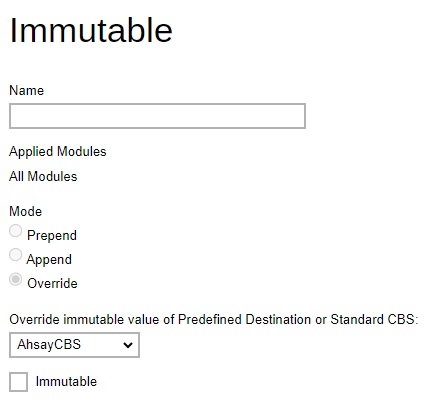
Preempted Backup Sets
This section allows you to predefine a backup set that will be run as default backup set for backup user with this policy group setting. Backup user CANNOT remove this preempted backup set from their backup job once it is preset by the system administrator.
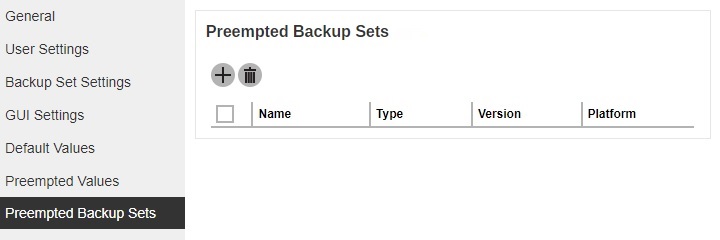
- Click Add under “Preempted Backup Sets” section.
Enter a name for the preempted backup set, then select the platform on which the backup set will run on and the backup set type. In our example, the preempted backup set is called BackupSet-1 which is a File Backup type that will be run on Windows. Click Next to continue.
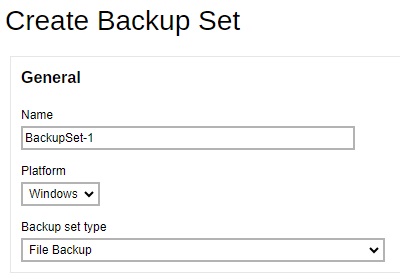
Specify the backup source for the new backup set. The selection items of this page varies depending on the backup set type you have chosen. Below is an example for a File Backup set.

You can apply filters to the backup source by enabling the switch then configure the filter that will be used. Select other backup source or deselect backup source. Click Next to continue.
If necessary, add a backup schedule by sliding the switch to the right and click Add.
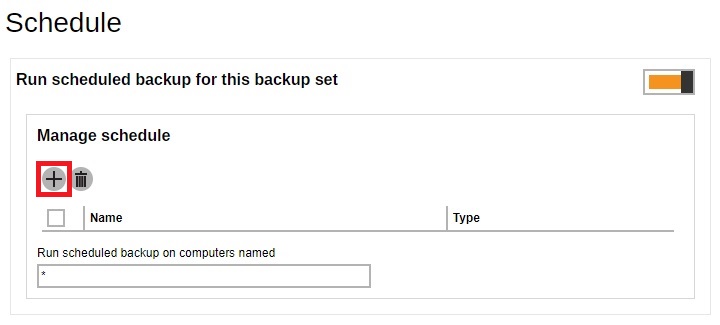
Configure the backup schedule then click Next to continue.
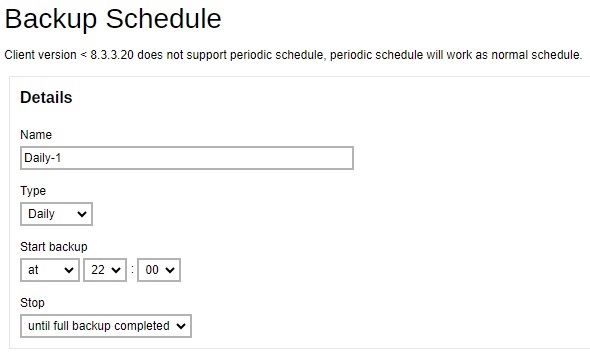
Please refer to the Overview part for more details.
Add a new backup destination for this backup set.
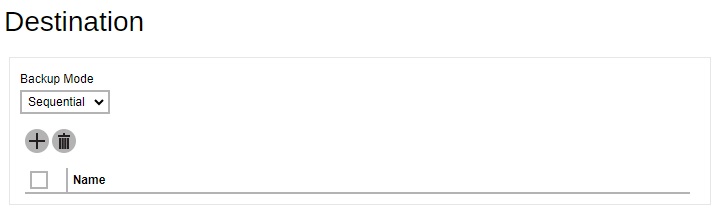
Select the backup mode. If Concurrent is selected, specify the number of concurrent backup destinations.
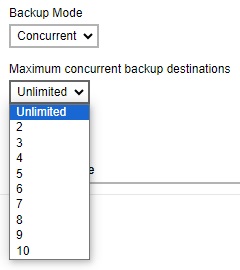
Click Add to add a destination. Tick the box next to the destination, once done click Add then Next to continue.
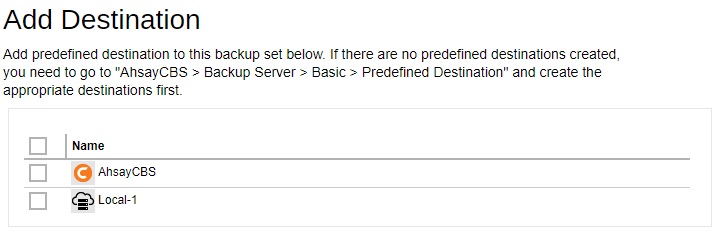
By default “OpenDirect” is already enabled, untick the box if you want to disable it. Click Next to continue.
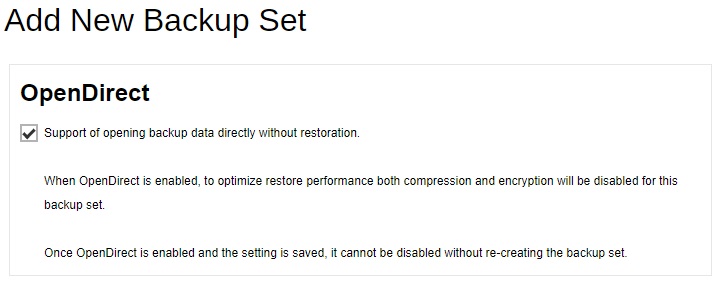
Enter the Windows User Authentication information. This is needed for backup set with backup schedule and network shared drive selected as backup source. Enter the domain name and user name for AhsayOBM to access the network location.
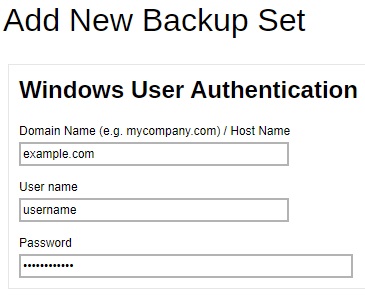
For the “User name”, the local account or a Microsoft account may be used. The Microsoft account is supported for AhsayOBM installed on Microsoft Windows version 8, 8.1 and 10.
Some users prefer to use a pin to login to Windows, this cannot be used for the Windows User Authentication. The pin can only be used for logging in to Windows and is not applicable for the Windows User Authentication. The password of the account must be provided instead of the pin to access files and/or folders in the network location.
Examples:
- Using a local account = username
- Using a Microsoft account = username@outlook.com
Click Save to save.
A new backup set called BackupSet-1 is created and can be seen in the Preempted Backup Sets list.
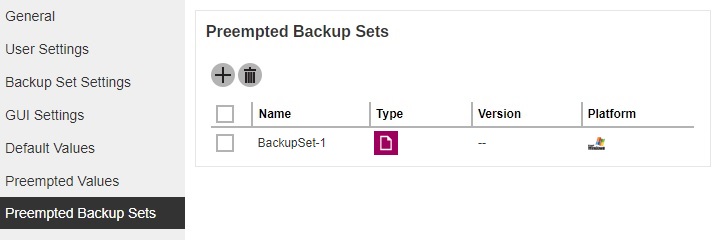

 FAQ
FAQ