
 FAQ
FAQBranding
Administrators can brand the AhsayCBS and generate new AhsayCBS installers from the AhsayCBS interface.
A Rebranding license is required for this feature to work. Evaluation license does not support this feature. If you do not have a license yet, visit the Ahsay Shopping Centre – Rebranding page to purchase one.
Before Getting Started
Here are the suggested steps to follow to complete the branding process in AhsayCBS.
- Prepare the logos, properties, application settings and digital signature to be applied in the Rebrand Clients section, which will be reflected in the Client Backup Agents (AhsayACB/AhsayOBM).
- Generate the AhsayOBM/AhsayACB installers for testing.
- Prepare the logos, properties, cascade style sheet, connector/SSL certificate settings and customized report templates to be applied in the Rebrand Web Console section, which will be reflected in the AhsayCBS web console.
- Generate the AhsayCBS installer for testing.
- Optional steps:
- AhsayUBS image file generation. Select either 'ISO' or 'IMG' as the format for image file generation. The image file will be the installation file for the AhsayUBS.
- If Microsoft 365 backups are offered, need to prepare the oauth2- microsoft365.jsp and oauth2-permission365.jsp files, to customize the Authorization code and Admin consent endpoint screen for Microsoft 365 Global region.
If Two-Factor Authentication and/or mobile backup service is enabled then Ahsay Mobile app branding is required.
The branding of Ahsay Mobile app can only be done by Ahsay, if you are interested in branding the Ahsay mobile app you must engage our professional services.
To engage our professional services for Ahsay Mobile branding, please contact our sales team at Ahsay by email at sales-kb@ahsay.com or call our International Sales Hotline +852 3580 8091.
Branding for AhsayCBS Interface
After installing AhsayCBS, upload the graphics and customize the properties.
- Login to the AhsayCBS management console as system user.
Go to System Settings > Basic > Administrative Access.
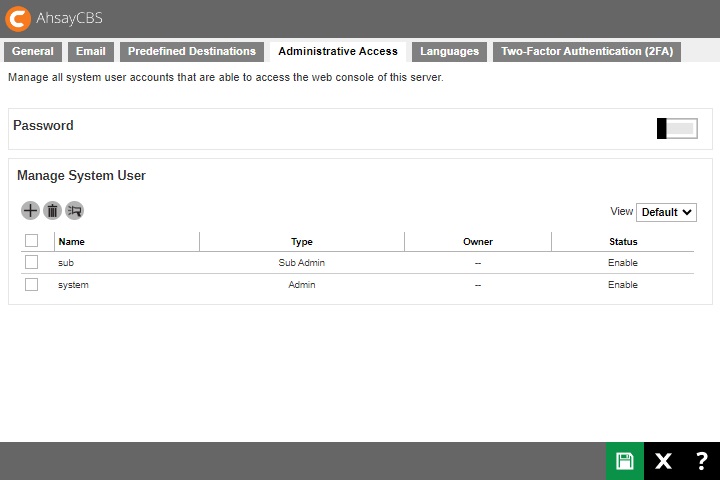
Click on the system user to brand the AhsayCBS.
If you are testing this feature, please create a sub admin user and test the following steps, this is because when new installers are generated, the existing installers will be overwritten with the new ones.
Click Rebrand Web Console on the left.
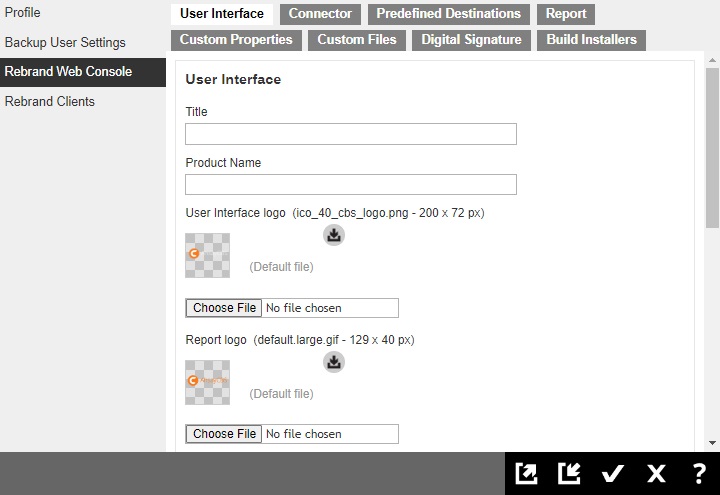
- Enter the following fields under the “User Interface” tab.
- Title – the name to be displayed on the title bar of the browser.
- Product Name – the name to be displayed in the software license page.
- Download link for iOS app – the URL link directs users to iOS App Store to download Ahsay Mobile.
- Download link for Android app – the URL directs users to Android Google Play to download Ahsay Mobile.
- Upload the branding image for the AhsayCBS interface. Please refer to the branding image specifications listed on the Image Specifications section, you can download the default logo/icon for reference.
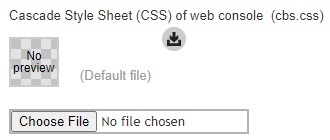
At the bottom of this page, you can upload the ”Cascade Style Sheet (CSS)” for the AhsayCBS interface.
Click the Connector tab if you need to change the connector settings and SSL settings. These settings will be applied to your new installers.
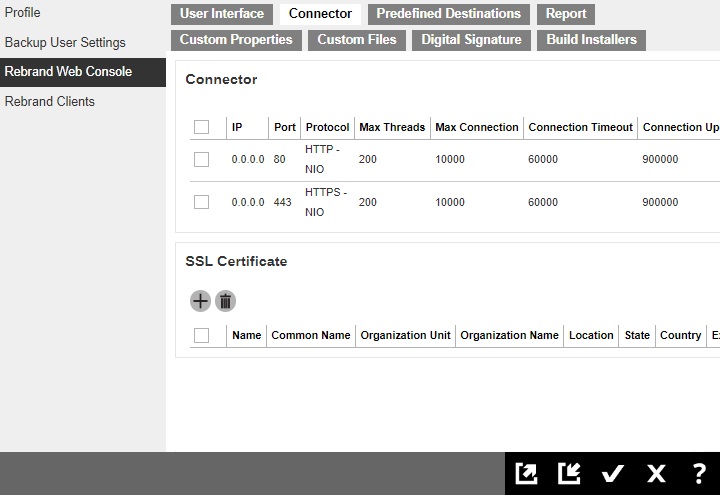
If you will generate the AhsayUBS installer, please reserve the port 8080 for the AhsayUBS web admin interface.
Click the Predefined Destinations tab if you need to customize the application name for standard destinations or the credentials for Cloud storage. Please refer to Customize Application Name for instruction.
OpenStack, Local, AhsayCBS and Destination Pool destinations cannot be customized.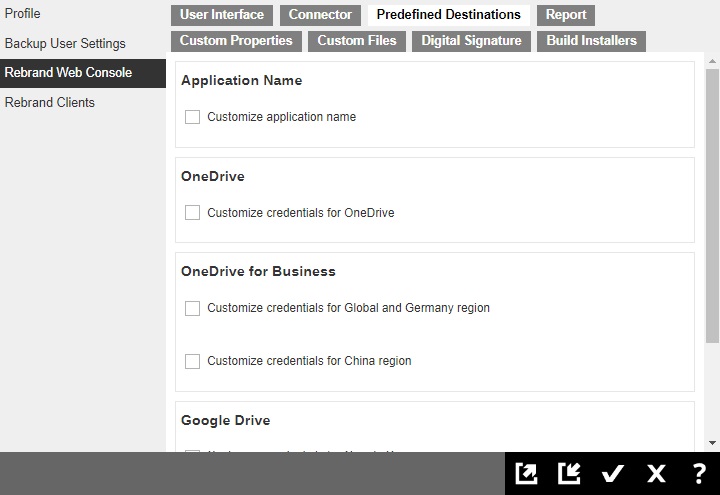
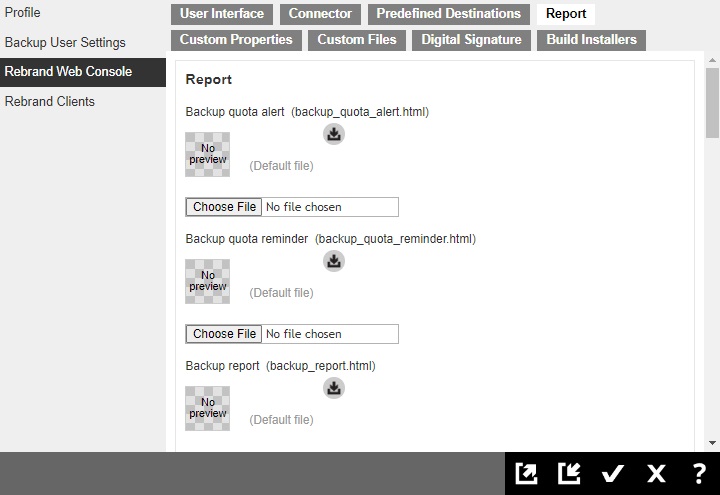
Click the Report tab if you want to modify the HTML template. These templates will be applied to your new installers.
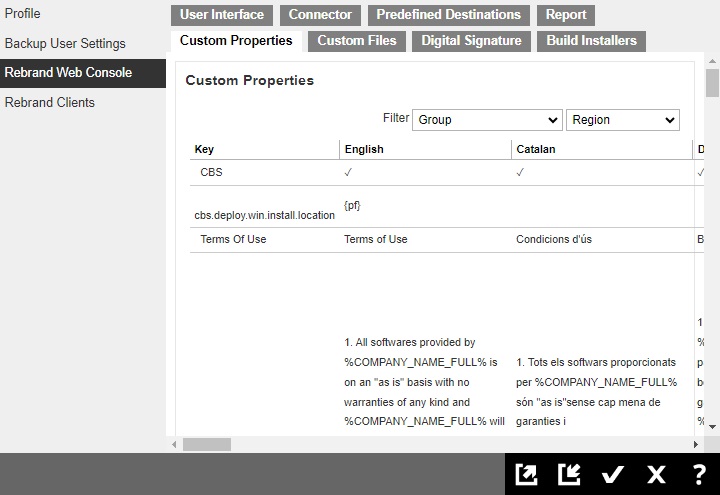
Click the Custom Properties tab if you want to modify the properties of the AhsayCBS. These properties will be applied to your new installers.
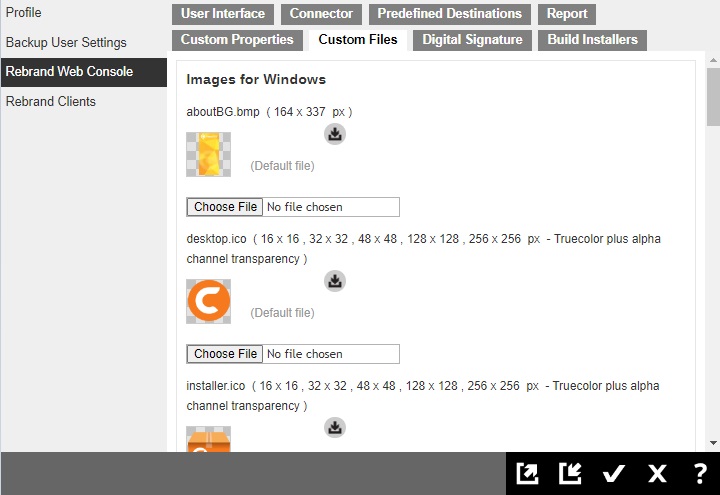
Click the Custom Files tab. Upload the branding image for the AhsayCBS installer/AhsayUBS image file. Please refer to the branding image specifications listed on the Image Specifications section, you can download the default logo/icon for reference.
If you have uploaded the digital signature in Rebrand Clients > Digital Signature, it will be applied to your new Windows installer.

Click the Build Installers tab. Select the Build Target platform to generate the installer(s).
 Before selecting the UBS build targets, it is suggested to first build and try the branded CBS installer to verify the branding are correct.
If you wish to rebrand the AhsayCBS to resellers using your own branding and to prevent resellers from knowing the software is from Ahsay and changing the branding, you can check the “Disable branding feature on customized web management console” checkbox. With this feature enabled, the Rebrand Web Console and Rebrand Clients sections in the web management console of the CBS installer to be generated will be disabled. In that case, backup users will not see any Rebrand parameters with Ahsay wording.

- Click OK and Save to save all the settings before generating the installer.
Go back to the Build Installers tab, click the Build Branded Server button to generate new AhsayCBS installer or AhsayUBS image file.
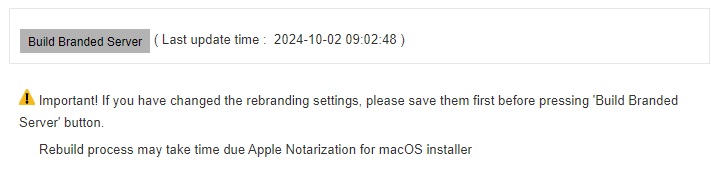 The installer generation process could take around 30 to 90 minutes for each chosen target to build and download. The generation time would depend on the traffic condition on the customization portal. The size of each build for download can be between 800MB to 1GB.
You can download the branded AhsayCBS installer from the download page.

In case there are any problems when building the installer, click the Download Log button to see the logs.
By clicking on the Download Log button, you can download the branding log file “cbs-log.zip” and you can look at the log to troubleshoot the branding issue
Branding for AhsayOBM/AhsayACB
- Login to the AhsayCBS management console with system account.
Go to System Settings > Basic > Administrative Access.
- Click on the system user to brand the client. If you are testing this feature, please create a sub admin user and test the following steps, this is because when new installers are generated, the existing installers will be overwritten with the new ones.
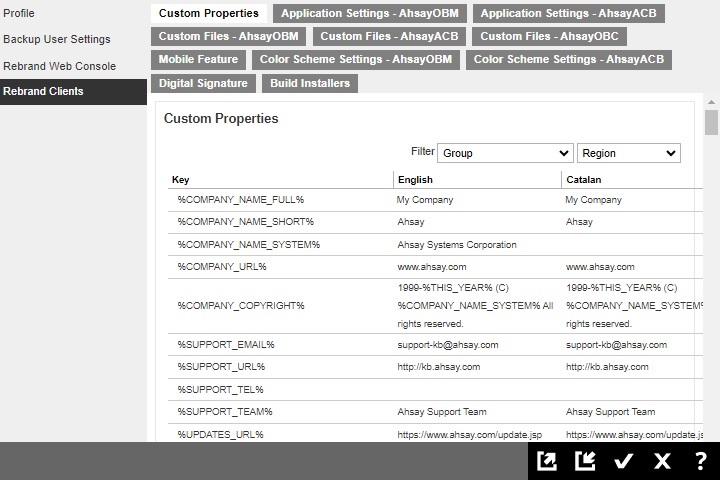
Click Rebrand Clients where you can customize the properties, apply the AhsayOBM, AhsayACB settings, and upload AhsayOBM and AhsayACB branding images.
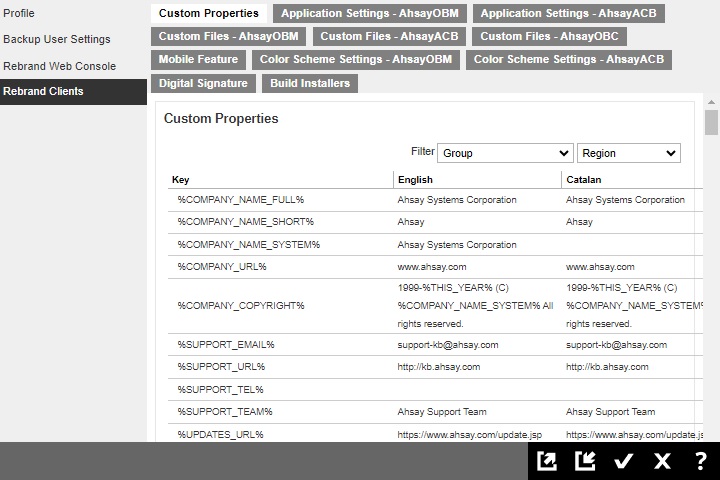
First, click the Custom Properties tab.
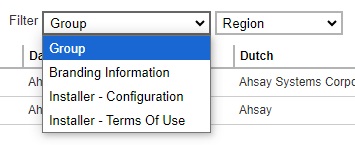
There are three categories of branding properties on this page, they are “Branding information”, “Installer – Configuration” and “Installer - Terms of Use”. By default, you will be able to brand properties of all categories, you can also select the desired category by using the “Group” filter.
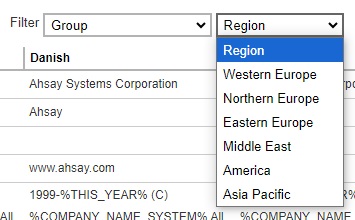
You can also filter the language displayed on this page by using the “Region” filter.
By clicking into each item, you can modify the name of each property in different languages. Click OK to continue.
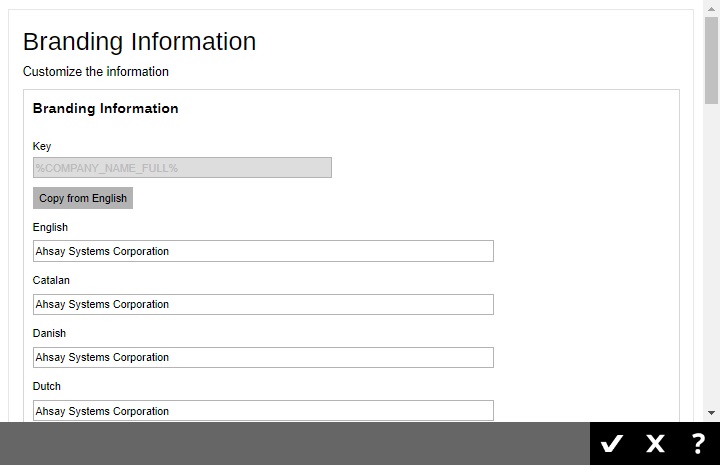
You will be able to see the modified branding properties as shown.
AhsayCBS made some constraints for the system properties, which are defined as follow:
Short System Property (%XXX_SHORT_NAME_SYSTEM%)
Accepts alphabet and/or numeric character(s).
General System Property (%XXX_SYSTEM%, except for Short System Property, %OBM_SYNOLOGY_APP_ID_SYSTEM% and %SOCIAL_MEDIA_LINK_XXX_SYSTEM%)
Only accept alphabet, numeric and/or space character(s).
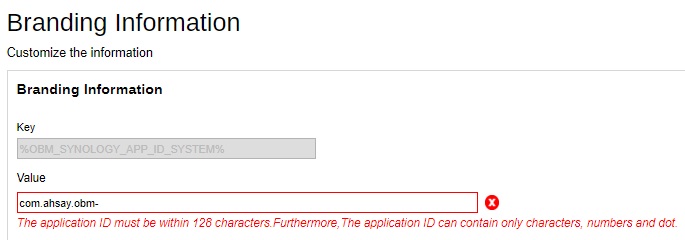
%OBM_SYNOLOGY_APP_ID_SYSTEM%
Accepts alphabet, numeric and/or dot character(s). The length cannot exceed 128 characters.
Install Location Properties (i.e. acb.deploy.win.install.location and obm.deploy.win.install.location)
Cannot be empty.
In order to meet the above constraints, some default values of system properties are modified:
%ACB_FULL_NAME_SYSTEM%
From “Ahsay A-Click Backup” to “Ahsay AClick Backup”
%OBSR_SHORT_NAME_SYSTEM%
From “AhsayOBS and AhsayRPS” to “AhsayOBSR”
%ACB_COMMENTS_SYSTEM%
From “Ahsay A-Click Backup” to “Ahsay AClick Backup”
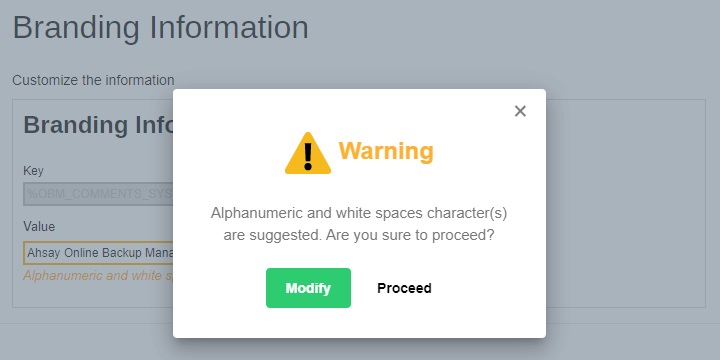
There will be warning shown if the character is incorrect.
It is not allowed to save the incorrect value, a warning Error will pop out.
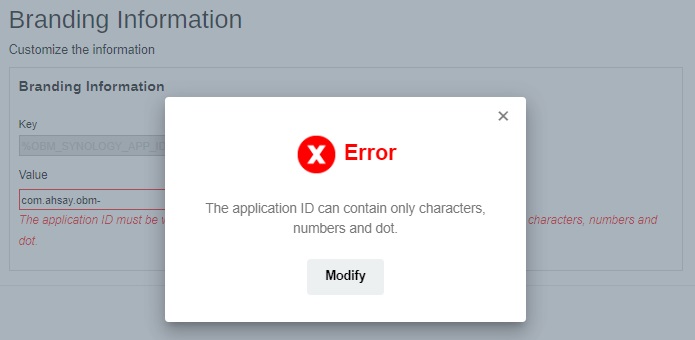
If there is still some unexpected character(s) in the branding system properties, which may cause unexpected behavior for installer(s), a warning will pop out to suggest that you modify the value after clicking OK.

After you completed properties, you can click the Application Settings – AhsayOBM tab.
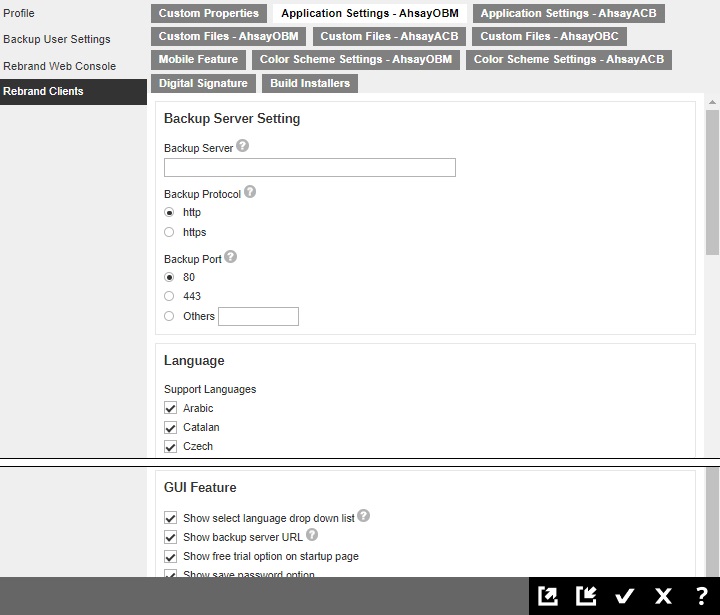
You can customize the default connection settings, supported languages, and GUI features. There are five GUI features that are available:
- Show select language drop down list – this is where the user can select the language to be used in AhsayOBM.
- Show backup server URL – this is where the user can input the backup server URL of the AhsayCBS where AhsayOBM will connect.
- Show free trial option on startup page – displays the Free Trial registration option on the startup page upon initial login.
- Show save password option – displays the Save password checkbox on both the login page and Profile > Authentication page.
- Install as stealth application on Windows platform – hides AhsayOBM from the desktop, System Tray and Start Menu. AhsayOBM can be launched using the batch file.
On Linux/FreeBSD operating systems, the Save password option is only applicable on Linux/FreeBSD GUI. As on Linux/FreeBSD CLI environments, the password is automatically saved after login using RunConfigurator.sh and cannot be disabled. As most all script files do not support user login functionality, i.e. RunBackupSet.sh, Restore.sh, Decrypt.sh, ListBackupSet.sh, ListBackupJob.sh, RunDataIntegritryCheck.sh etc.Click the Application Settings – AhsayACB tab.
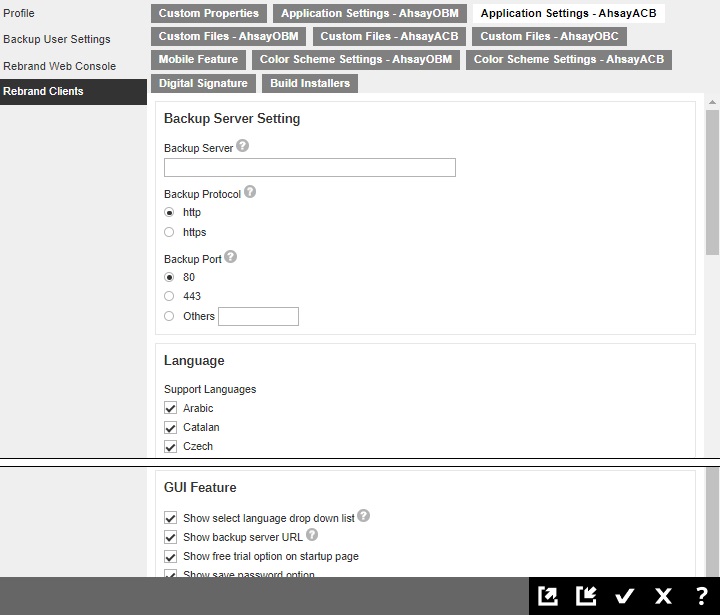
Similar to the previous step, you can customize the default connection settings, supported languages, and GUI features. There are five GUI features that are available:
- Show select language drop down list – this is where the user can select the language to be used in AhsayACB.
- Show backup server URL – this is where the user can input the backup server URL of the AhsayCBS where AhsayACB will connect.
- Show free trial option on startup page – displays the Free Trial registration option on the startup page upon initial login.
- Show save password option – displays the Save password checkbox on both the login page and Profile > Authentication page.
- Install as stealth application on Windows platform – hides AhsayACB from the desktop, System Tray and Start Menu. AhsayACB can be launched using the batch file.
Below is a table comparing the different behavior of the Free Trial registration and Save password options under two different scenarios.
New installation of AhsayOBM/AhsayACB v9.1.0.0 or above.
Upgrade of pre-v8.5.2.35 AhsayOBM/AhsayACB to v9.1.0.0 or above.
Free Trial Save Password New installation of AhsayOBM/AhsayACB v9.1.0.0 or above Enabled Will be displayed on the startup page. Will be displayed on the login page and Profile > Authentication page. Disabled Will not be displayed but will go straight to the login page. Will be hidden on the login page and Profile > Authentication page. Upgrade of pre-v8.5.2.35 AhsayOBM/AhsayACB to v9.1.0.0 Enabled Will be displayed on the startup page. Will be displayed on the login page and Profile > Authentication page. Disabled Will not be displayed but will go straight to the login page. Will be hidden on the login page and Profile > Authentication page. Click the Custom Files – AhsayOBM tab.
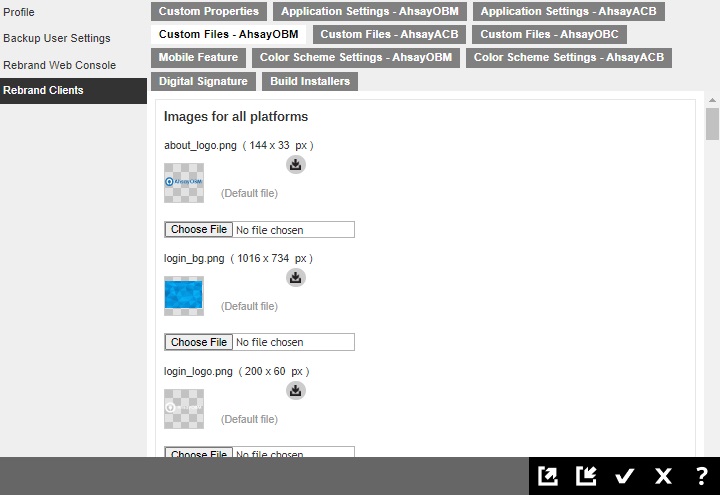
You can upload the branded images for your AhsayOBM installer/application. Please refer to the branding Image Specifications section. You can also download the default logo/icon for reference.
Click the Custom Files – AhsayACB tab.
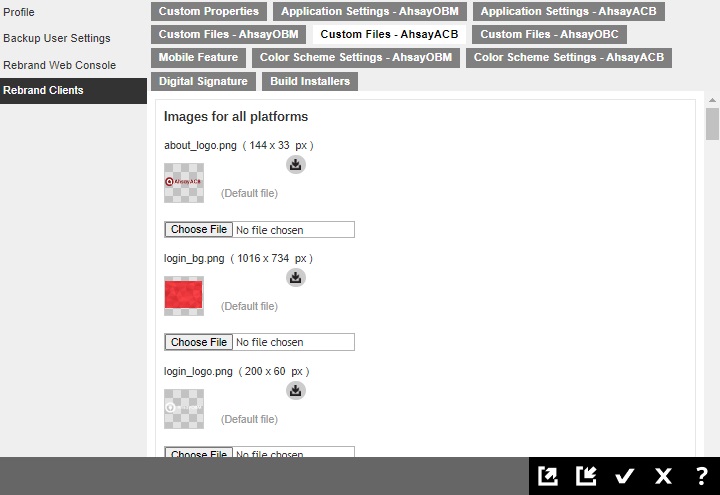
You can upload the branded images for your AhsayACB installer/application. Please refer to the branding Image Specifications section. You can also download the default logo/icon for reference.
Click the Custom Files – AhsayOBC tab.
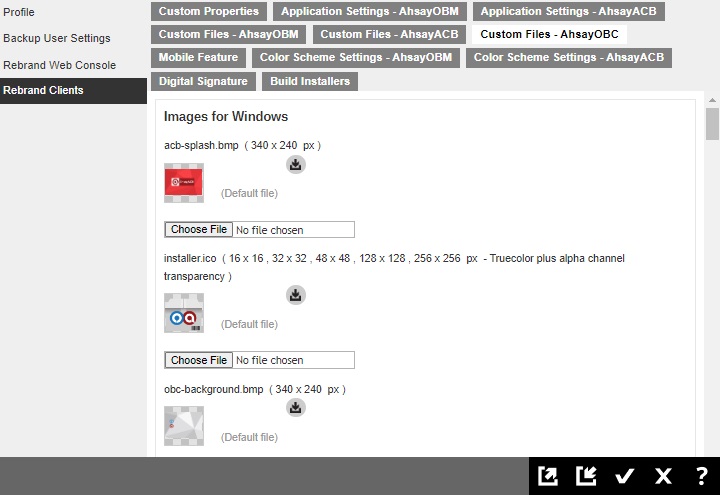
You can upload the branded images for your AhsayOCB installer. Please refer to the branding Image Specifications section. You can also download the default logo/icon for reference.
Click the Mobile Feature tab.
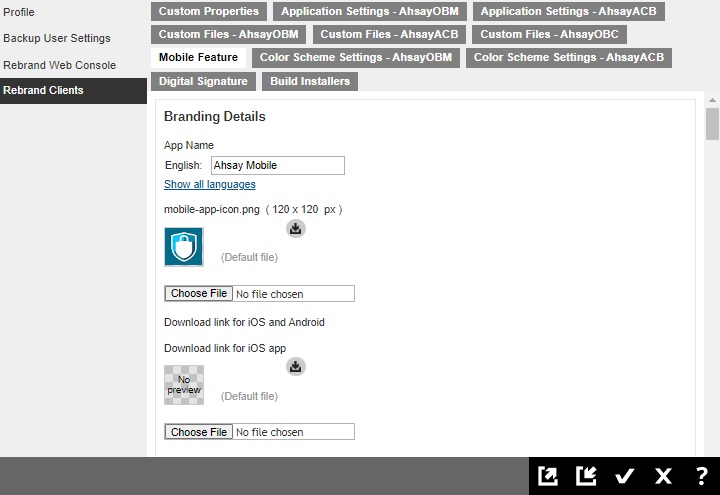
Provide the app name and upload the branded images for your Mobile app.
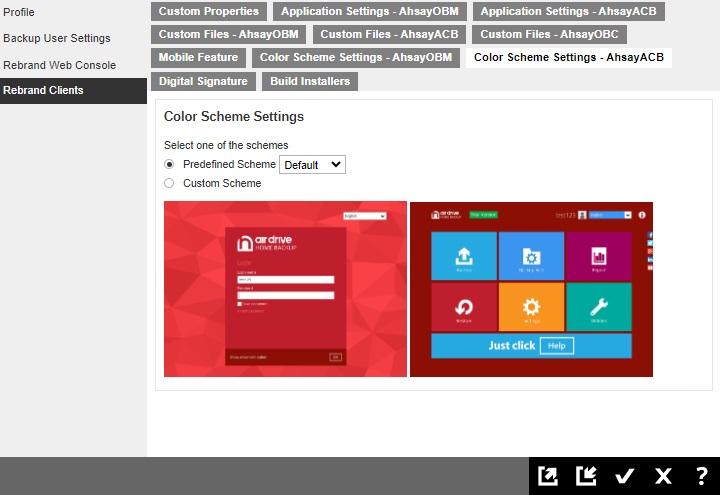
Click the Color Scheme Settings – AhsayOBM tab.
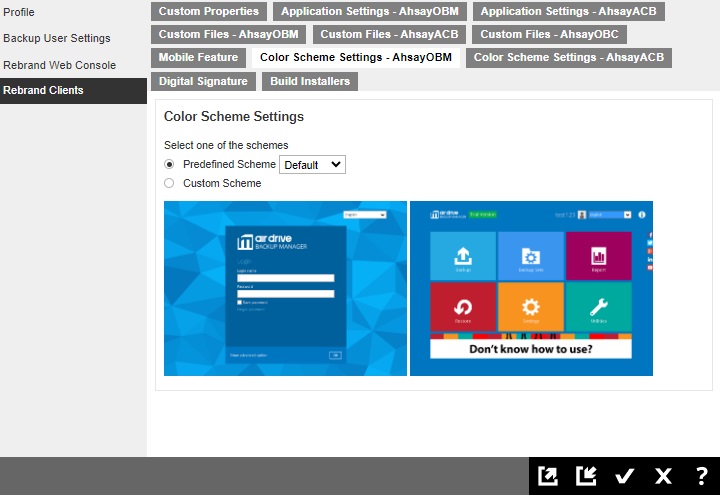
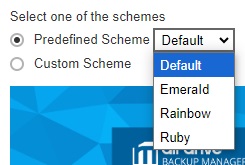
AhsayCBS supports changing the color scheme for backup clients. You can select the color scheme settings from Predefined Scheme or Custom Scheme.
For Predefined Scheme, you can click on the dropbox to choose from the predefined options.
For Custom Scheme, you can choose the color for each section.

The color setting is based on hex color codes and you can either select the color using the palette or just input the hex color code. Please refer to the following link for details of hex color code: Color Hex Color Codes.
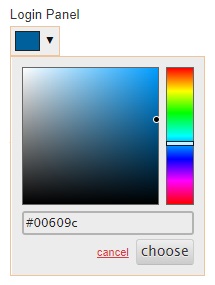
Click choose once you have selected a color to continue.
After changing and saving the configuration of Color Scheme Settings – AhsayOBM, administrator can provide available online/offline installer with according color scheme for client user to download and run once Build Installers > Build Branded Client finished successfully.
AhsayOBR will follow the same color scheme settings with AhsayOBM.
Click the Color Scheme Settings – AhsayACB tab.
See instructions above for details.
After changing and saving the configuration of Color Scheme Settings – AhsayACB, administrator can provide available online/ offline installer with according color scheme for client user to download and run once Build Installers > Build Branded Client finished successfully.Optional: Click the Digital Signature tab if you need to generate your AhsayOBM/AhsayACB installers with a digital certificate and/or certificates for QNAP.
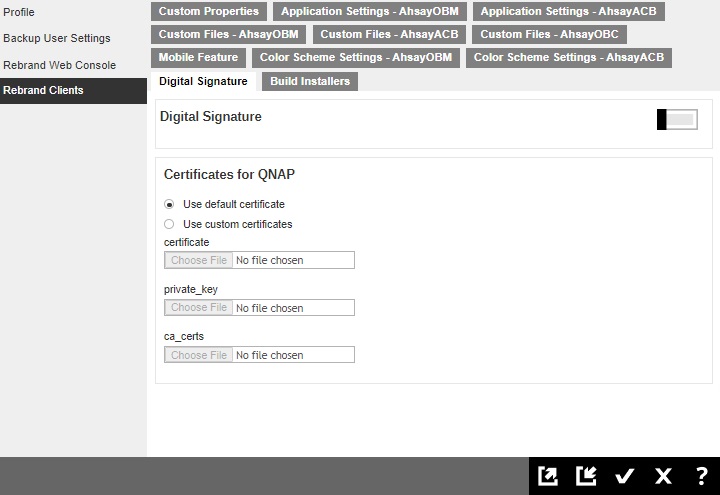 The digital signature is only supported for AhsayOBM and AhsayACB Windows installers.
To apply a Digital Signature
- Switch on the Digital Signature button.
You can use the Ahsay default digital certificate by selecting the Use default certificate.
 If the default digital signature is used then the AhsayOBM and AhsayACB Windows installers will show they are signed by Ahsay Systems Corporation Limited.
Or
If you prefer to use your own digital certificate, you can select Use certificate in mycredentials.spc/mycert.pfx uploaded option.
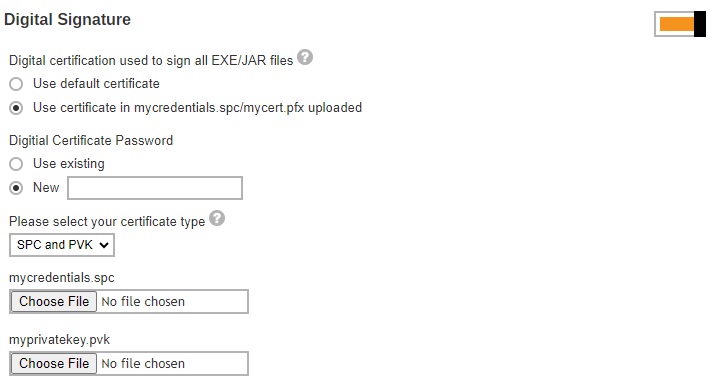
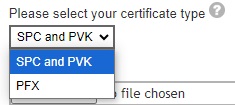
Enter the digital certificate password and select whether you are uploading a SPC and PVK or PFX digital certificate, then you can upload your digital certificate file.
To apply certificates for QNAP which will be used to package the QNAP QPKG
You can use the Ahsay default QNAP certificate by selecting Use default certificate.
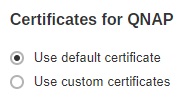
Or
If you prefer to use your own code signing certificate, you can select Use custom certificates then upload your certificate, private_key and ca_certs files.
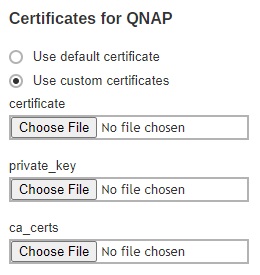 The QNAP certificate is not a SSL certificate, but a Code Signing certificate signed by a trusted CA. If you have a Windows code signing certificate, this may be reused after extracting the certificate, private_key and ca_certs files.
Your machine must be pre-installed with OpenSSL command before you follow the steps below:
After obtaining a code signing certificate from a trusted CA (i.e. codesign.pfx), generate the certificate.
openssl pkcs12 -in codesign.pfx -out certificate -nokeys -clcertsGenerate the private_key.
openssl pkcs12 -nodes -in codesign.pfx -nocerts -out private_keyGenerate the ca_certs.
openssl pkcs12 -in codesign.pfx -nodes -nokeys -cacerts -out ca_certs- Upload the certificate, private_key and ca_certs.
- A standard code signing certificate should be used and not an EV code signing certificate.
- No password should be set on the files to import.
- The files to be uploaded should have no file extension, use the full filename which should exactly be “certificate”, “private_key” and “ca_certs”.
- Click OK and Save to save all the settings.
Build AhsayOBM/AhsayACB Installers
Follow the steps below to build branded installers of AhsayOBM and AhsayACB for your resellers. There are two ways to do this:
Build Installer for Each Reseller
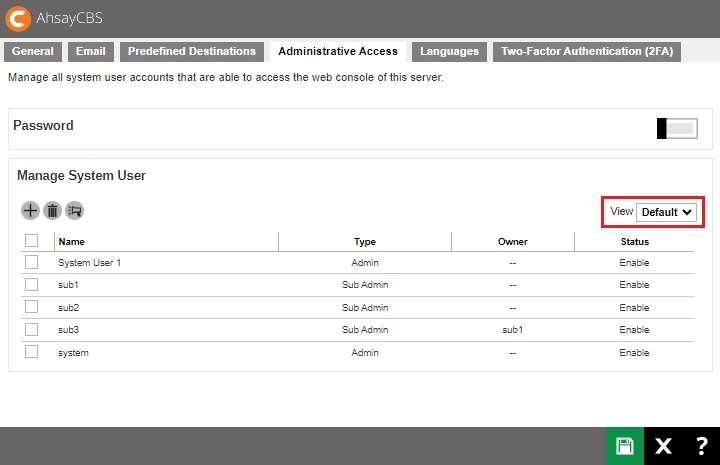
- Go to System Settings > Basic > Administrative Access.
In the “View” option select Default. Select the sub admin account that you want to apply the branding to build installers.
Go to Rebrand Clients > Build Installers tab. Select the installers that you want to be included and click the Build Branded Client button. AhsayCBS will request our customization portal to generate new installers.
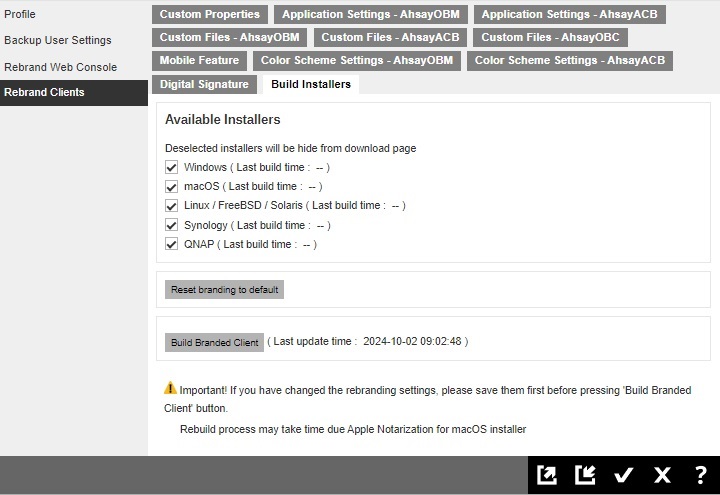
The installer generation process could take around 10 to 20 minutes to build and download. The generation time depends on the traffic condition on the customization portal. The option will be greyed-out while the Build process is activated.

You will be able to see the following message when the installer generation is completed.

In case of any problems when the installer is being built, click the Download Log button. This will download the branding log file obclog.zip so you can check the log to troubleshoot the branding issue.
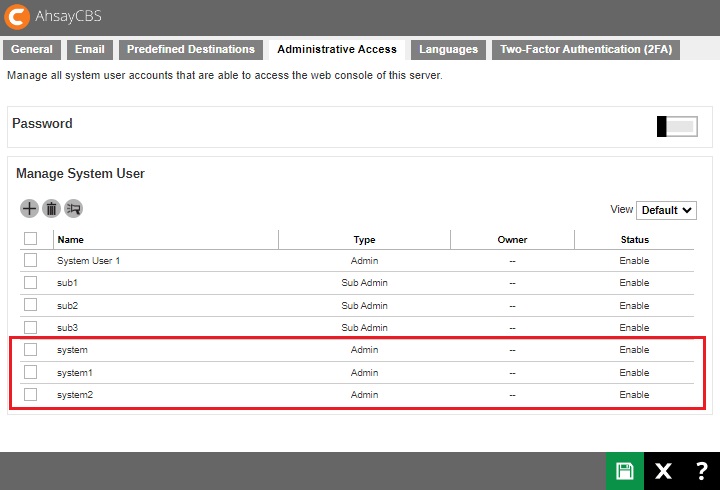
Build Installers in One Go for Selected or All Resellers
If there are multiple admin accounts when building installers for several or all resellers, AhsayCBS will build the AhsayOBM/AhsayACB installers for the first admin account on the list.
In this example, the installers will be built for the “system” account since it is the first one on the list.
- Go to System Settings > Basic > Administrative Access.
In the “View” option, select Build.
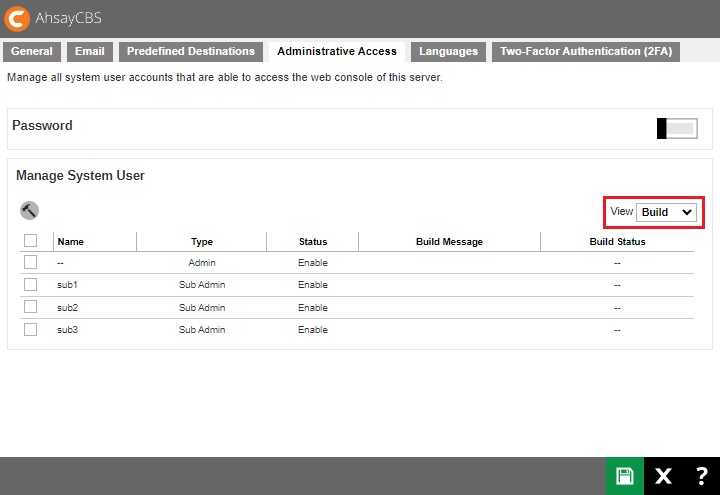
Select the sub admin account that you want to apply the branding then click Build Branded Client to start building the branded installers.
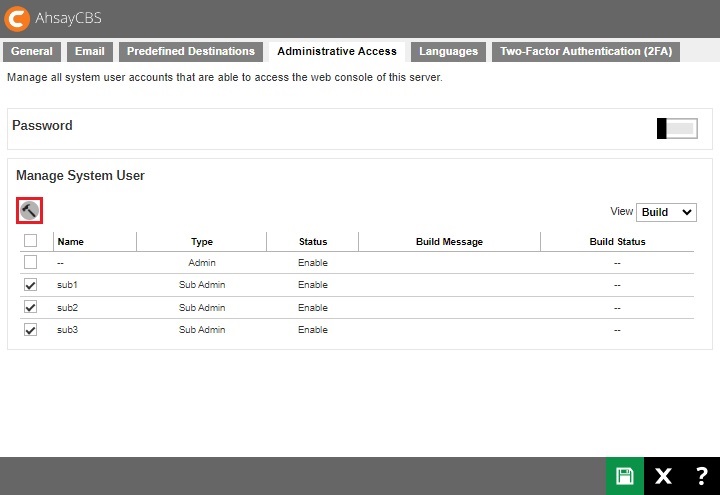
The progress of the build can be seen in the ”Build Message”.
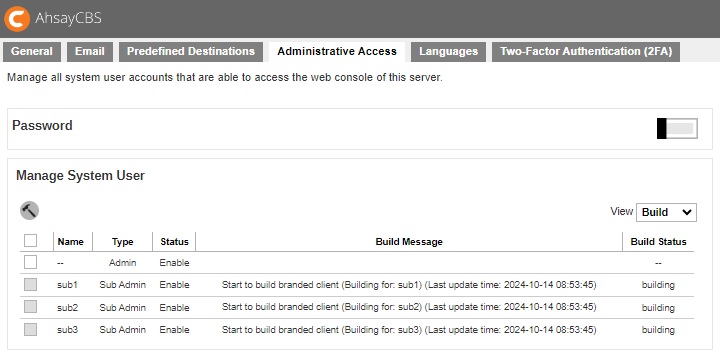
Once the build is done you can see “finished” under “Build Status”.
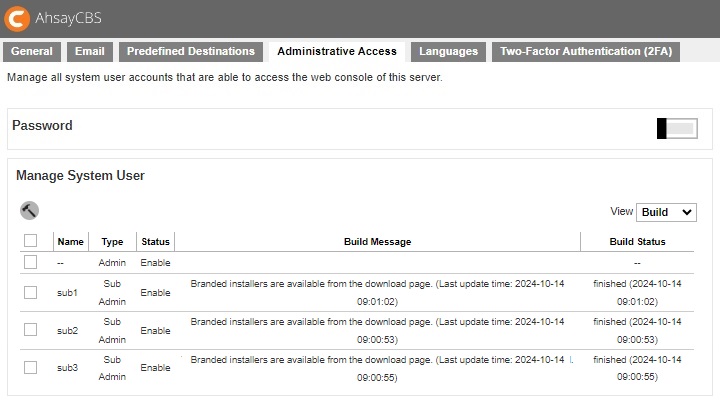
The branded installers are stored in CBS_HOME\system\cbs\Installers\%Reseller_ID%.
Example
The branded installer for each reseller will be in its own folder in the Installers folder.

The branded installers can be found in the Reseller ID folder.
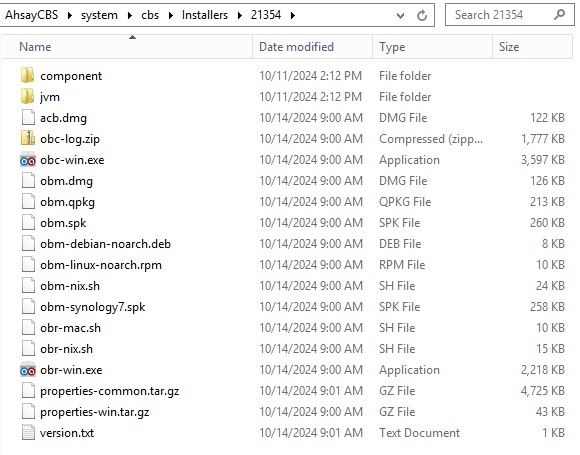
Please leave them inside this folder and it is forbidden to move them to other folders. When your reseller’s customer access to the web console by the system account’s hostname. AhsayCBS will arrange the corresponding branded installers for users to download.
Customize Application Name
Request for Permission Pages
When your client set up the cloud storage on:
- Dropbox
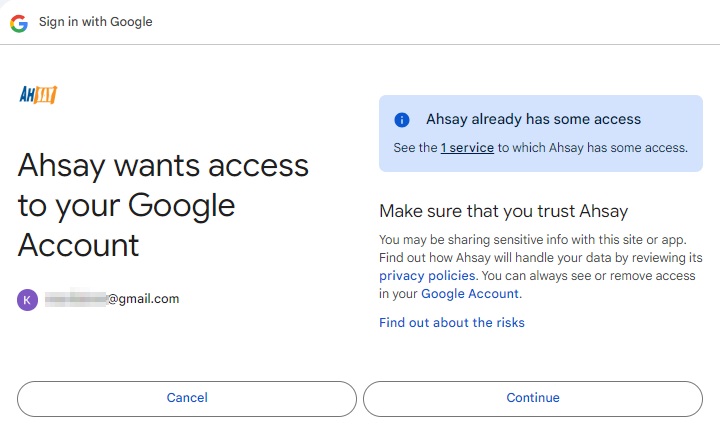
- Google Drive
- OneDrive
- OneDrive for Business
AhsayOBM /AhsayACB would forward an URL through the browser to the cloud storage. The cloud storage would require your client to login and/or prompt the following page to get client’s approval for the AhsayOBM /AhsayACB to access the cloud storage.
Examples
Google Drive
OneDrive
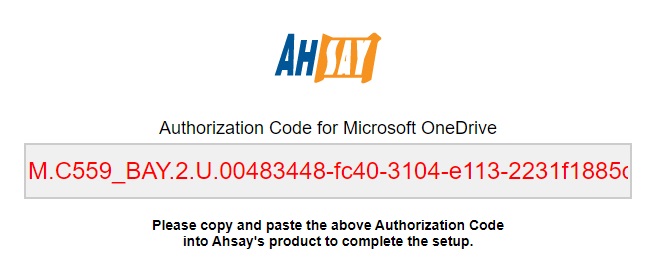
In this request for permission pages, you can see the “Ahsay” logo and the “Ahsay” wording. You can setup the destination settings in the policy group in your AhsayCBS to customize the branding.
Preparation
Before you customize the logo and application name on the request for permission page, you need to collect the following details:
Dropbox
- Application key
- Application secret
Google Drive
- Client ID
- Client Secret
- Native application redirect URI
OneDrive
- Client ID
- Client Secret
- Native application redirect URI
OneDrive for Business
Client ID
To retrieve the client ID:
- Login to Azure AD.
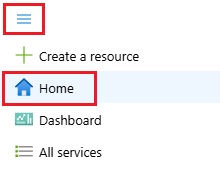
Click the portal menu located on the upper left side. Then click Home.
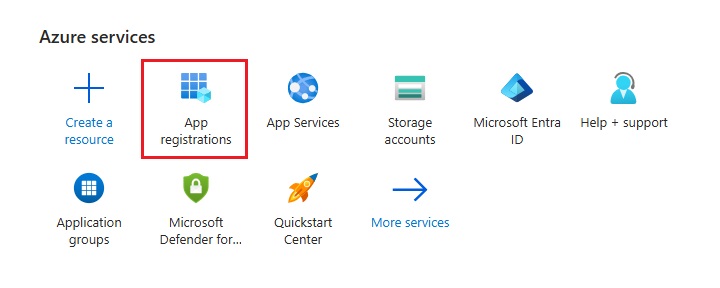
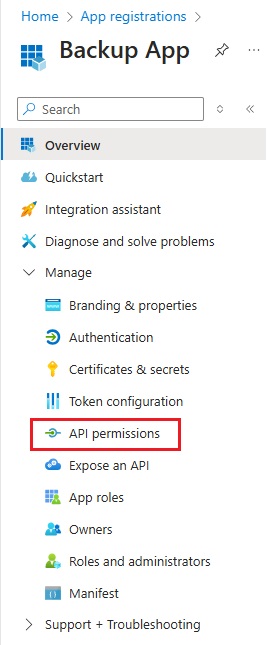
Click App registrations.
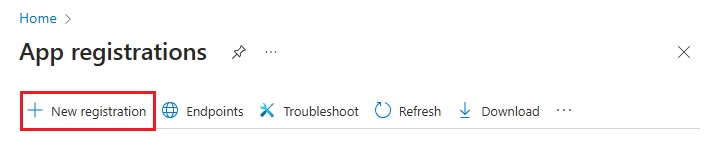
Click New registration.
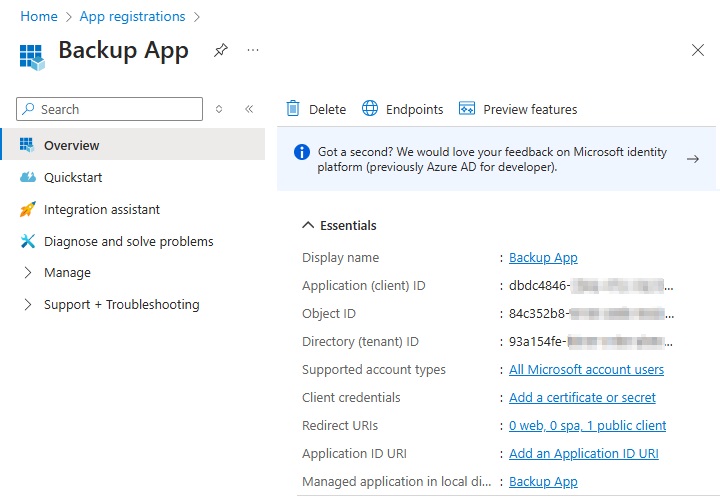
Enter a name for the customized application, select the account type and provide the Redirect URI path. Click Register.

The “Application (client) ID” will be displayed, which is the Client ID required for OneDrive for Business customization.
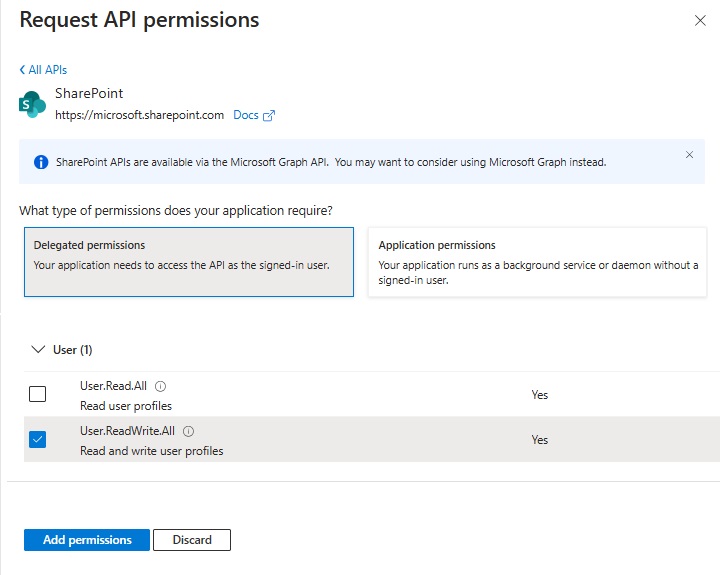
Finally, configure the permission required, click API permissions. Click Add a permission then search for the following and add the “Delegated permissions”.
Windows Azure Active Directory
Directory.AccessAsUser.All
User.ReadOffice 365 SharePoint Online
User.ReadWrite.All
Click Add Permissions to save once done.
Native application redirect URI
To retrieve the Native application redirect URI:
Create a web page (.jsp) for request of the Authorization Code.
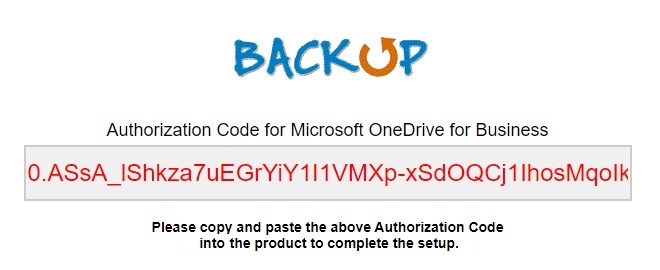
A sample format of the page:
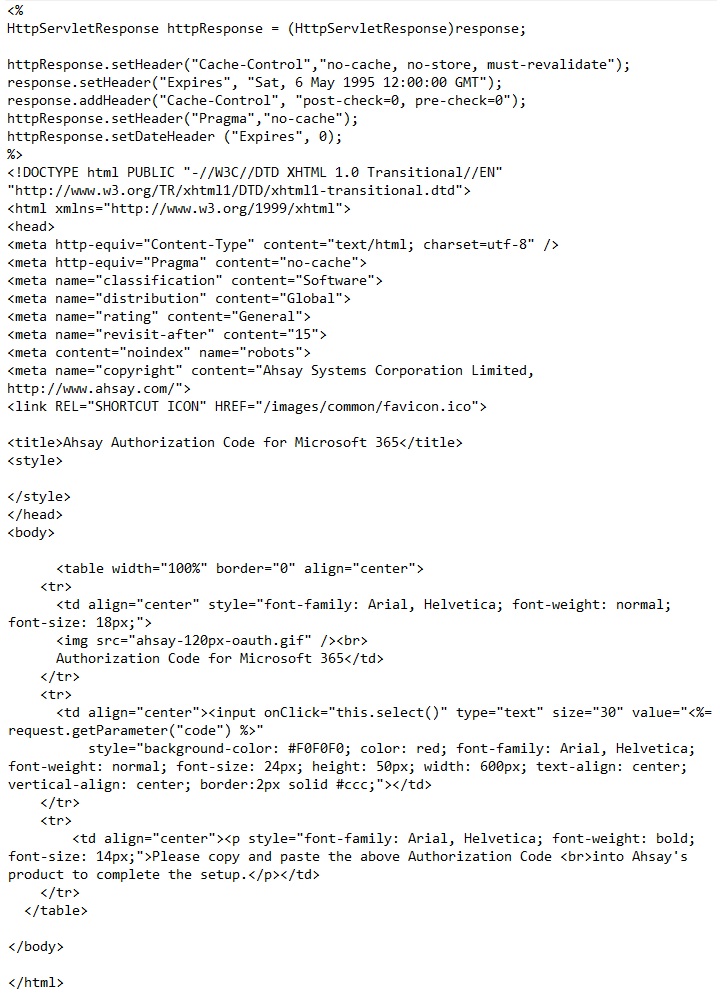
To obtain a sample jsp file click here.
The line value="<%=request.getParameter(“code”)%> are used for retrieving / displaying the authorization code, you must include this on the page.
It is expected that you have basic HTML knowledge to create the authorization code request page.
- Once you have created the customized page, copy and place the jsp file in the AhsayCBS server at:
- on Windows %AhsayCBS_Install_Home%\webapps\ROOT
- on Linux %AhsayCBS_Install_Home%\webapps\ROOT
The Native application redirect URI will be:
https://%AhsayCBS_hostname%/%customized_page_name%.jsp
Where AhsayCBS_hostname is the hostname or IP address of your AhsayCBS server and customized_page_name is the name of the jsp file.
Example: https://www.yourdomain.com/oauth2-microsoft365-sample.jsp
Configure the Storage
After you have collected the above information from your cloud / developer account, you can put the relevant information in the policy settings of your AhsayCBS.
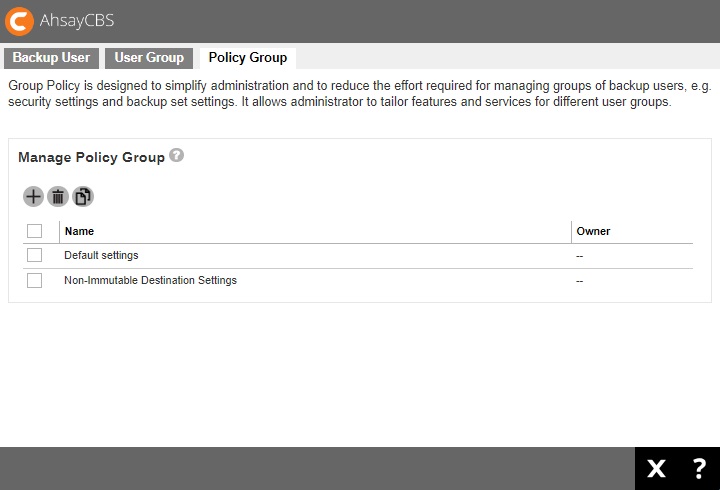
Go to Backup / Restore > Users, Groups & Policies > Policy Group. Select the policy group that you want to apply the setting.
Click Backup Set Settings.
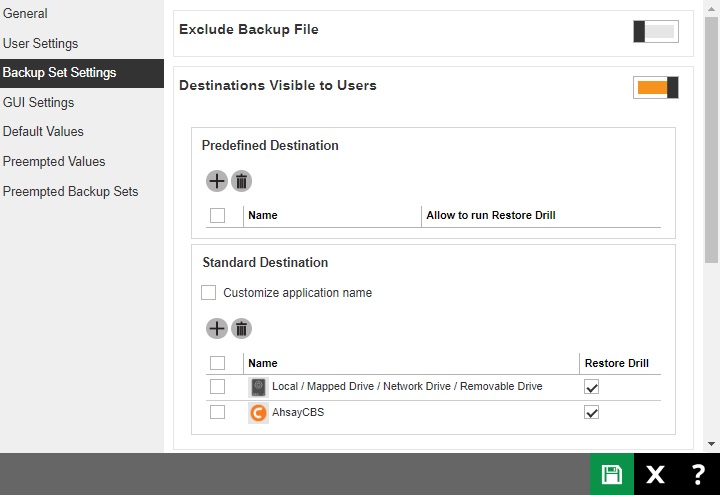
- Under “Destinations Visible to Users”, add and customize the cloud storage that you want to use:
- Dropbox
Click Create under “Standard Destination” then select Dropbox.
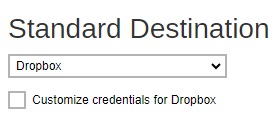
Tick the Customize credentials for Dropbox checkbox. Enter the "Application key" and "Application secret".
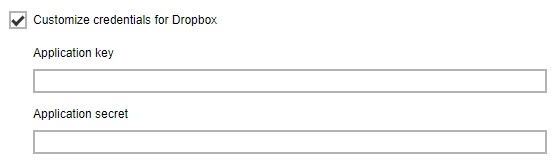
- Click Add then Save to save.
- Google Drive
Click Create under “Standard Destination” then select Google Drive.
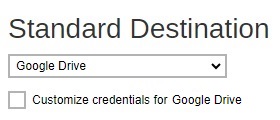
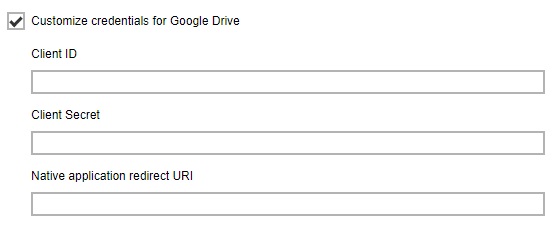
Tick the Customize credentials for Google Drive checkbox. Enter the "Client ID", "Client Secret" and "Native application redirect URI".
- Click Add then Save to save.
- OneDrive
Click Create under “Standard Destination” then select OneDrive.
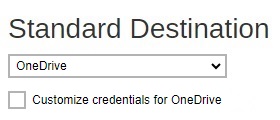
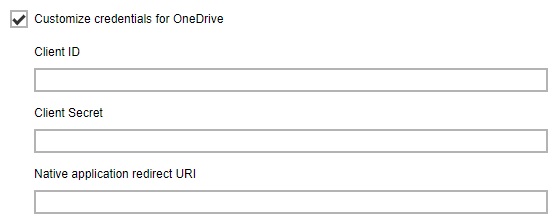
Tick the Customize credentials for OneDrive checkbox. Enter the "Client ID", "Client Secret" and "Native application redirect URI".
- Click Add then Save to save.
- OneDrive for Business
Click Create under “Standard Destination” then select OneDrive for Business.
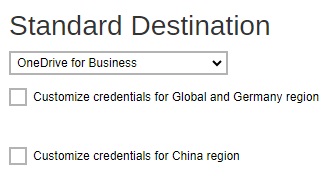
Tick the Customize credentials for Global and Germany region and/or Customize credentials for China region checkbox. Enter the "Client ID" and "Native application redirect URI".
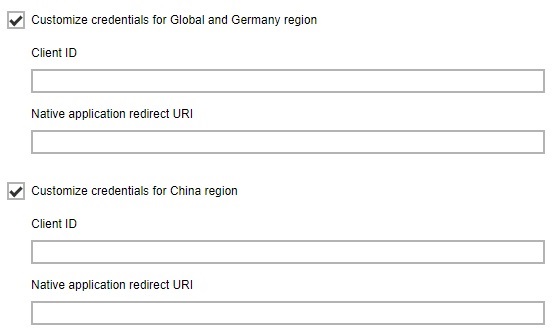
- Click Add then Save to save.
- Dropbox
Customize the Folder/Bucket Name in Standard Destination
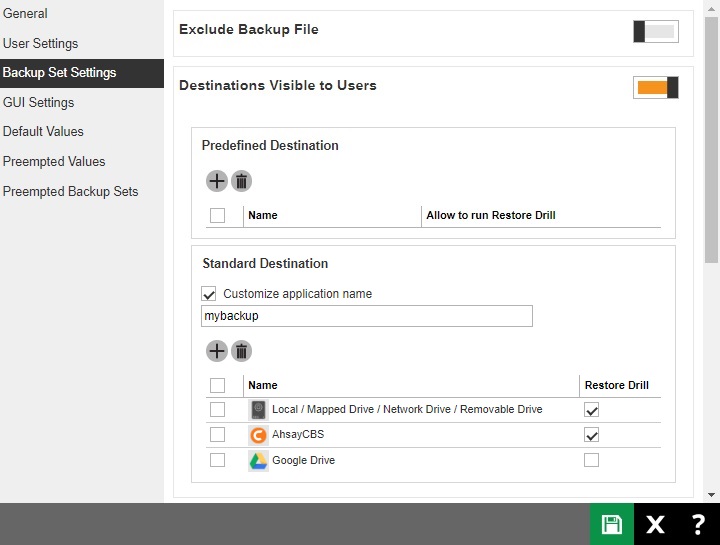
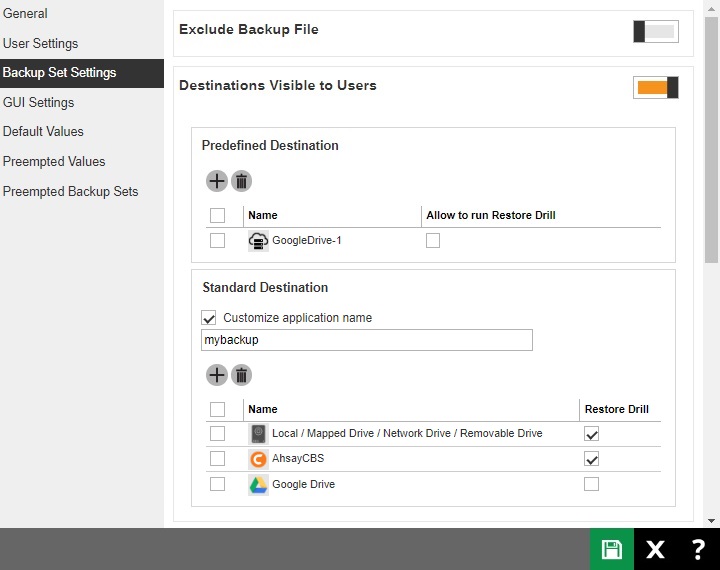
Go to Backup / Restore > Users, Groups & Policies > Policy Group. Click on the desired Policy Group, then click the Backup Set Settings section on the left. You can customize the application name (folder/bucket name) in different storages from there.
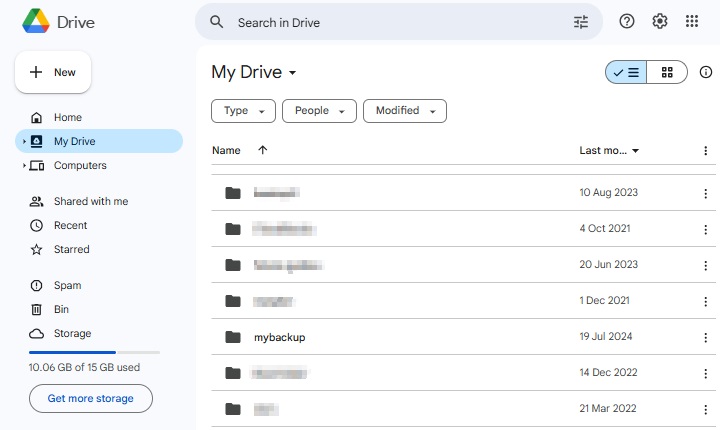
In the following example, we set the “Customize application name” as mybackup, when backup to the cloud storage (e.g.: Google Drive), the folder name “mybackup” will be created.
Example on Google Drive
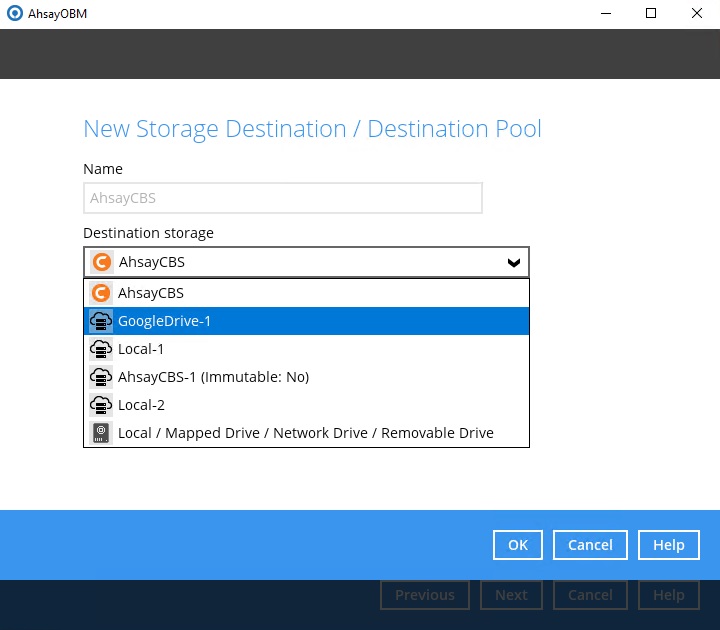
Customize the Storage in Predefined Destination
Go to Backup / Restore > Users, Groups & Policies > Policy Group. Click on the desired Policy Group, then click the Backup Set Settings section on the left. You can add a predefined destination for your clients, and your clients will be able to select the predefined destination when they create a new backup set.
Example on AhsayOBM
Microsoft 365 Backup Customization
For details on how to customize the Authorization code and Admin consent endpoint screen for the Microsoft 365 Global region please refer to discussion regarding Microsoft 365 Backup Customization.
Customize Download Page
New style-id for the different tabs and platforms with corresponding tab count enable the users to hide the tabs, platform, or installer links without any trouble. The download page can be customized to hide/show,
- the following tabs: AhsayOBM, AhsayACB, Mobile, Restore, AhsayCBS, and AhsayUBS.
- the operating system in each tab, example only show AhsayOBM/AhsayACB installers for Windows.
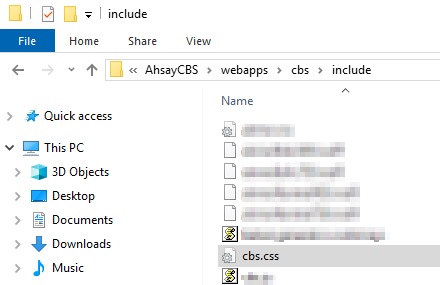
The download page customization can be done by editing the cbs.css file with a text editor which is located in the $APPLICATION_HOME\webapps\cbs\include folder.
The default path for AhsayCBS running on:
- Windows is C:\Program Files\AhsayCBS\webapps\cbs\include
- Linux/FreeBSD is /usr/local/cbs/webapps/cbs/include
- AhsayUBS is /ubs/mnt/esfmfw/obsr/system/obsr/webapps/cbs/include
To customize the AhsayCBS Download Page:
- Go to the $APPLICATION_HOME\webapps\cbs\include folder.
Open the cbs.css and add the line that would customize the download page then save.
Examples
To hide the "Mobile" download tab
[name=ShowDownloadIndexBean] div > ul > li:nth-of-type(3) { display:none; }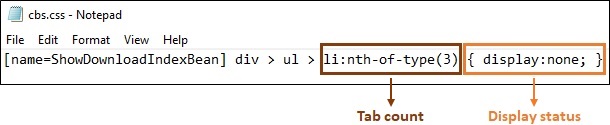
To hide the AhsayOBM macOS tile
#download-obm-mac {display:none;}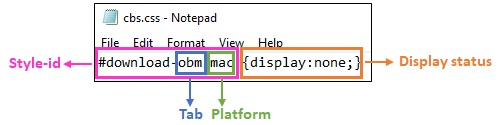
To hide the AhsayOBM dmg online installer and tar gz offline installer links for macOS but leaving the macOS tile visible.
#download-obm-mac .download-link-div {display:none;}
Refer to the table below for the list of tabs, tab-counts, platforms and style-ids of the download links.- Restart the AhsayCBS service then clear your browsers cache.
List of tabs, tab-counts, platforms, and style-ids of the download links for mapping.
| Tab | Count | Platform | style-id |
|---|---|---|---|
| AhsayOBM | li:nth-of-type(1) | Windows | download-obm-win |
| macOS | download-obm-mac | ||
| Linux/FreeBSD/Solaris | download-obm-nix | ||
| Synology | download-obm-synology | ||
| QNAP | download-obm-qnap | ||
| AhsayACB | li:nth-of-type(2) | Windows | download-acb-win |
| macOS | download-acb-mac | ||
| Mobile | li:nth-of-type(3) | Android | download-mob-android |
| iOS | download-mob-ios | ||
| Restore | li:nth-of-type(4) | Windows | download-obr-win |
| macOS | download-obr-mac | ||
| Linux/FreeBSD/Solaris | download-obr-nix | ||
| CBS | li:nth-of-type(5) | Windows | download-cbs-win |
| Linux/FreeBSD/Solaris | download-cbs-nix | ||
| UBS | li:nth-of-type(6) | Disk Image | download-ubs-image |
Tab count
- li:nth-of-type(1) for tab AhsayOBM
- li:nth-of-type(2) for tab AhsayACB
- li:nth-of-type(3) for tab Mobile
- li:nth-of-type(4) for tab Restore
- li:nth-of-type(5) for tab AhsayCBS
- li:nth-of-type(6) for tab AhsayUBS
Tab
- obm for AhsayOBM
- acb for AhsayACB
- mob for Mobile
- obr for Restore
- cbs for AhsayCBS
- ubs for AhsayUBS
Platform
- win for Windows
- mac for macOS
- nix for Linux/FreeBSD/Solaris
- syn for Synology
- qnap for QNAP
- android for Android
- ios for iOS
- image for Disk Image
style-id
This identifies the tab and platform.
Installer Download link
This identifies the download installer links of the selected platform.
Display status
This hides the display of the download platform and installer link.
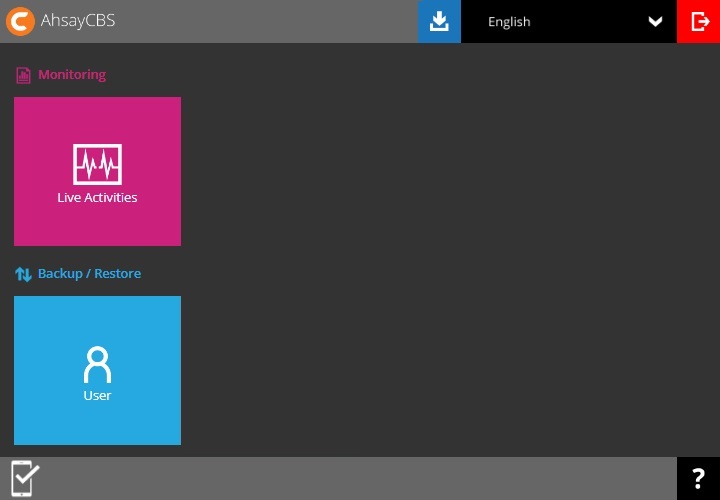
Customize AhsayCBS User Web Console
The VM Run Direct tile on the AhsayCBS User web console can be hidden by editing the cbs.css file which is located in the $APPLICATION_HOME\webapps\cbs\include folder.

The default path for AhsayCBS running on:
- Windows is C:\Program Files\AhsayCBS\webapps\cbs\include
- Linux/FreeBSD is /usr/local/cbs/webapps/cbs/include
- AhsayUBS is /ubs/mnt/esfmfw/obsr/system/obsr/webapps/cbs/include
Follow the instructions below to hide the VM Run Direct tile on the AhsayCBS User web console:
Go to $APPLICATION_HOME\webapps\cbs\include folder to locate the cbs.css file.
Using a text editor open cbs.css and add the following code:
.cbs-new_home_container .cbs-new_menu_container-bkup_restore-reseller div.cbs-menu_box4.cbs-menu_box-bkup_restore-reseller.cbs-menu-bkup_restore:nth-child(3) {display: none;}- Clear your browsers cache.
Login to the AhsayCBS user web console using an AhsayOBM or AhsayACB user account to verify that the VM Run Direct Tile is already hidden.
Branding Behavior
Branding behavior has changed for AhsayCBS v9.5 which may influence your workflow.
Recap of pre-v9.5 Branding Behavior
- Self-contained Branding profile (text properties, graphics, branding settings) are stored in $CBSHOME\conf\Branding\*.json; where the filename is either ROOT or the ID number of the Sub Admin.
- JSON rollback copies are generated whenever there are any branding setting changes saved in AhsayCBS. It is denoted by the file extension ".json.1" being the first recent (cycling up to a maximum of 11, the oldest).
- When a new Sub Admin is created, it initially inherits branding from ROOT.json, afterwards Sub Admin branding is independent and saved within its own JSON.
- Behavior under any new installation of AhsayCBS version (v8/v9), using branded cbs-win.exe, $CBSHOME\webapps\cbs\images\ will contain the custom branded images that were packaged with the installer. This also applies to using a branded cbs-nix.tar.gz.
- Under upgrade behavior, using branded or Ahsay standard Windows installer cbs-win.exe, $CBSHOME\webapps\cbs\images\ will retain existing images and will not be replaced (overwrite) from the installation, however, additional new images may be added if upgrade is to a higher AhsayCBS version that requires them.
- Under upgrade behavior, using branded or Ahsay standard cbs-nix.tar.gz when following upgrade procedures from CLI, you will be swapping out the current AhsayCBS images ($CBSHOME\webapps\cbs\images\) with that from the TAR meaning "images" will be that from the swap; therefore if there are custom images to retain then you should transfer (merge) them over afterwards.
Generally, the branding JSON is still around but no longer used by AhsayCBS v9.5 for storing branding changes.
AhsayCBS v9.5 Branding Behavior
Upgraded AhsayCBS
Upon upgrade from AhsayCBS pre-v9.5, AhsayCBS v9.5 will:
- Automatically convert all branding JSON ($CBSHOME\conf\Branding\*.json).
- Import the properties into $CBSHOME\conf\cbs.db.
- Export remaining assets into $CBSHOME\conf\Branding\{ID} structure containing branded graphics, XML, and metadata (where {ID} = SubAdmin ID# or {ID} = “ROOT” for Admin profile).
The migration is triggered when the branding settings is loaded for the first time (e.g. access sub admin console, build client installer) or by daily Auto Save routine (06:00), whichever occur first, after handling, the JSON will rename to “.json.bak” to signify it was migrated. The files will remain until future enhancement is available to automatically purge. You may opt to manually remove the migrated JSONs to save space or archive as you see fit.
Newly installed AhsayCBS
From AhsayCBS v9.5 onwards, Branding will store relevant changes into their new locations:
- cbs.db (temp files cbs.db-wal and cbs.db-shm)
- $CBSHOME\conf\Branding\{ID}
These are needed if troubleshooting is necessary.
Best practice to avoid branding leakage is to ensure you have uploaded custom graphics to replace all editable images via AhsayCBS Branding UI. Then export the JSON and retain it in a safe location.
AhsayCBS v9.5 behavior change within $CBSHOME\CONF\BRANDING\
- Branding JSON are no longer generated, nor existing JSON updated. Any "*.json.*" found here (i.e. ROOT.json, ROOT.json.2) are pre-v9.5, and will remain here until future enhancement to remove them.
- Branding JSON rollback files (the .1, .2) are no longer generated whenever you save Branding changes from the AhsayCBS UI. Automatic creation of previous JSON copy no longer exist.
- The Export / Import of branding JSON is still available; however, the exported JSON will omit exporting graphics that are unchanged (i.e. no custom graphic uploaded), thus reducing the JSON export file size [unchanged graphics source from $CBSHOME\webapps\cbs\images\ if the graphic is not found within {ID} structure after import]. JSON exported from AhsayCBS v9.5 is not backwards compatible with earlier AhsayCBS version.
- Routine AhsayCBS conf backup and Auto Save will still bundle exported branding JSON file(s), along with the cbs.db; however, the $CBSHOME\conf\Branding\{ID} directory is not packaged.
AhsayCBS v9.5 behavior change affecting language and GUI feature of AhsayOBM/AhsayACB
The current settings for Language and GUI Feature will re-apply during AUA (i.e. version upgrade and hotfix). If there were changes to either of these, clients will receive the latest values applied after AUA.
Image Specifications
You can use common graphics editing tools that are able to edit 32bit graphic files to generate these png format files with transparent background.
Example
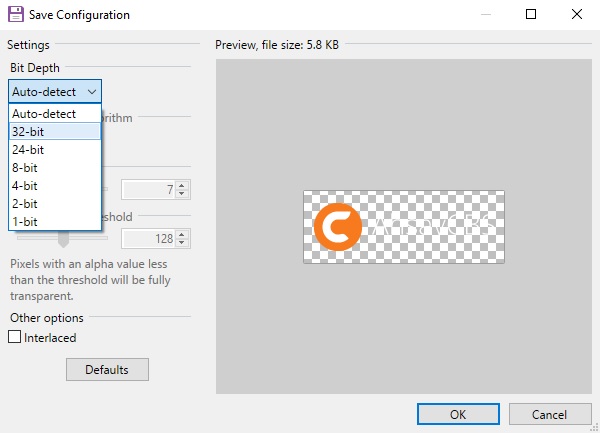
For those ico (Windows icon) and icns (Mac icon) files, you can use icon editing tools (available to download from the Internet). Most of the icon files have multiple sizes of images. Please refer to the original icon format to replace your product logo in the files.
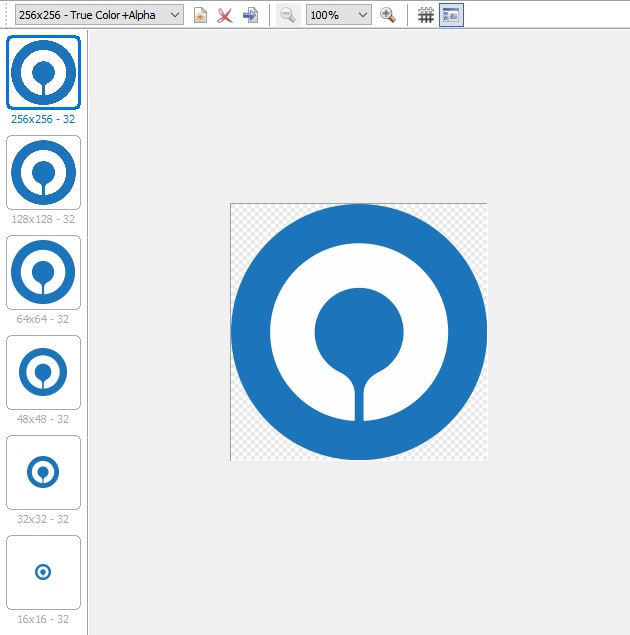
Image Specifications for AhsayCBS (Web Interface, PDF and Email Reports)
| File name: ico_40_cbs_logo.png |
| Transparent PNG, 200px x 72px (Width x Height) |
 |
| File name: default.large.gif |
| Transparent GIF, 129px x 40px (Width x Height) |
| File name: ico_24_cbs.png |
| Transparent PNG, 24px x 24px (Width x Height) |
| File name: ico_obm_16.png |
| Transparent PNG, 18px x 18px (Width x Height) |
| File name: ico_acb_16.png |
| Transparent PNG, 18px x 18px (Width x Height) |
Image Specifications for Ahsay Mobile Icon (on Web Console Mobile App Download Page and Mobile Feature Tab)
| File name: mobile-app-icon.png |
| PNG, 120px x 120px (Width x Height) |
 |
Image Specifications for AhsayCBS (Installation Graphics)
Images for Windows (Installation Graphics)
| File name: aboutBG.bmp |
| Bitmap, 164px x 337px (Width x Height) |
 |
| File name: desktop.ico |
| Windows icon with true color plus alpha channel transparency, 256, 128, 48, 32, 16 px x 256, 128, 48, 32, 16 px (Width x Height) |
 |
| File name: installer.ico |
| Windows icon with true color plus alpha channel transparency, 256, 128, 48, 32, 16 px x 256, 128, 48, 32, 16 px (Width x Height) |
 |
| File name: splash.bmp |
| BMP, 340px x 240px (Width x Height) |
 |
| File name: restart.ico |
| Windows icon with true color plus alpha channel transparency, 256, 128, 48, 32, 16 px x 256, 128, 48, 32, 16 px (Width x Height) |
 |
| File name: small.bmp |
| BMP, 55px x 58px (Width x Height) |
| File name: start.ico |
| Windows icon with true color plus alpha channel transparency, 256, 128, 48, 32, 16 px x 256, 128, 48, 32, 16 px (Width x Height) |
 |
| File name: stop.ico |
| Windows icon with true color plus alpha channel transparency, 256, 128, 48, 32, 16 px x 256, 128, 48, 32, 16 px (Width x Height) |
 |
| File name: uninstall.ico |
| Windows icon with true color plus alpha channel transparency, 256, 128, 48, 32, 16 px x 256, 128, 48, 32, 16 px (Width x Height) |
 |
| File name: webAdmin.ico |
| Windows icon with true color plus alpha channel transparency, 256, 128, 48, 32, 16 px x 256, 128, 48, 32, 16 px (Width x Height) |
 |
Images for AhsayUBS (installation graphics)
| File name: favicon.ico |
| Website icon with true color plus alpha channel transparency, 32, 16 px x 32, 16 px (Width x Height) |
| File name: footer.png |
| PNG, 127px x 42px (Width x Height) |
| File name: header_bg.png |
| PNG, 2400px x 143px (Width x Height) |
(The size of this graphic is reduced to fit into this guide.) |
| File name: header_logo.png |
| Transparent PNG, 524px x 143px (Width x Height) |
 |
| File name: login_bg.png |
| PNG, 471px x 340px (Width x Height) |
 |
| File name: login_logo.png |
| Transparent PNG, 353px x 140px (Width x Height) |
 |
| File name: splash_320x200.bmp |
| Bitmap, 320px x 200px (Width x Height) |
 |
| File name: splash_1024x768.bmp |
| Bitmap, 1024px x 768px (Width x Height) |
(The size of this graphic is reduced to fit into this guide.) |
Image Specifications for AhsayOBM (Application Graphics)
Images for all platforms
| File name: about_logo.png |
| Transparent PNG, 144px x 33px (Width x Height) |
| File name: login_bg.png |
| PNG, 1016px x 734px (Width x Height) |
(The size of this graphic is reduced to fit into this guide.) |

| File name: login_logo.png |
| Transparent PNG, 200px x 60px (Width x Height) |
 |
| File name: logo.png |
| Transparent PNG, 32px x 32px (Width x Height) |
| File name: main_logo.png |
| Transparent PNG, 148px x 33px (Width x Height) |
| File name: splash.png |
| PNG, 420px x 240px (Width x Height) |
 |
| File name: dstn_CBS_24.png |
| Transparent PNG, 24px x 24px (Width x Height) |
| File name: dstn_CBS_32.png |
| Transparent PNG, 32px x 32px (Width x Height) |
| File name: dstn_CBS_48.png |
| Transparent PNG, 48px x 48px (Width x Height) |
| File name: fs16_root_CBS.png |
| Transparent PNG, 16px x 16px (Width x Height) |
Images for Linux, FreeBSD and Solaris (Application Graphics)
| File name: desktop.png |
| Transparent PNG, 128px x 128px (Width x Height) |
 |
Images for Synology (Application Graphics)
| File name: logo_16.png |
| Transparent PNG, 16px x 16px (Width x Height) |
| File name: logo_32.png |
| Transparent PNG, 32px x 32px (Width x Height) |
| File name: logo_72.png |
| Transparent PNG, 72px x 72px (Width x Height) |
 |
Images for QNAP (Application Graphics)
| File name: logo_72.png |
| Transparent PNG, 72px x 72px (Width x Height) |
|
Images for Windows (System Tray)
The following icons icon1.ico, icon2.ico, icon3.ico and icon4.ico will be used in the Windows system tray. Please arrange them in an animated sequence. The application will arrange the animation sequence when the backup job is run.
| File name: icon1.ico |
| Windows icon with true color plus alpha channel transparency, 16px x 16px (Width x Height) |
Original and Image enlarged for easy reference |

| File name: icon2.ico |
| Windows icon with true color plus alpha channel transparency, 16px x 16px (Width x Height) |
Original and Image enlarged for easy reference |

| File name: icon3.ico |
| Windows icon with true color plus alpha channel transparency, 16px x 16px (Width x Height) |
Original and Image enlarged for easy reference |

| File name: icon4.ico |
| Windows icon with true color plus alpha channel transparency, 16px x 16px (Width x Height) |
Original and Image enlarged for easy reference |

| File name: toast.ico |
| Windows icon with true color plus alpha channel transparency, 64px x 64px (Width x Height) |
 |
Images for Mac (Application and Installation Graphics)
| File name: desktop.icns |
| Mac icon with true color plus alpha channel transparency, 256, 128, 48, 32, 16 px x 256, 128, 48, 36, 16 px (Width x Height) |
 |
| File name: GenericJavaApp.icns |
| Mac icon with transparent background. Default Java application icons that will be displayed when there are icons missing. Not directly related to product branding. |
 |
| File name: installer.icns |
| Mac icon with true color plus alpha channel transparency, 256, 128, 48, 32, 16 px x 256, 128, 48, 36, 16 px (Width x Height) |
 |
| File name: Logo.icns |
| Mac icon with true color plus alpha channel transparency, 256, 128, 48, 32, 16 px x 256, 128, 48, 36, 16 px (Width x Height) |
|
| File name: uninstall.icns |
| Mac icon with true color plus alpha channel transparency, 256, 128, 48, 32, 16 px x 256, 128, 48, 36, 16 px (Width x Height) |
 |
| File name: OBMLogo.icns |
| Mac icon with true color plus alpha channel transparency, 256, 128, 48, 32, 16 px x 256, 128, 48, 36, 16 px (Width x Height) |
|
| File name: background.jpg |
| JPEG, 622px x 420px (Width x Height) |
(The size of this graphic is reduced to fit in this guide.) |

| File name: logo.png |
| Transparent PNG, 128px x 128px (Width x Height) |
 |
Images for Synology (Installation Graphics)
| File name: PACKAGE_ICON.PNG |
| Transparent PNG, 72px x 72px (Width x Height) |
 |
| File name: PACKAGE_ICON_120.PNG |
| Transparent PNG, 120px x 120px (Width x Height) |
 |
| File name: PACKAGE_ICON_256.PNG |
| Transparent PNG, 256x x 256px (Width x Height) |
 |
Images for QNAP (Installation Graphics)
| File name: PACKAGE_ICON_64.GIF |
| GIF, 64px x 64px (Width x Height) |
 |
| File name: PACKAGE_ICON_64_GRAY.GIF |
| GIF, 64px x 64px (Width x Height) |
 |
| File name: PACKAGE_ICON_80.GIF |
| GIF, 80px x 80px (Width x Height) |
 |
Images for Windows (Installation Graphics)
| File name: aboutBG.bmp |
| Bitmap, 164px x 337px (Width x Height) |
 |
| File name: desktop.ico |
| Windows icon with true color plus alpha channel transparency, 256, 128, 48, 32, 16 px x 256, 128, 48, 32, 16 px (Width x Height) |
|
| File name: installer.ico |
| Windows icon with true color plus alpha channel transparency, 256, 128, 48, 32, 16 px x 256, 128, 48, 32, 16 px (Width x Height) |
|
| File name: small.bmp |
| Bitmap, 55x x 58x (Width x Height) |
 |
| File name: uninstall.ico |
| Windows icon with true color plus alpha channel transparency, 256, 128, 48, 32, 16 px x 256, 128, 48, 32, 16 px (Width x Height) |
|
Image Specifications for AhsayACB (Application Graphics)
Images for all platforms
| File name: about_logo.png |
| Transparent PNG, 144px x 33px (Width x Height) |
| File name: login_bg.png |
| PNG, 1016px x 734px (Width x Height) |
 |
| File name: login_logo.png |
| Transparent PNG, 200px x 60px (Width x Height) |
 |
| File name: logo.png |
| Transparent PNG, 32px x 32px (Width x Height) |
| File name: main_logo.png |
| Transparent PNG, 148px x 33px (Width x Height) |
| File name: splash.png |
| PNG, 420px x 240px (Width x Height) |
 |
| File name: dstn_CBS_24.png |
| Transparent PNG, 24px x 24px (Width x Height) |
| File name: dstn_CBS_32.png |
| Transparent PNG, 32px x 32px (Width x Height) |
| File name: dstn_CBS_48.png |
| Transparent PNG, 48px x 48px (Width x Height) |
| File name: fs16_root_CBS.png | Format: png Width: 16 px Height: 16 px |
| Transparent PNG, 16px x 16px (Width x Height) | |
Images for Windows (System Tray)
The following icons icon1.ico, icon2.ico, icon3.ico and icon4.ico will be used in the Windows system tray. Please arrange them in an animated sequence. The application will arrange the animation sequence when the backup job is run.
| File name: icon1.ico |
| Windows icon with true color plus alpha channel transparency, 16px x 16px (Width x Height) |
Original and Image enlarged for easy reference |

| File name: icon2.ico |
| Windows icon with true color plus alpha channel transparency, 16px x 16px (Width x Height) |
Original and Image enlarged for easy reference |

| File name: icon3.ico |
| Windows icon with true color plus alpha channel transparency, 16px x 16px (Width x Height) |
Original and Image enlarged for easy reference |

| File name: icon4.ico |
| Windows icon with true color plus alpha channel transparency, 16px x 16px (Width x Height) |
Original and Image enlarged for easy reference |

| File name: toast.ico |
| Windows icon with true color plus alpha channel transparency, 64px x 64px (Width x Height) |
 |
Images for Mac (Application and Installation Graphics)
| File name: desktop.icns |
| Mac icon with true color plus alpha channel transparency, 256, 128, 48, 32, 16 px x 256, 128, 48, 32, 16 px (Width x Height) |
 |
| File name: GenericJavaApp.icns |
| Mac icon with transparent background. Default Java application icons that will be displayed when there are icons missing. Not directly related to product branding. |
|
| File name: installer.icns |
| Mac icon with true color plus alpha channel transparency, 256, 128, 48, 32, 16 px x 256, 128, 48, 32, 16 px (Width x Height) |
 |
| File name: Logo.icns |
| Mac icon with true color plus alpha channel transparency, 256, 128, 48, 32, 16 px x 256, 128, 48, 32, 16 px (Width x Height) |
|
| File name: uninstall.icns |
| Mac icon with true color plus alpha channel transparency, 256, 128, 48, 32, 16 px x 256, 128, 48, 32, 16 px (Width x Height) |
 |
| File name: ACBLogo.icns |
| Mac icon with true color plus alpha channel transparency, 256, 128, 48, 32, 16 px x 256, 128, 48, 32, 16 px (Width x Height) |
|
| File name: background.jpg |
| JPEG, 622px x 420px (Width x Height) |
(The size of this graphic is reduced to fit into this guide.) |

| File name: logo.png |
| PNG, 128px x 128px (Width x Height) |
 |
Images for Windows (Installation Graphics)
| File name: aboutBG.bmp |
| Bitmap, 164px x 337px (Width x Height) |
(The size of this graphic is reduced to fit into this guide.) |

| File name: desktop.ico |
| Windows icon with true color plus alpha channel transparency, 256, 128, 48, 32, 16 px x 256, 128, 48, 32, 16 px (Width x Height) |
|
| File name: installer.ico |
| Windows icon with true color plus alpha channel transparency, 256, 128, 48, 32, 16 px x 256, 128, 48, 32, 16 px (Width x Height) |
|
| File name: small.bmp |
| Bitmap, 55px x 58px (Width x Height) |
 |
| File name: uninstall.ico |
| Windows icon with true color plus alpha channel transparency, 256, 128, 48, 32, 16 px x 256, 128, 48, 32, 16 px (Width x Height) |
|
IMAGE SPECIFICATIONS FOR AHSAYOBC (INSTALLATION GRAPHICS)
Images for AhsayOBC (Installation Graphics)
| File name: acb-splash.bmp |
| Bitmap, 340px x 240px (Width x Height) |
 |
| File name: installer.ico |
| Windows icon with true color plus alpha channel transparency, 256, 128, 48, 32, 16 px x 256, 128, 48, 32, 16 px (Width x Height) |
 |
| File name: obc-splash.bmp |
| Bitmap, 340px x 240px (Width x Height) |
 |
| File name: obc-background.bmp | Format: Bitmap Width: 340 px Height: 240 px |
| Bitmap, 340px x 240px (Width x Height) | |
 |
| File name: obm-splash.bmp |
| Bitmap, 340px x 240px (Width x Height) |
 |