Article ID
Last Reviewed Date
Product Version
Operating System
Description
This Know-How article explains how to perform the initial backup to a removable drive on the customer site. Then transport the removable drive to the data center and copy the data directly onto the AhsayCBS / Predefined destination, bypassing the Internet. This procedure is highly recommended for backup set with large data size and/or networks with slow connection speed.
Although the instruction is described for AhsayCBS / Predefined destination, the same steps can also be performed for other backup destinations like FTP, SFTP and Cloud Storage destination.
Solution
-
First, configure the backup set to perform the initial backup to a local destination (e.g. removable hard drive).
-
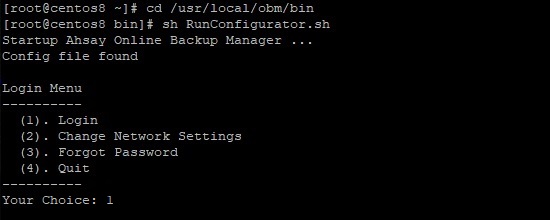
Login to AhsayOBM, execute the RunConfigurator.sh script file in the AhsayOBM installation bin folder.
-
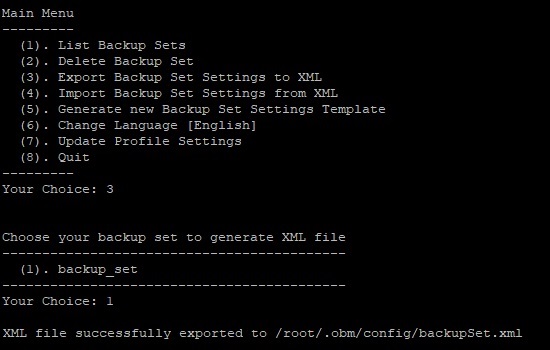
Export the backup set setting by choosing 3, then the number of the corresponding backup set (e.g. we will export the setting of "backup_set").
 It is assumed that the 'import destination', in this case AhsayCBS / Predefined destination has already been added to the backup set.
 -
Exit from AhsayOBM (e.g. choose 8 in the RunConfigurator.sh script), then go to the backupSet.xml file location (e.g. /root/.obm/config/backupSet.xml).

-
Edit the backupSet.xml file with a text editor.

-
Next, add the local destination (e.g. directory path to the removable drive or on the client computer) as one of the backup destination of the backup set.
Insert the following entries into the backupSet.xml file (edit the value of the Name and Directory according to your setup), make sure that you are adding the entries at the correct location as shown in the example.
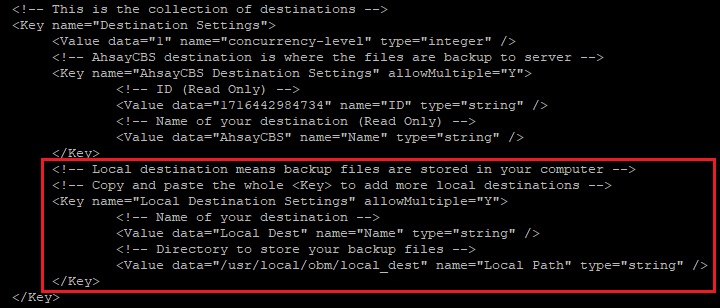
In the above example, the local destination path is /usr/local/obm/local_dest and the destination name is Local Dest.
For more details on the backupSet.xml template, refer to the Appendix of the AhsayOBM Overview Guide for Linux (CLI).
- Save then exit from the text editor.
- Login to AhsayOBM, execute the RunConfigurator.sh script again.
-
Import the backup set setting by choosing 4, then Y when prompted for confirmation.
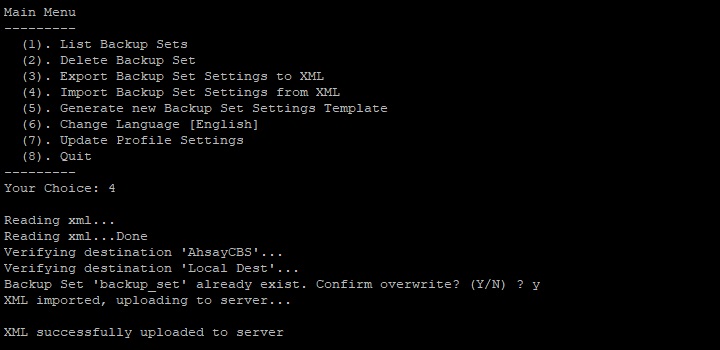
-
Confirm that both the 'import destination' (e.g. AhsayCBS or Predefined destination) and the 'local destination' (e.g. path to the removable drive or on the client computer) are added.
Choose 1 to list the backup set, then the number of the corresponding backup set.
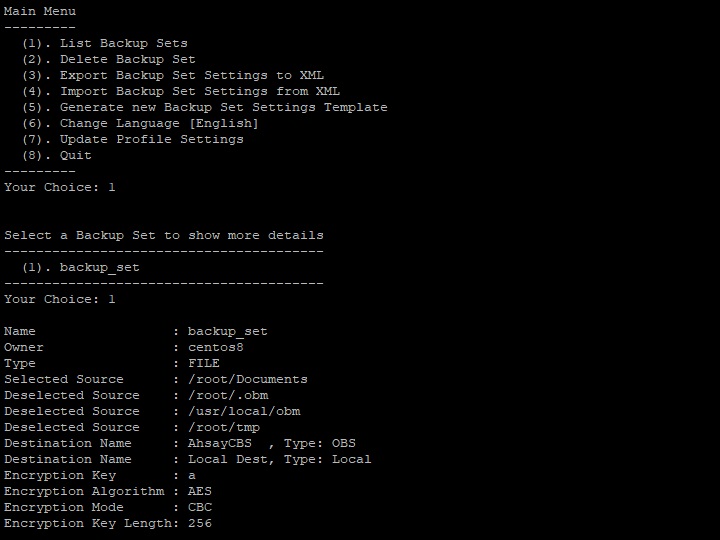 In the above example, the 'local destination' (e.g. Local Dest) was added properly and the 'import destination' (e.g. AhsayCBS) was also listed.
-
-
Next, perform the initial backup to the local destination (e.g. removable hard drive).
-
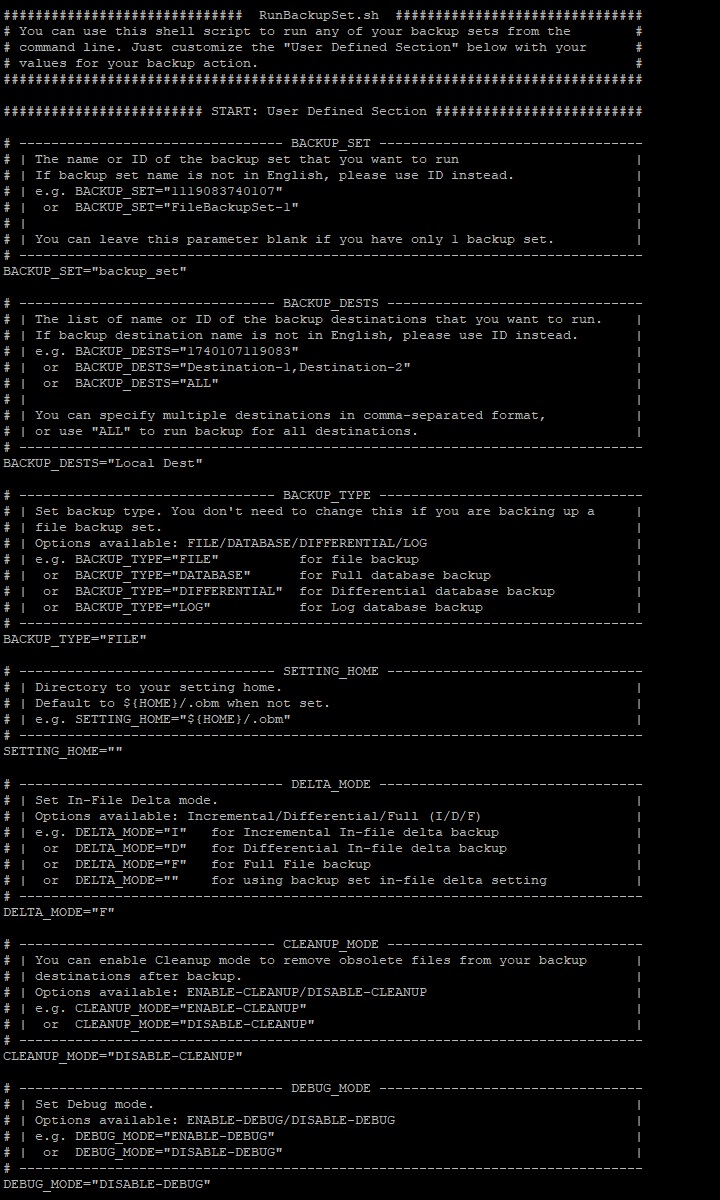
Edit the RunBackupSet.sh file in the AhsayOBM installation bin folder with a text editor.
In this example, edit the file by adding the corresponding backup set's name (e.g. backup_set), the local destination's name (e.g. Local Dest). Also enable Full delta mode for full backup.
- Save then exit from the text editor.
-
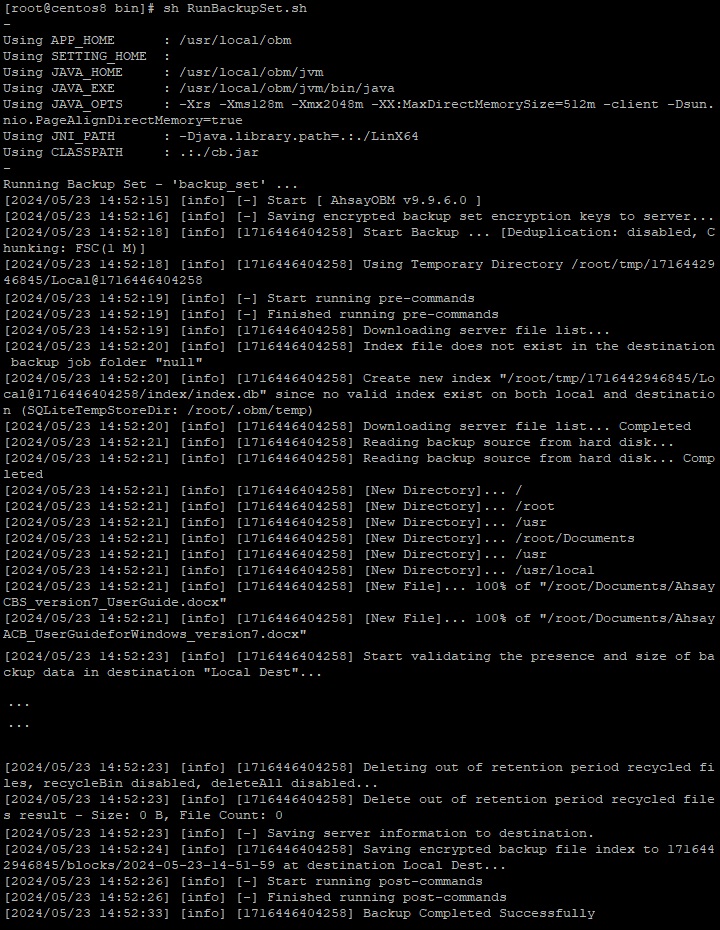
Execute the RunBackupSet.sh file afterward.
-
-
Import the data from the local destination (e.g. removable hard drive) to the AhsayCBS and Predefined destination (e.g. Google Drive, OneDrive, Dropbox).
Copy the data (the entire 'backupset_id' folder) from the removable drive at %Local_Destination%\%backupset_id%\*.
Import the data to:
-
AhsayCBS by copying to the user home path of the corresponding backup user at %User_Home%\username\.
Example:
%Local_Destination%\1614311678846\*
to
%User_Home%\username\1614311678846\*
-
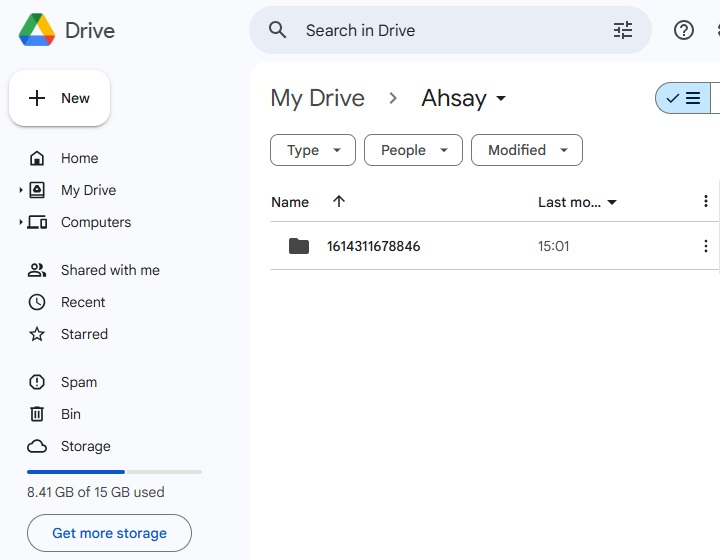
Google Drive destination by copying to the corresponding location on Google Drive at My Drive > Ahsay > %backupset_id%.
Example:
%Local_Destination%\1614311678846\*
to
My Drive > Ahsay > 1614311678846
-
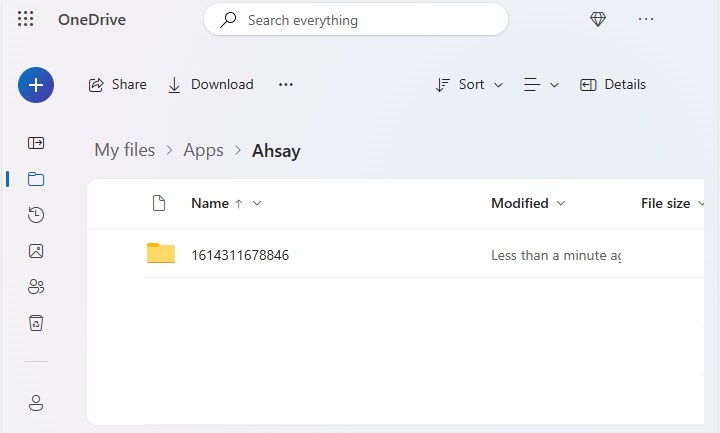
OneDrive destination by copying to the corresponding location on OneDrive at My files > Apps > Ahsay > %backupset_id%.
Example:
%Local_Destination%\1614311678846\*
to
My files > Apps > Ahsay > 1614311678846
-
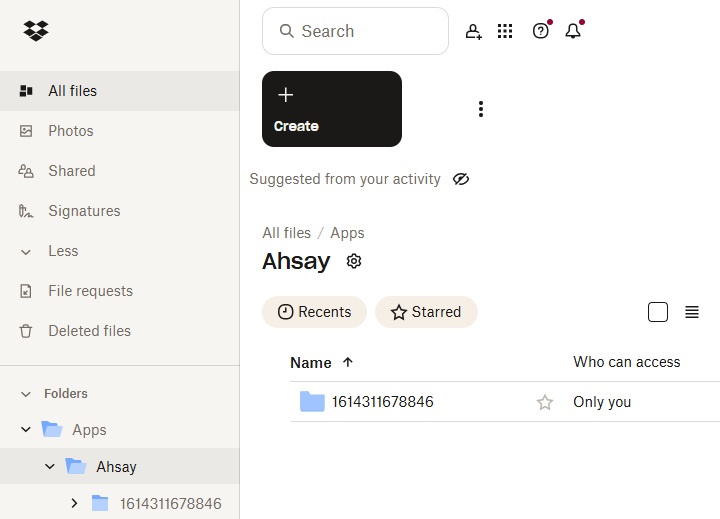
Dropbox destination by copying to the corresponding location on Dropbox at All files > Apps > Ahsay > %backupset_id%.
Example:
%Local_Destination%\1614311678846\*
to
All files > Apps > Ahsay > 1614311678846
Do not perform another backup job while the data are being copied from the removable hard drive to the backup destination.
Administrator can:
- Temporarily suspend the backup user while the data are being copied, and
-
Temporarily disable the backup schedule(s) of the corresponding backup set.
-
-
Perform a Data Integrity Check for the corresponding backup set.
Refer to How to run a Data Integrity Check on Linux (CLI) machine? for instructions.
-
The import procedure is completed.
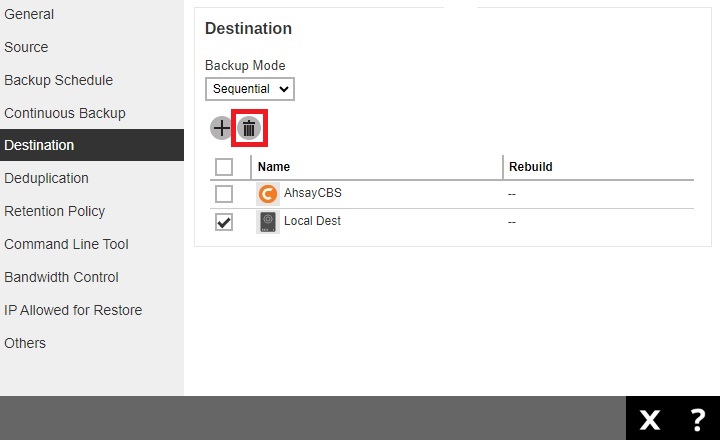
Re-enable the backup user and/or backup schedule(s), then remove the local destination (e.g. removable hard drive) via the AhsayCBS web console afterward.