Article ID
Last Reviewed Date
Product Version
Operating System
Description
This Know-How article outlines the steps to perform a backup to a local destination and to import the data onto a cloud storage destination.
Solution
- First, configure the backup set to perform the initial backup to a local destination.
- Login to the AhsayOBM / AhsayACB client user interface.
-
Click Backup Sets, then the corresponding backup set.
- Create a backup set by clicking the Add icon.
- Select the Backup set type, then enter a Name for your backup set.
- Continue to create the backup set as you would.
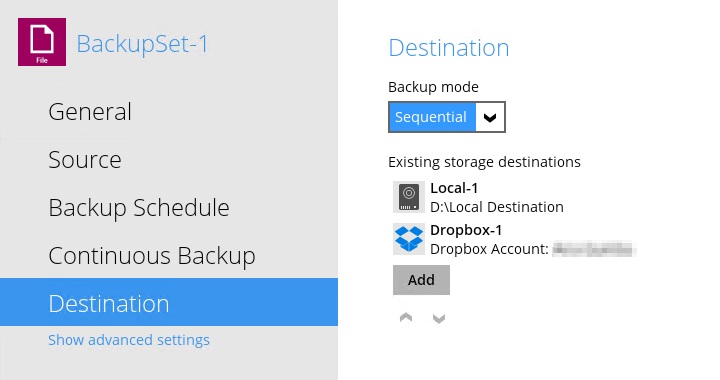
- In the Destination menu, click the + icon next to Add new storage destination / destination pool.
- From the Destination storage dropdown menu, select Local / Mapped Drive / Network Drive / Removable Drive.
-
Ensure that the destination type is set to Single storage destination, then click on the Change button to change the local destination path.
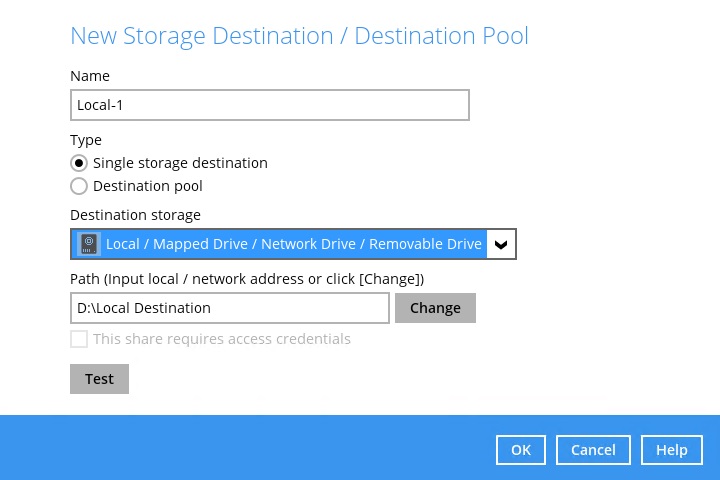
- Click OK, then Next and continue on with the backup set creation.
- Next, perform the initial backup to the local destination.
-
In the client user interface, click Backup.
-
Select the corresponding backup set for backup.

-
Under Destinations, deselect all destinations except for the newly created local destination (if there is any).
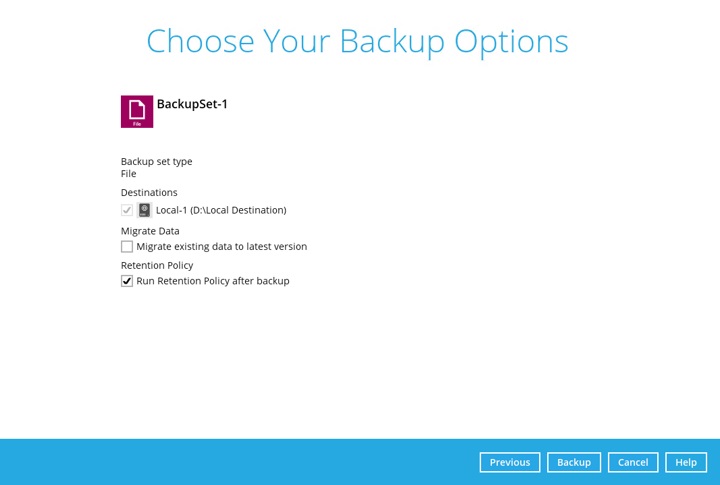
- Click Backup to start the initial backup.
-
-
Configure the corresponding backup set with the additional backup destination of your choice.
Ensure that no backup job is performed while the data are being synchronized to the cloud storage; you should suspend the user account until data has transferred.-
In the client user interface, click Backup Sets.
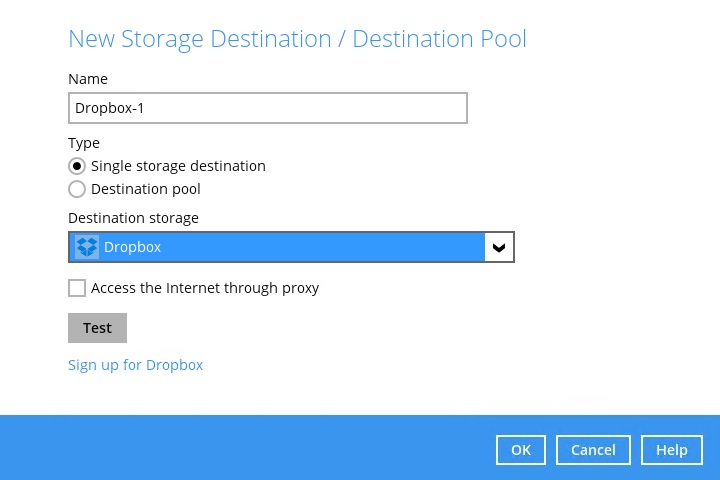
- Select Destination, then click Add.
-
From the Destination storage dropdown menu, select the corresponding cloud storage service.
-
Click the Test button, where AhsayOBM / AhsayACB will now request for authorization to access the cloud storage.
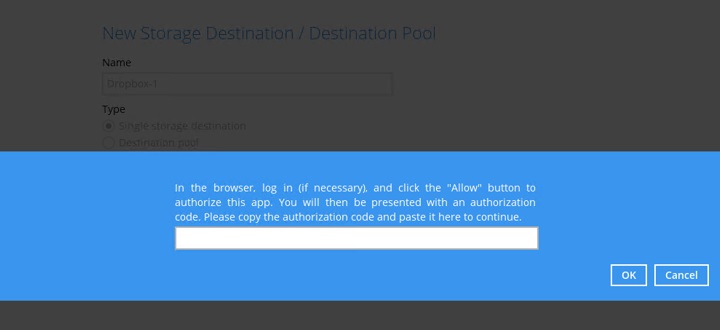
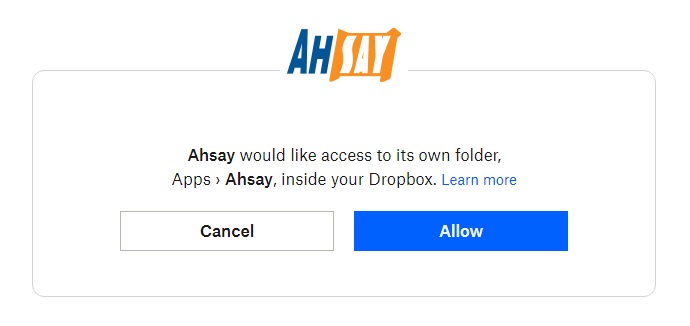
- A browser window will open, login to the cloud storage service (if necessary).
-
Click Allow to allow AhsayOBM / AhsayACB to access the storage.
-
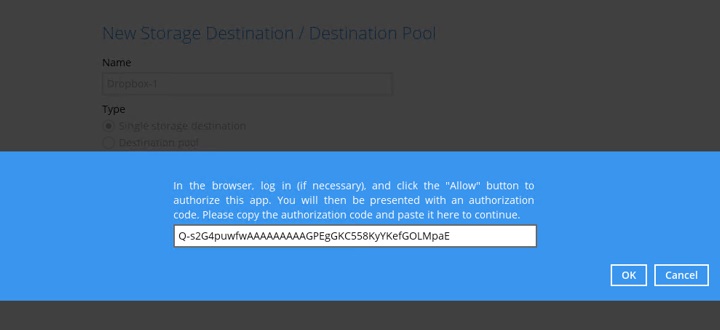
Go back to the backup client application then copy and paste the authorization code.
 The steps for adding destination for other cloud storage services (e.g. Google Drive, Microsoft OneDrive) are very similar (e.g. authorizing access to the cloud storage with similar steps).
 - Click OK, then click OK again.
-
Click Save to save the settings.
-
-
Synchronize the data from the local destination to the cloud storage destination.
The steps required to synchronize data from the local destination to the cloud storage destination may be different depending on the storage provider.Dropbox will be used as an example. Ensure that the Dropbox application is running on the client computer.
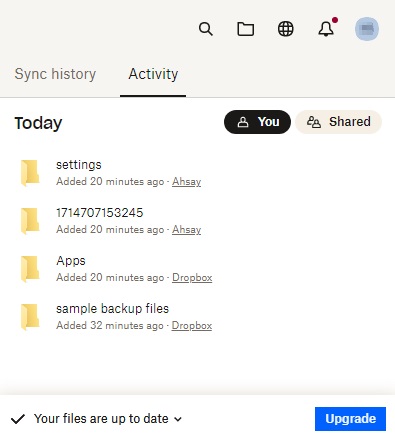
Copy the data from the local backup destination to the Dropbox folder at:
%Local_Destination%\%backupset_id%\*
to
%Dropbox_Folder%\Apps\Ahsay\*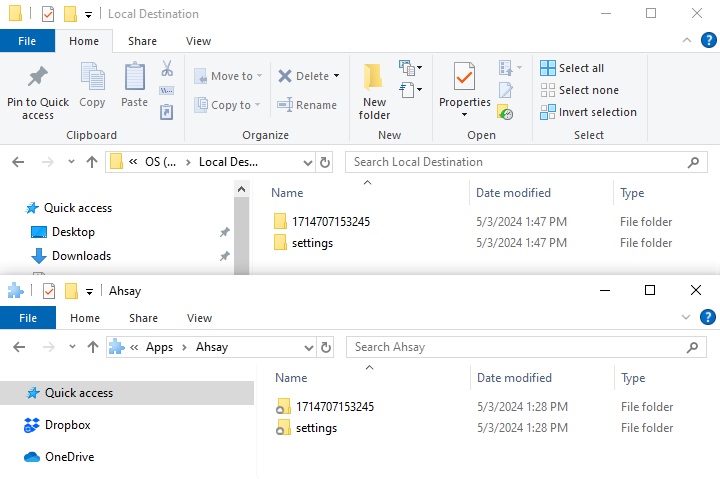
For other cloud storage provider such as Google Drive, Microsoft OneDrive, synchronize the data from the local backup destination at:
%Local_Destination%\%backupset_id%\*
to
%Cloud_Storage%\Ahsay\*Wait for the copied data to synchronize to the cloud storage.
-
The import procedure is completed.
You can remove the local destination of the backup set created previously.
It is strongly recommended that all backup sets are configured to backup to multiple backup destinations, to provide user with data redundancy and backup / restore flexibility. - Manual / Scheduled backup can resume afterward.