Article ID
Product Version
Operating System
Description
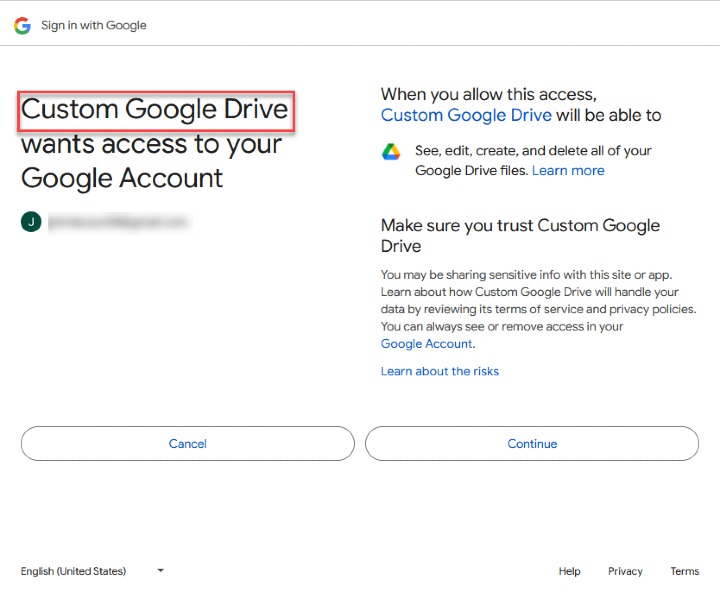
AhsayCBS allows users to display a customized Google Drive name and image in place of its standard branding for a more personalized user experience. This can be done by directly editing the needed API through Google's Developers Console.
Solution
To customize your Google Drive app, follow these steps:
-
Login to your Google Developers Console (to access the site, you may click this link)
-
Tap on Select a project and select New Project
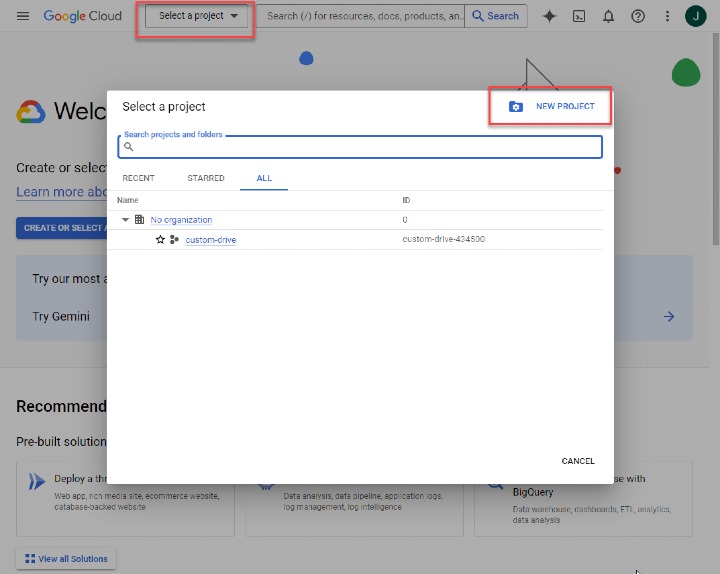
-
Enter your desired name for your project
-
Go to the APIs & Services from the panel on the left. Select Enable APIs and Services
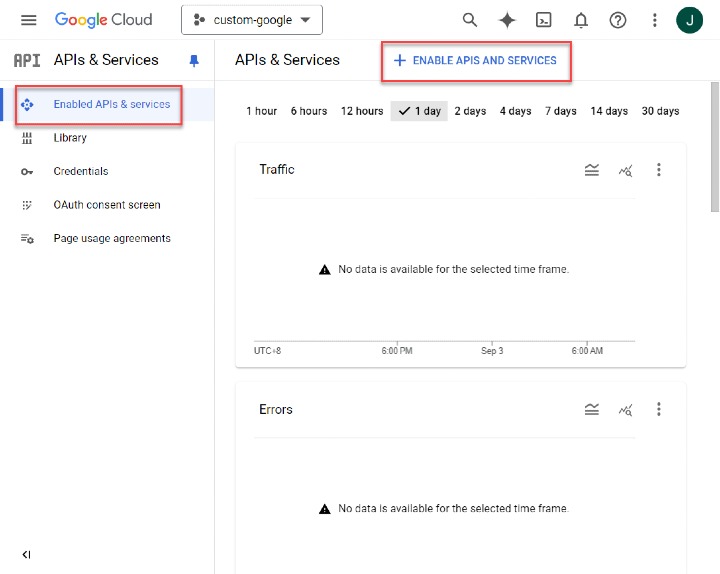
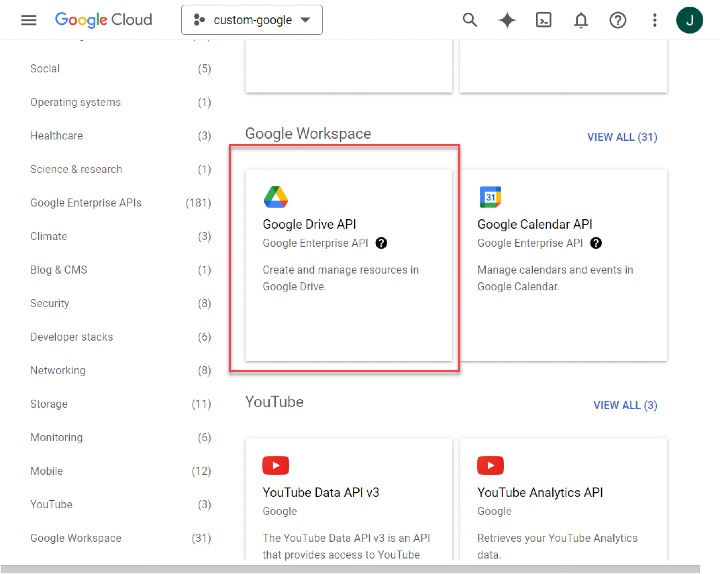
-
Scroll down and select Google Drive API under the Google Workspace section. In the following screen, click on Enable. Wait until the process ends.
-
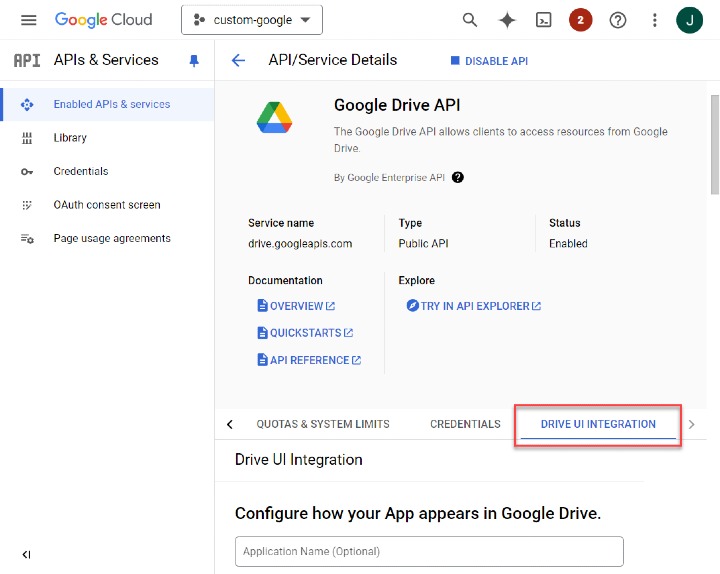
Select Drive UI Integration tab.
-
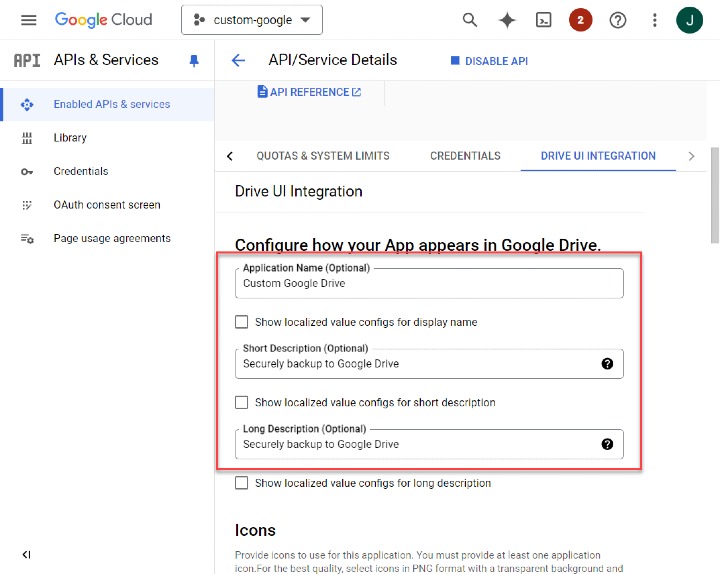
Enter in the details for the first three categories i.e. Application Name, Short Description, Long Description.
-
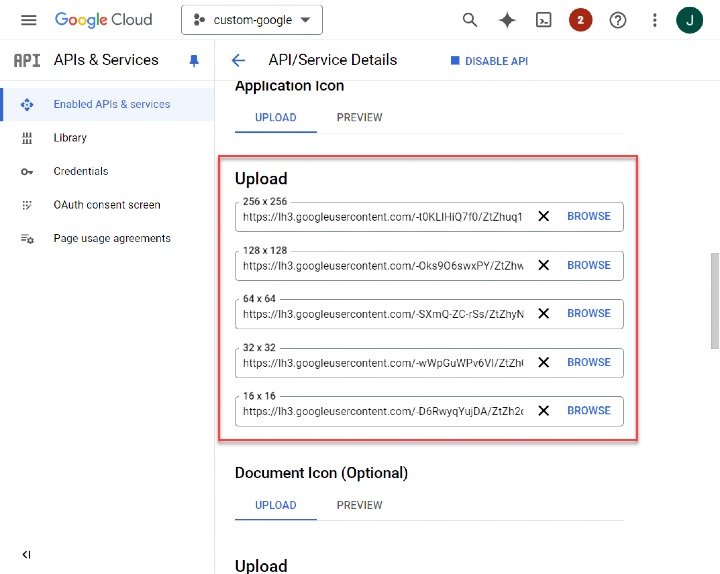
Under the Icons section, upload the icons that you wish to use for your App. Within each field are the icon sizes (in pixels) of each image that should be uploaded. You may preview these images afterwards.
-
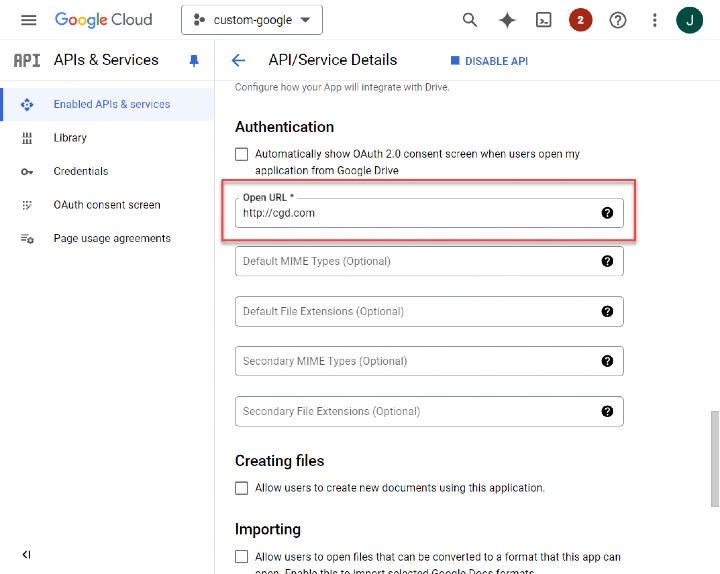
Under the Authentication section, fill in the Open URL field. Click on Submit at the very bottom of the page afterwards.
-
Open the OAuth consent screen tab next from the left-side panel.
-
You will be given the option to select between an Internal or External User Type. For more information about each User Type, click here.
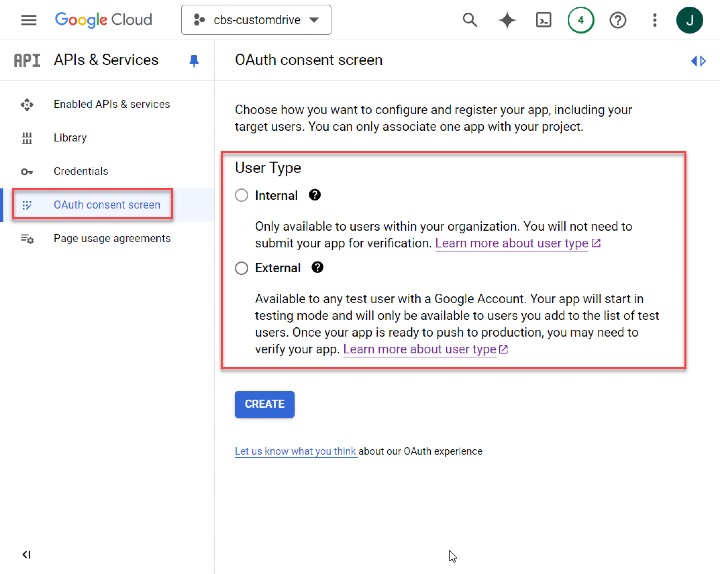
After selecting a User Type, you will have to fill in each of the marked fields (marked with *) in the next screen. After, fill in the Developer contact information at the bottom of the page, then click Save and Continue.
-
For the Scopes and Test users pages, you may fill each page in if needed. Otherwise, skip ahead to the next step.
-
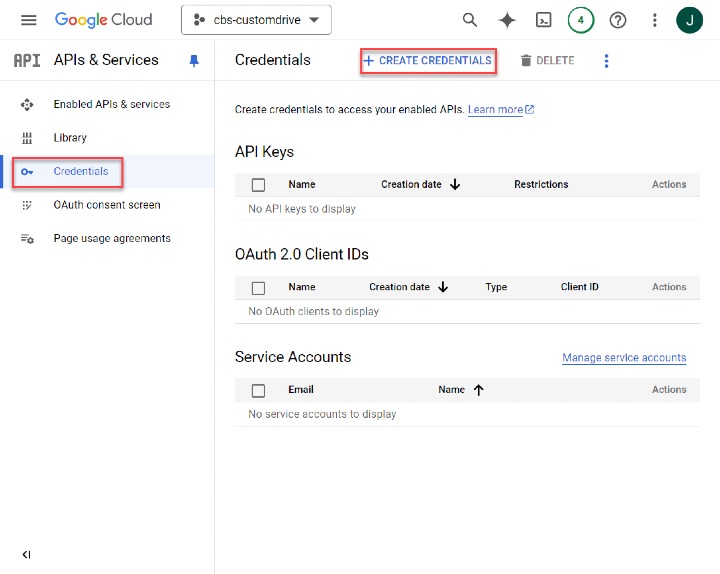
Open the Credentials tab from the left-side panel. Click on Create Credentials. In the drop-down menu, select OAuth client ID.
-
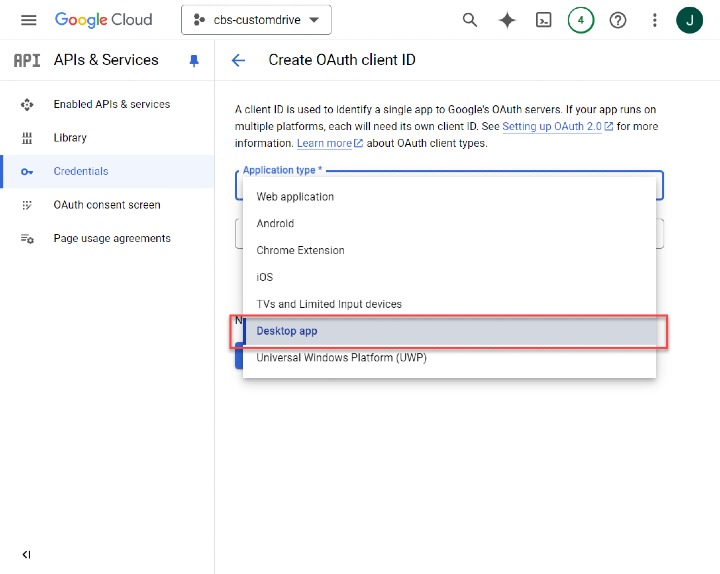
Select Desktop app from the drop-down menu. Input a Name and click on Create. Wait until the process finishes.
-
You will be presented with a "client ID" and a "client secret". You may also find these details saved in a JSON file that can be downloaded.

-
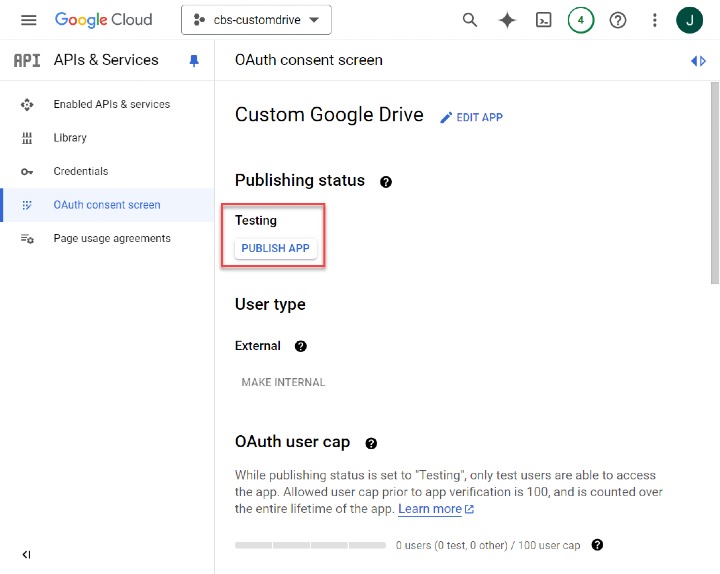
Open the OAuth consent screen tab on the left-hand panel. Under the name of your app, select Publish App.
-
Login to AhsayCBS and select Users, Groups & Policies.
-
Open the Policy Group tab and select your preferred Policy Group.
-
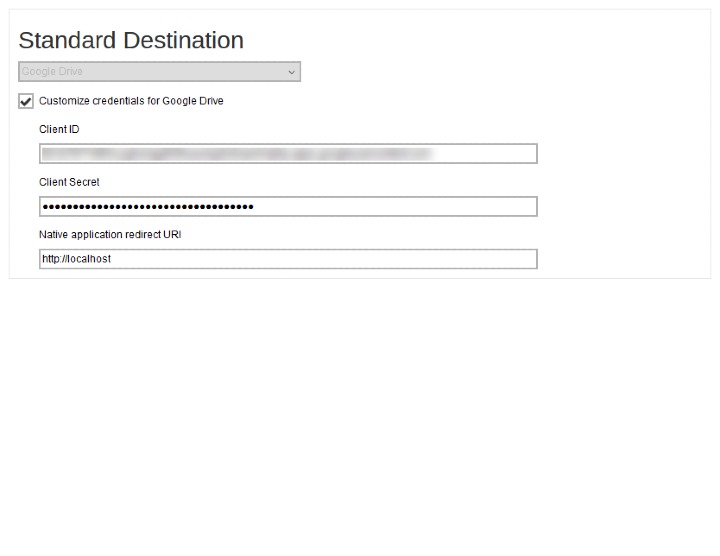
Go to Backup Set Settings > Standard Destination. Check "Customize application name". Input your application name.
Select Google Drive.
-
Input the credentials previously presented to you i.e. "client ID" and "client secret". You may find these details from the JSON file you could download in step __ including the "Native application redirect URI".
-
Save your settings. You may test if the process was successful by trying to create a Backup Set on AhsayOBM using Google Drive as the Destination storage.