Create a Backup Set
The screenshots used for this guide are based on MS Exchange Server and will include screenshots for MS Exchange Mail Level if applicable.
Creating a Microsoft Exchange Backup Set
-
Log in to the AhsayOBM application user interface.
For instructions on how to log in, please refer to the Login section.
-
In the AhsayOBM main interface, click Backup Sets.
-
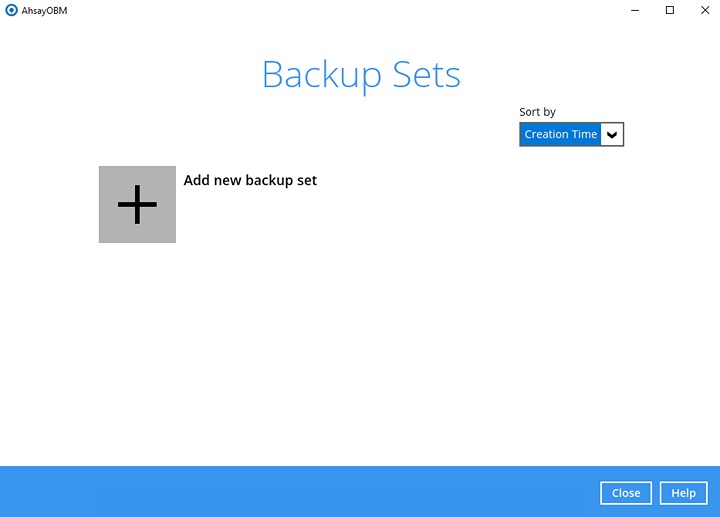
Create a new backup set by clicking the "+" icon beside "Add new backup set".
-
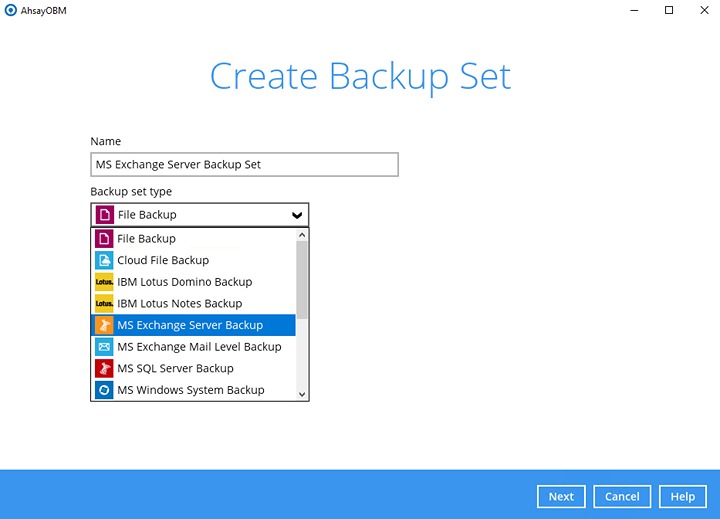
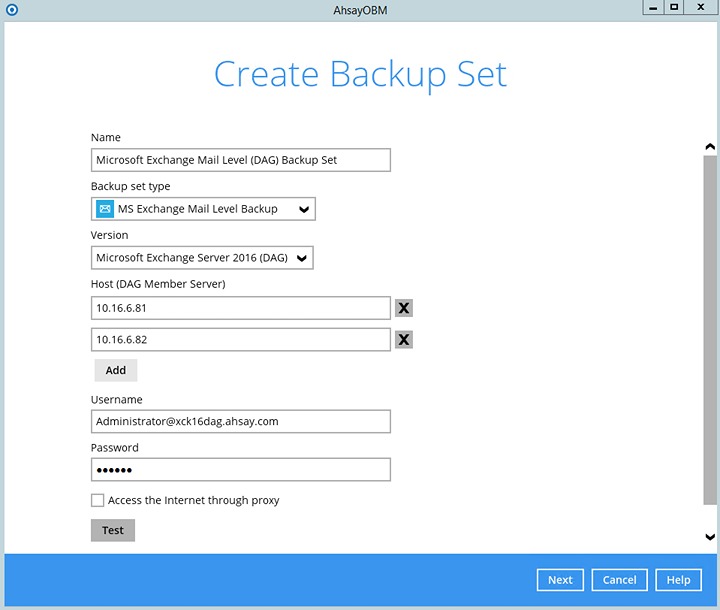
Select the Backup set type as MS Exchange Server Backup or MS Exchange Mail Level Backup. The system will automatically detect and select the Exchange Server version, make sure the version selected is correct. Name your new backup set and then click Next to proceed.

-
Standalone
-
Database Availability Group
-
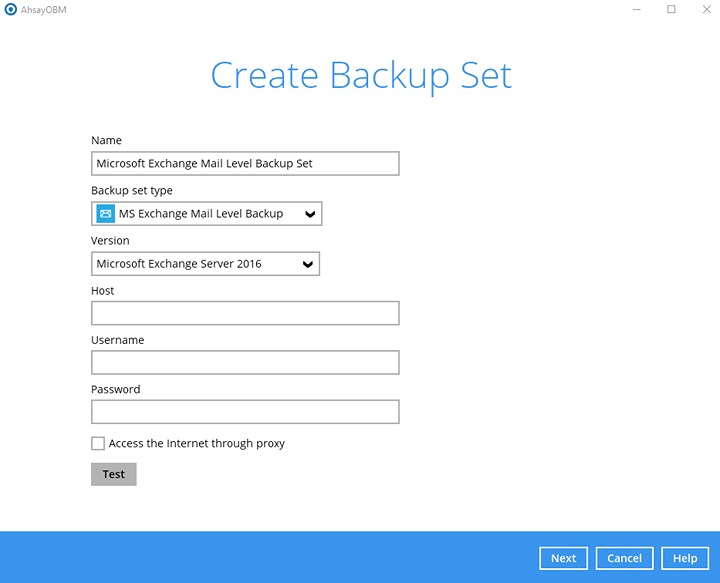
Name your new backup set.
-
Select from the following version:
- Microsoft Exchange Server 2013
- Microsoft Exchange Server 2016
- Microsoft Exchange Server 2019
- Microsoft Exchange Server 2013 (DAG)
- Microsoft Exchange Server 2016 (DAG)
- Microsoft Exchange Server 2019 (DAG)
As AhsayOBM is installed directly on the MS Exchange server. The correct MS Exchange version will be automatically selected.
-
Enter the hostname of the Exchange server.
-
Enter the username and password of the Windows user account used for backup.
-
Check the Access the Internet through proxy if required.
-
Click the Test button to verify the login details.
Then, click Next to proceed.
-
-
-
In the "Backup Source" window;
-
MS Exchange Server
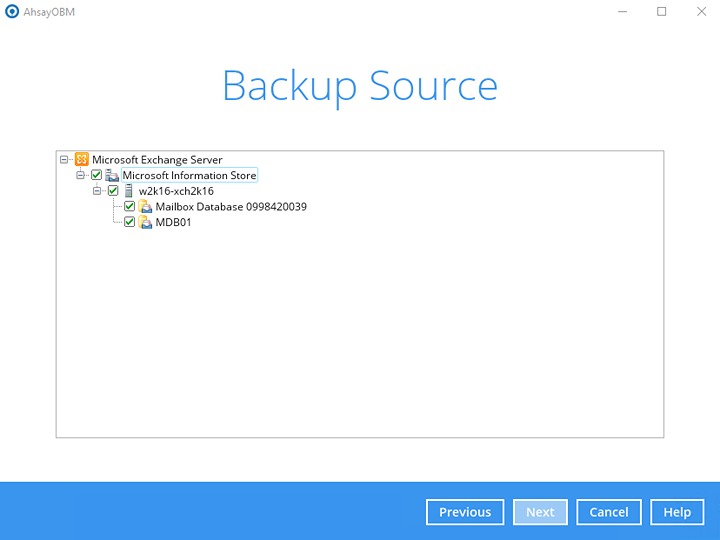
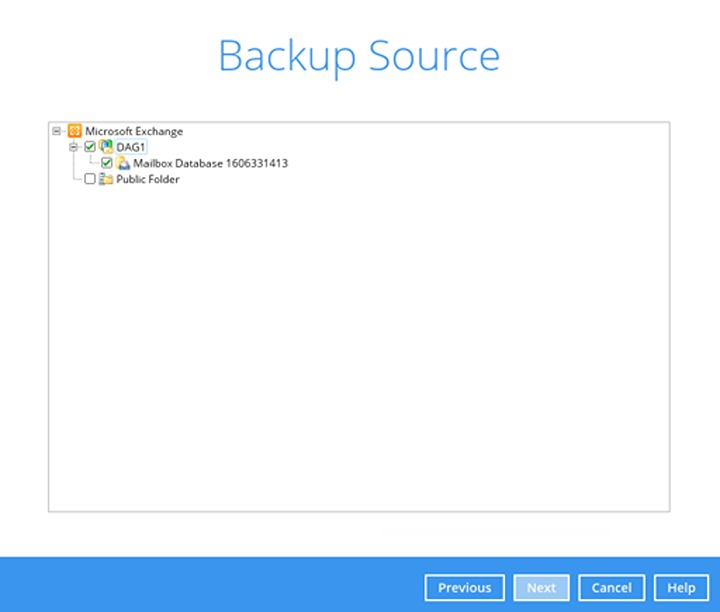
Select the Information Store for standalone backup or DAG/Public Folder for DAG backup. Click Next to proceed.
-
Standalone
-
Database Availability Group (DAG)
-
-
MS Exchange Mail Level
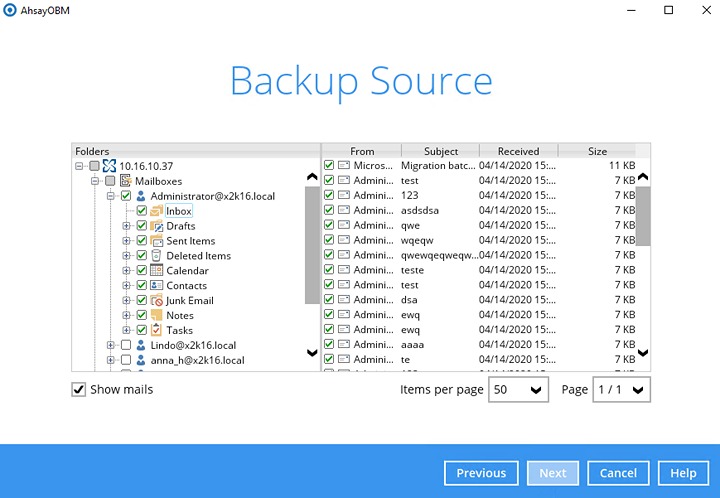
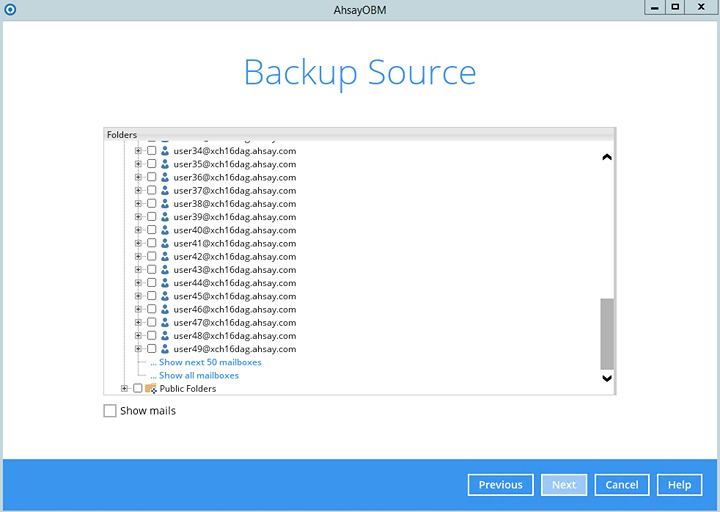
Select the mailboxes or public folders for backup. Fifty (50) users will be displayed by default. If the MS Exchange Server account consists of more than fifty (50) users or above, click the show next 50 mailboxes button to display the next users. You can expand the mailbox or public folder to select which mail folder to back up by clicking the [+] button. You can also click Show mails to select an individual mail to back up.
Once done, click Next to proceed.
-
Standalone
-
Database Availability Group (DAG)
-
-
-
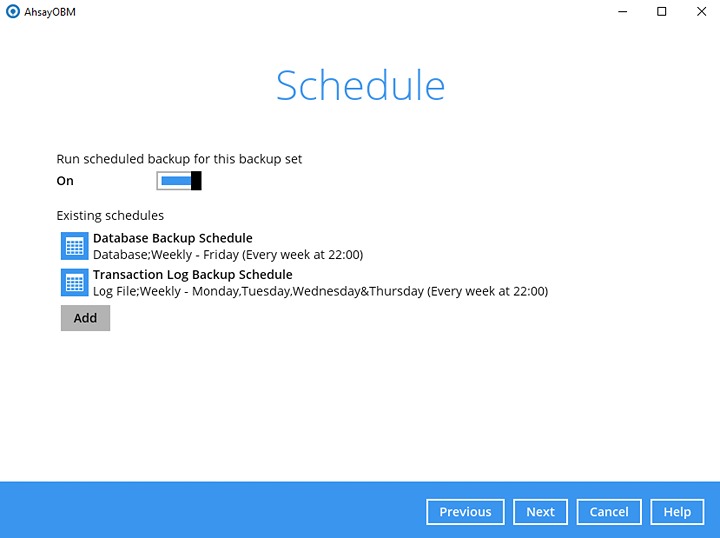
In the "Schedule" window, you can configure a backup schedule for backup job to run automatically at your specified time interval. By default, the “Run scheduled backup for this backup set” option is enabled. You can modify the existing schedules, or you can create a new one by clicking the Add button.
-
In the "Destination" window, select a backup destination where the backup data will be stored. Click the "+" icon beside "Add new storage destination / destination pool".
-
Click Next on the "Destination" window to proceed.
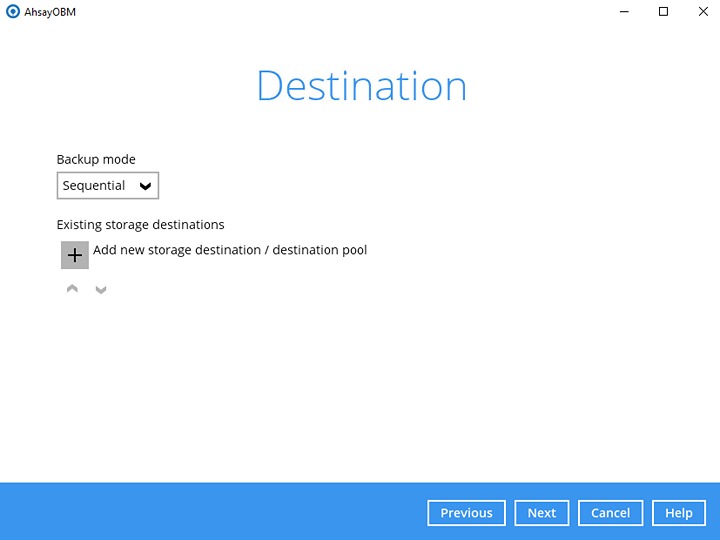
Select the destination storage, then click OK to proceed.
Click Next in the following "Destination" window to proceed.
-
In the "Encryption" window, the default "Encrypt Backup Data" option is enabled with an encryption key preset by the system which provides the most secure protection.
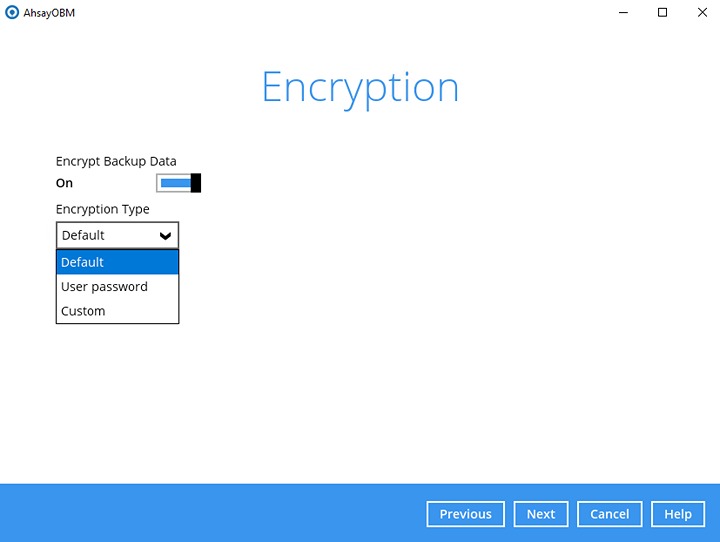
For details on how to configure the "Encryption" settings, please refer to the Overview section.
For best practices on managing your encryption key, refer to the following article: . FAQ: Best practices for managing encryption key on AhsayOBM or AhsayACB?
Click Next when you are done setting.
-
If you have enabled the Encryption Key feature in the previous step, the following pop-up window shows, no matter which encryption type you have selected.
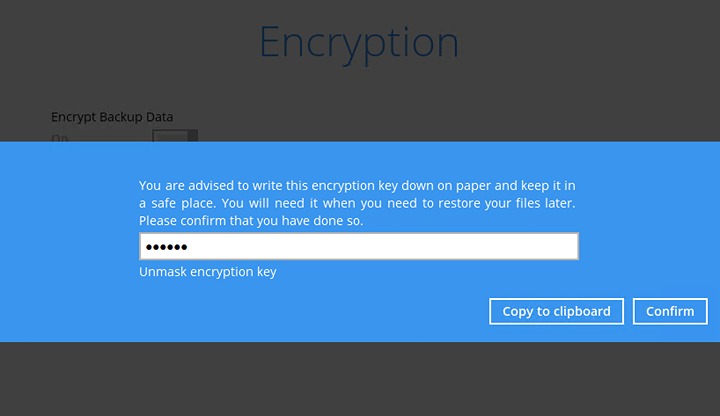
The pop-up window has the following three options to choose from:
-
Unmask encryption key - The encryption key is masked by default. Click this option to show the encryption key.
-
Copy to clipboard - Click to copy the encryption key, then you can paste it in another location of your choice.
-
Confirm - Click to exit this pop-up window and proceed to the next step.
-
-
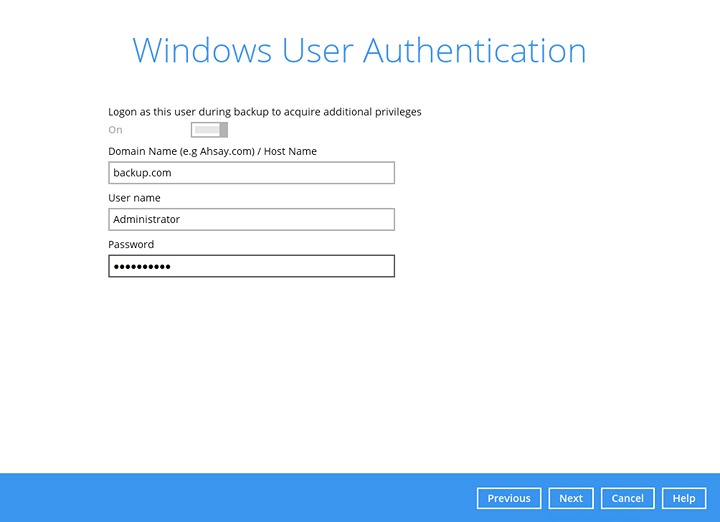
Enter the Windows login credentials for user authentication. Click Next to proceed.
-
The Windows User Authentication interface will show only if scheduled backup is enabled and set successfully.
-
Microsoft Exchange Mail Level does not require Windows User Authentication.
-
-
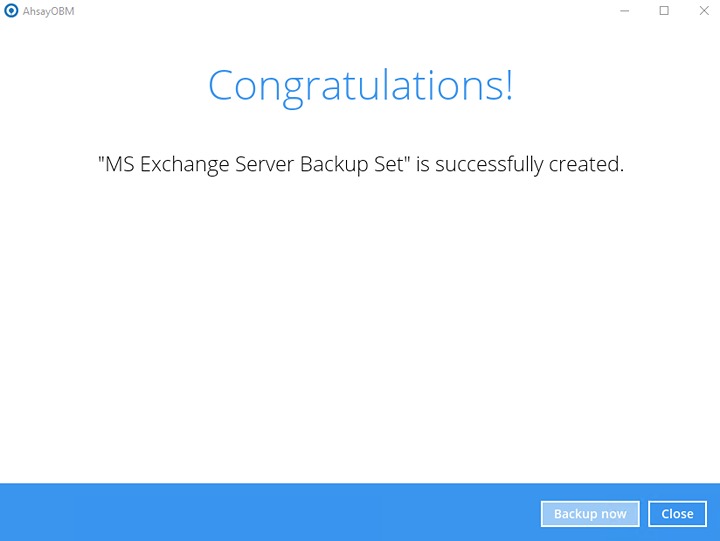
The following screen shows when the new backup set is created successfully.
-
You can click Backup now to start a backup immediately, or you can run a backup job later by following the instructions in Run a Backup Job
-
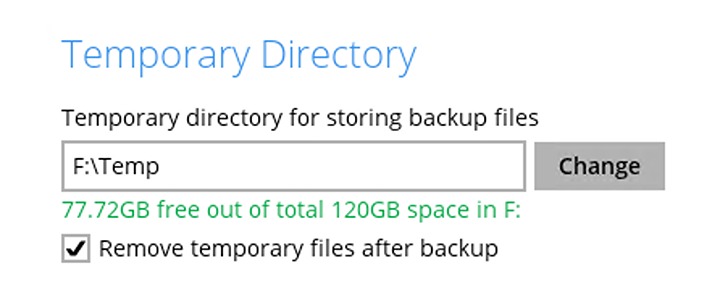
Based on Best Practices and Recommendations, it is highly recommended to change the “Temporary Directory” to another location with sufficient free disk space other than the following:
C: (e.g. Drive F:)To do this, go to Backup Sets > Others > Temporary Directory and click the Change button to browse to another location.
-
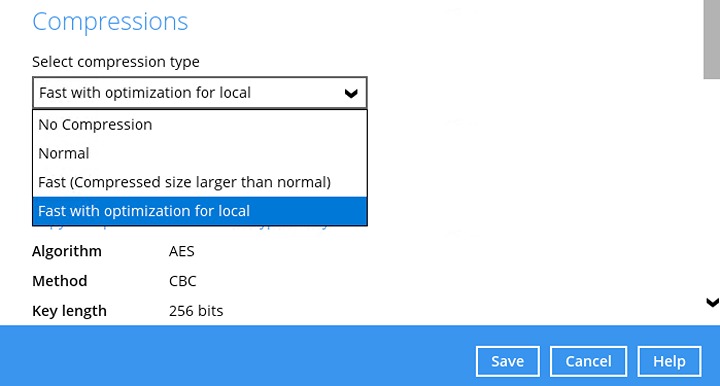
Optional: Select yoru preferred compression type. By default, the compression type is Fast with optimization for local.
Go to Others>Compressions, then select from the following:
-
No Compression
-
Normal
-
Fast (Compressed size larger than normal)
-
Fast with optimization for local
-

 Backup and Restore