Creating an Oracle Database Backup Set for Windows/Linux (GUI)
The screenshots used for this guide are based on AhsayOBM on Windows and will include screenshots for Linux (GUI) when applicable.
Log in to the AhsayOBM application user interface.
For instructions on how to log in, please refer to the Login section.
In the AhsayOBM main interface, click Backup Sets.
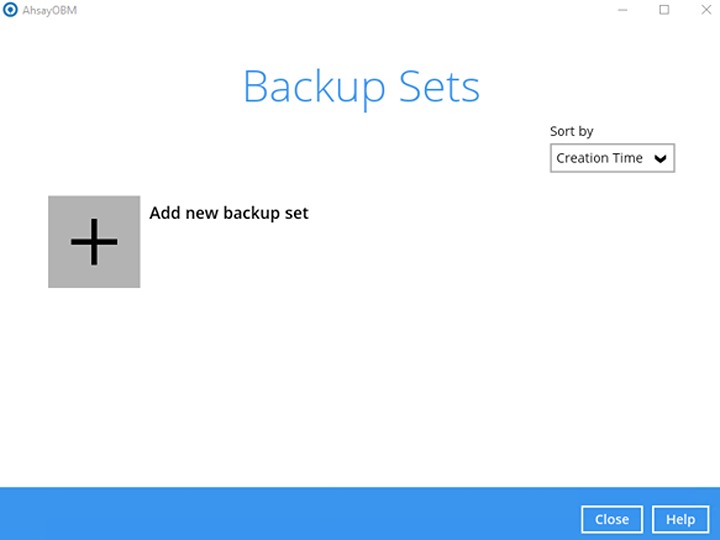
Create a new backup set by clicking the "+" icon before "Add new backup set"
In the “Create Backup Set” window, select Oracle Database Server Backup as the “Backup set type”. Configure the following settings:
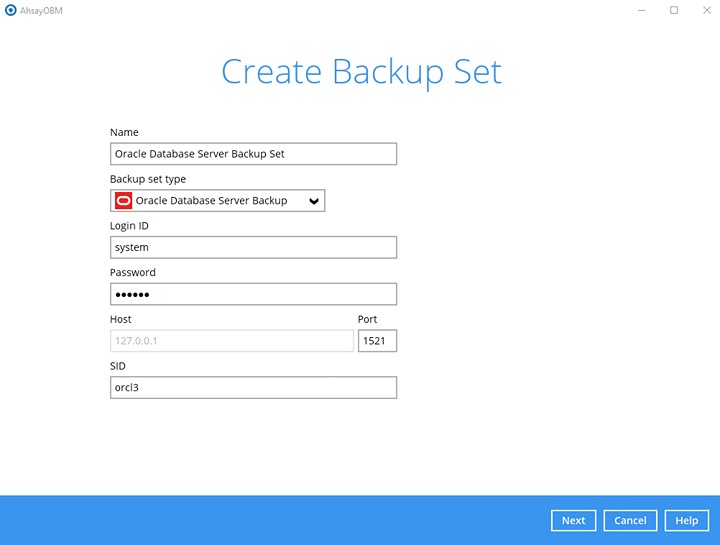
- Name - the name of the backup set.
- Backup set type - the type of the backup set (i.e. Oracle Database Server Backup).
- Login ID - the login ID of the Oracle server. The default login ID is "system".
- Password - the password of the login account.
- Host - this value is not user configurable.
- Port - the port where the connections to the Oracle server is made. The default port is "1521".
- SID - the Oracle System Identifier. For more details, please refer to the System Identifier (SID) in the Requirements section..
Once all the fields are configured, click Next to proceed.
In the “Backup Source” menu, select the Oracle database(s) you would like to back up. Click Next to proceed.
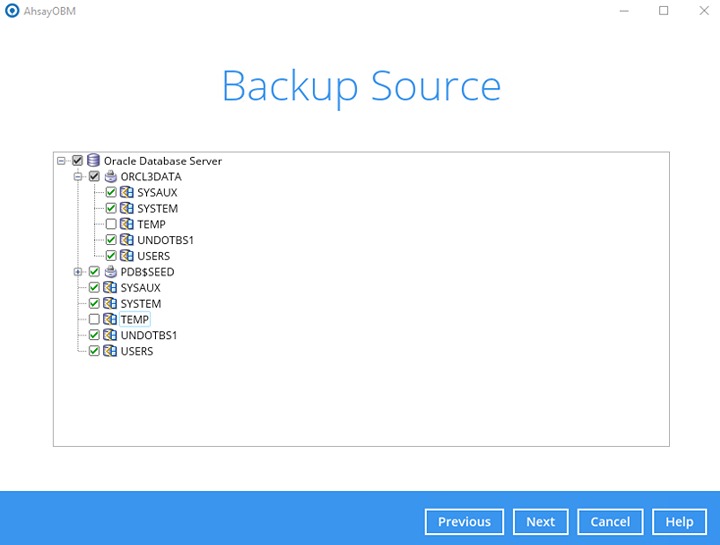
All databases including SYSAUX, SYSTEM, UNDOTBS1, USERS and related application databases except for “TEMP” must be selected in the backup source when creating the backup set. Otherwise, without a backup of these databases, a full Oracle database instance recovery will NOT be possible.
Even if the "TEMP" is selected in the backup source, this database will be skipped during a backup job.
A backup schedule for a backup job to run automatically at your specified time interval can be configured. The backup schedule is enabled by default.
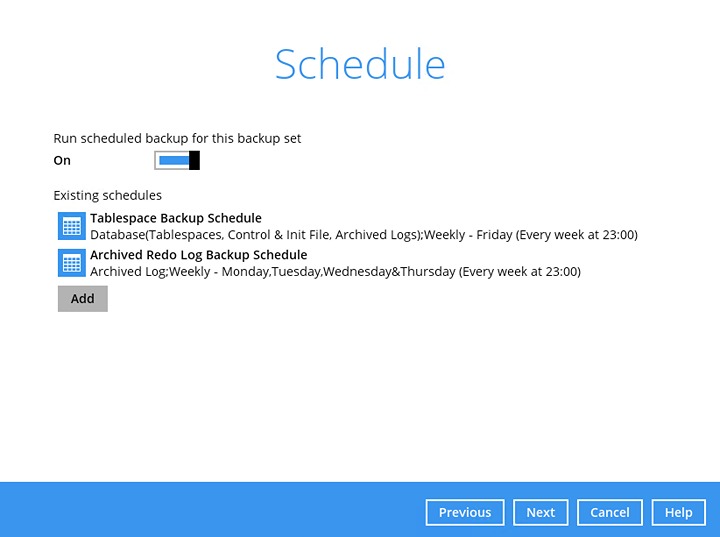
There are two default backup schedules:
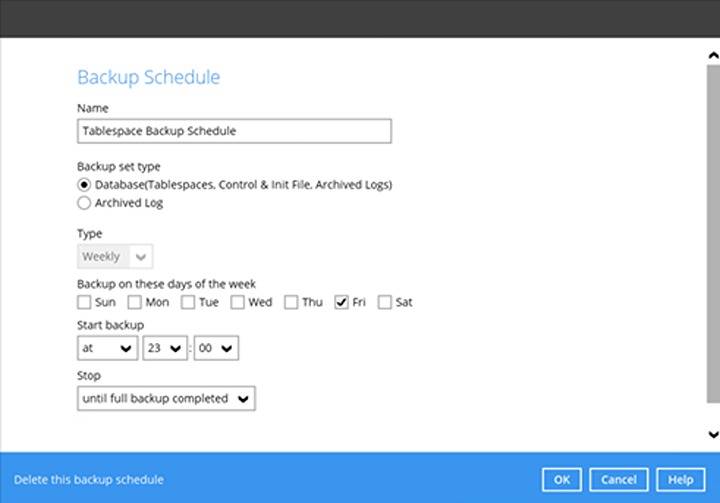
Tablespace Backup Schedule
This type of backup schedule will automatically run weekly every Friday at 23:00
Archived Redo Log Backup Schedule
This type of backup schedule will automatically run weekly every Monday, Tuesday, Wednesday, and Thursday at 23:00
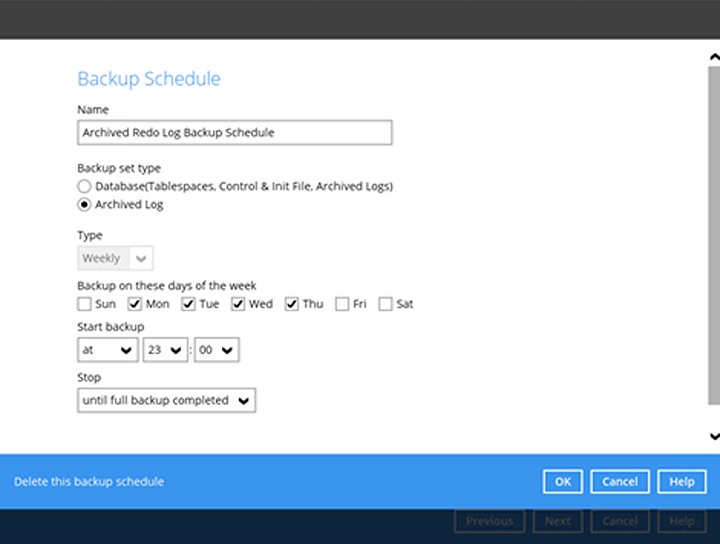
To change the backup schedule settings of an existing schedule, double-click the schedule to be modified. Otherwise, click Next to proceed.
For details on how to configure the backup schedule settings, please refer to the Overview section.
In the “Destination” window, select a backup destination where the backup data will be stored. Click the "+" icon before “Add new storage destination / destination pool”.
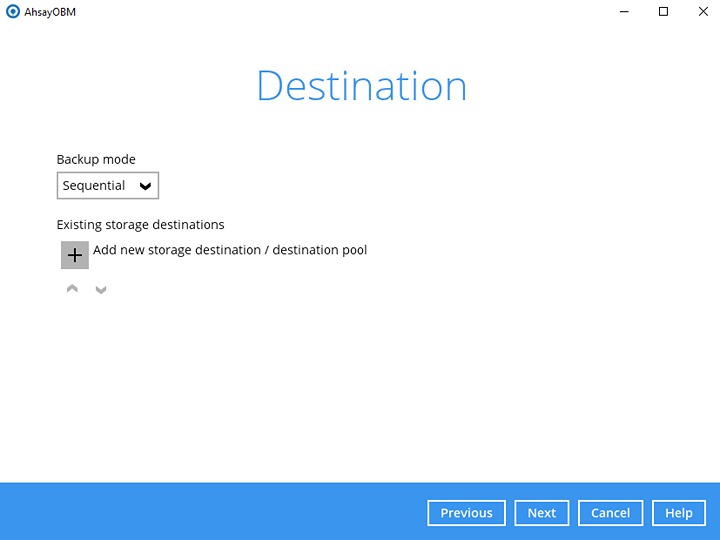
Select the destination storage, then click OK to proceed.
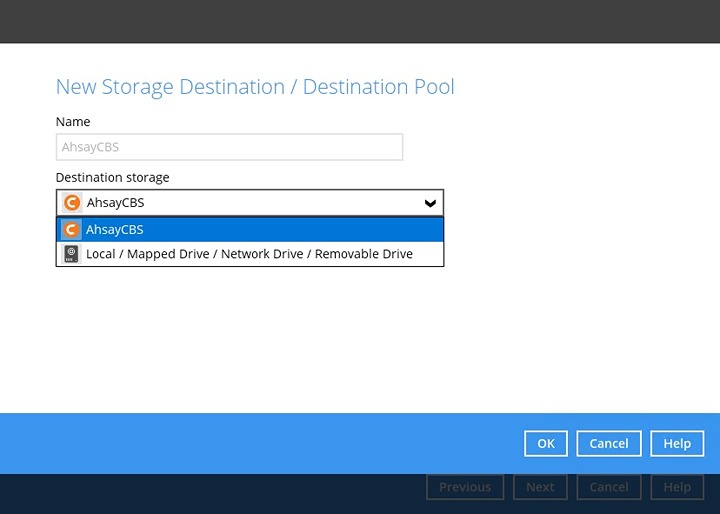
If you have chosen the Local / Mapped Drive / Network Drive / Removable Drive option, click Change to select the storage destination. Tick This share requires access credentials if credentials are needed to access the directory path.
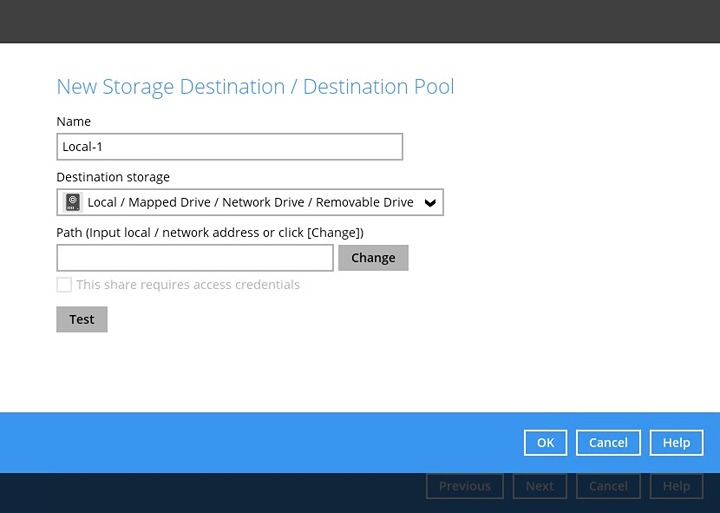
Click Test to validate the path, "Test completed successfully" shows when the validation is done.
- When you are done with the settings, click Next on the "Destination" window to proceed.
In the “Encryption” window, the default “Encrypt Backup Data” option is enabled with an encryption key preset by the system which provides the most secure protection.
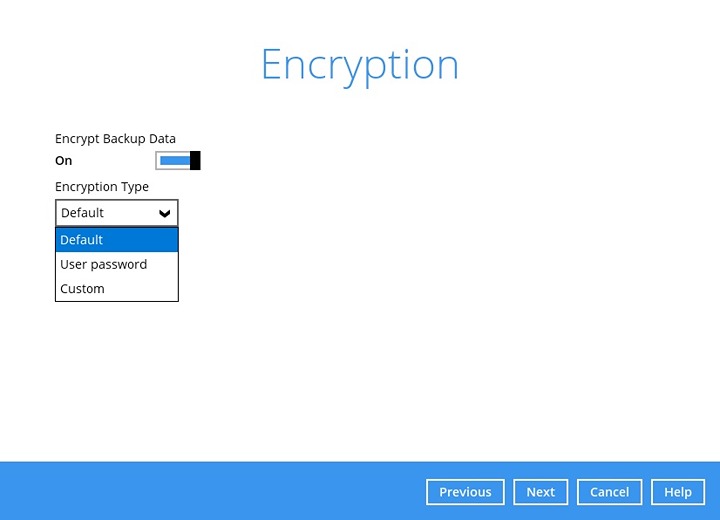
For details on how to configure the "Encryption" settings, please refer to the Overview section.
For best practices on managing your encryption key, refer to the following: FAQ: Best practices for managing encryption key on AhsayOBM or AhsayACB.
Click Next when you are done setting.
If you have enabled the Encryption Key feature in the previous step, the following pop-up window shows, no matter which encryption type you have selected.
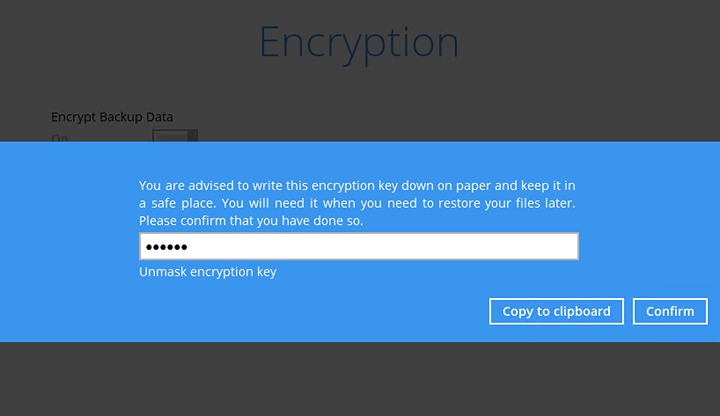
The pop-up window has the following three options to choose from:
Unmask encryption key - The encryption key is masked by default. Click this option to show the encryption key.

- Copy to clipboard - – Click to copy the encryption key, then you can paste it in another location of your choice.
- Confirm - Click to exit this pop-up window and proceed to the next step.
The following screen shows when the new backup set is created successfully.
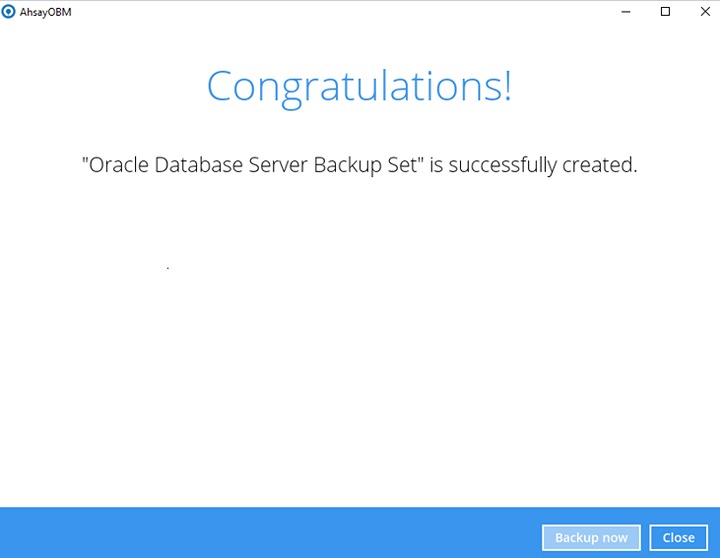
- You can click Backup now to start a backup immediately, or you can run a backup job later by following the instructions in the Run a Backup Job section.
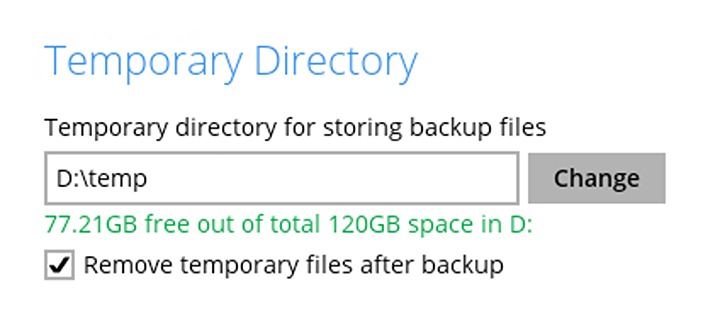
Based on Best Practice and Recommendations, it is highly recommended to change the "Temporary Directory" to another location with sufficient free disk space other than Drive C: (e.g. Drive D:).
To do this, go to Backup Sets > Others > Temporary Directory and click the Change button to browse to another location.
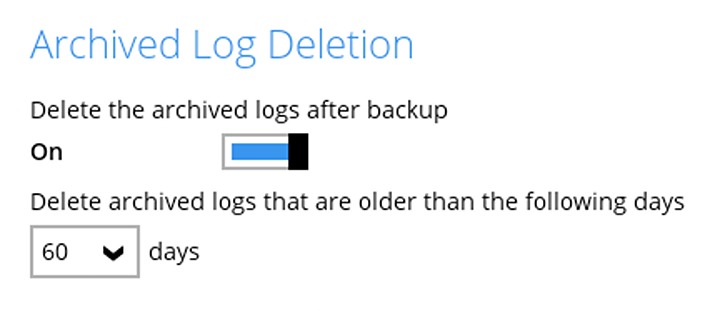
Optional: Archived Log Deletion
The deletion of the archived logs is enabled by default and archived logs more than 60 days are deleted from the Oracle database instance. This process occurs after every database and archived log backup job.
For example, if the Oracle database instance generates a lot of archived log files, you may want to reduce the number of days before they are deleted.
Optional: Select your preferred compression type. By default, the compression type is Fast with optimization for local.
Go to Others > Compressions, then select from the following:
- No Compression
- Normal
- Fast (Compressed size larger than normal)
- Fast with optimization for local
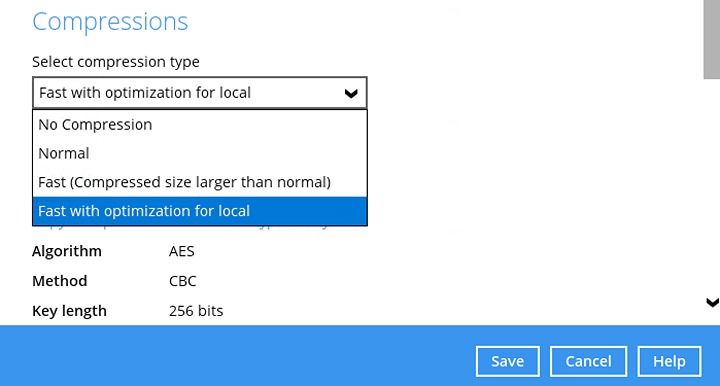
Click Save to apply the changes.

 Backup and Restore