Creating an Oracle Database Backup Set for Linux (CLI)
Start up AhsayOBM.
For instructions on how to do this, refer to the Login section for CLI.
There are two options to create an Oracle Database Backup Set for Linux.
For backup set creation on AhsayCBS web console, most backup set preferences may be configured using AhsayCBS except the following:
- backup set encryption key settings
- Oracle login password
After the backup set preferences are setup on the AhsayCBS web console, to complete the backup set creation process, the RunConfigurator.sh script will need to be used on the Oracle database server machine to do the following:
- to set up the backup set encryption key settings
- to export/import the backupSet.xml file to set up the Oracle login password
For backup set creation using the command line, most backup set preferences may be configured using the backupSet.xml file.
To complete the backup set creation process after successfully importing the backupSet.xml file, the RunConfigurator.sh script will need to be used on the Oracle database server machine to set up the backup set encryption key settings.
Create Oracle Database Backup Set Using AhsayCBS
Log in to AhsayCBS and go to User.

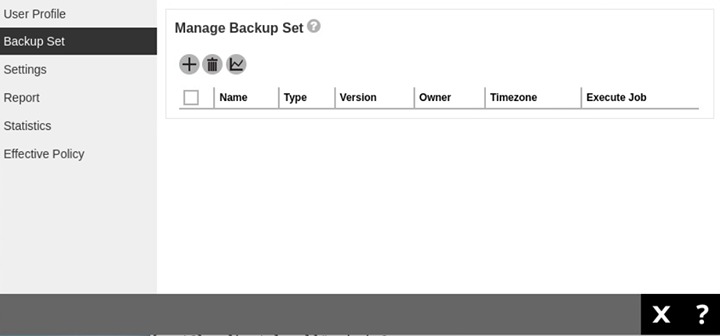
Go to Backup Set, then click the "+" to create a backup set.
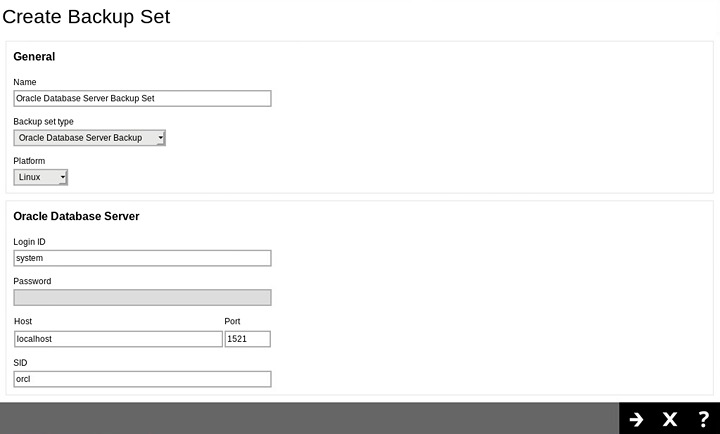
Enter a “Name” for the backup set to be created. Select Oracle Database Server Backup asthe “Backup set type”. Select Linux as the “Platform”. The default “Login ID” is system. Update the “Host” and “Port”. The default settings for these are localhost and 1521 respectively. Input the Oracle “SID” then click the right arrow/Next to proceed.
Add the backup source in the “Other Selected Source” by clicking "+" . Keep doing this until all the sources are entered. To back up all databases, enter Oracle Database Server in the “Other Selected Source”.

To exclude a source, you can add it under “Deselected Source” by clicking "+" . Keep doing this until all the excluded sources are entered. Click the right arrow/Next to proceed.

All databases including SYSAUX, SYSTEM, UNDOTBS1, USERS and related application databases except for “TEMP” must be selected in the backup source when creating the backup set. Otherwise, without a backup of these databases, a full Oracle database instance recovery will NOT be possible.
Even if the “TEMP” is selected in the backup source, this database will be skipped during a backup job.
A backup schedule for a backup job to run automatically at your specified time interval can be configured. The backup schedule is enabled by default. If you do not want to create a backup schedule, you can turn it off by sliding the lever to the left.
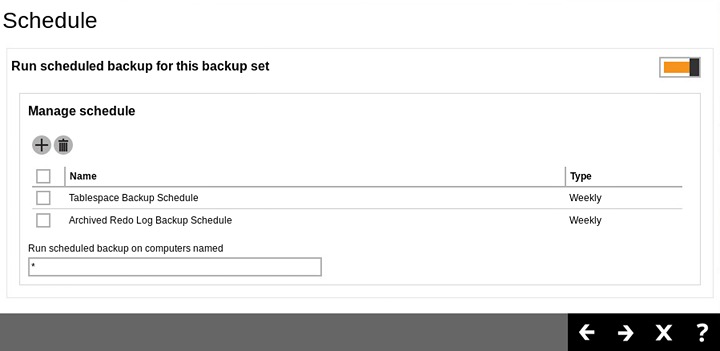
There are two default backup schedules:
- Tablespace Backup Schedule
- Archived Redo Log Backup Schedule
In the “Destination” window, select the “Backup Mode” then click "+" to add a backup storage destination.

Select your desired destination, it could be one or both displayed destinations. Tick the checkbox to select and click the "+" button.
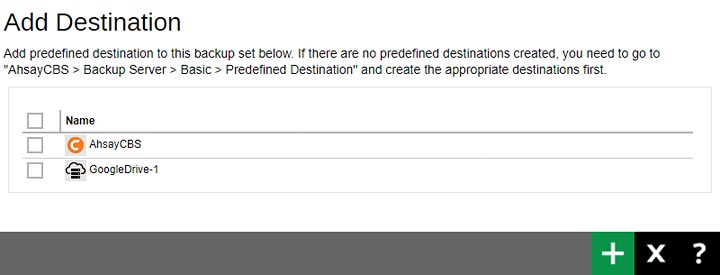
Click the Save button.
Click on the created backup set.
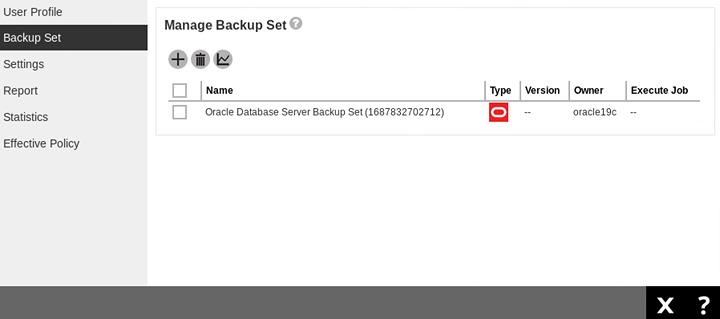
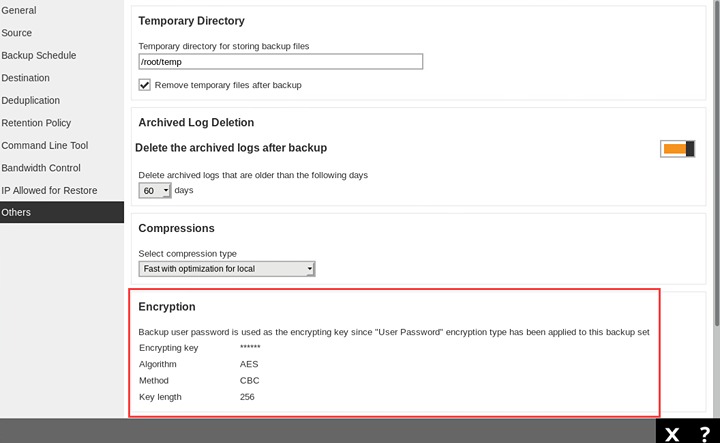
Go to Others and input the path of your temporary directory. It is recommended to check the box beside Remove temporary files after backup to make sure the spooled database files are cleaned up after each backup job to free up space on the temporary drive. Otherwise, if the temporary drive runs out of space, the database backup job will not run.
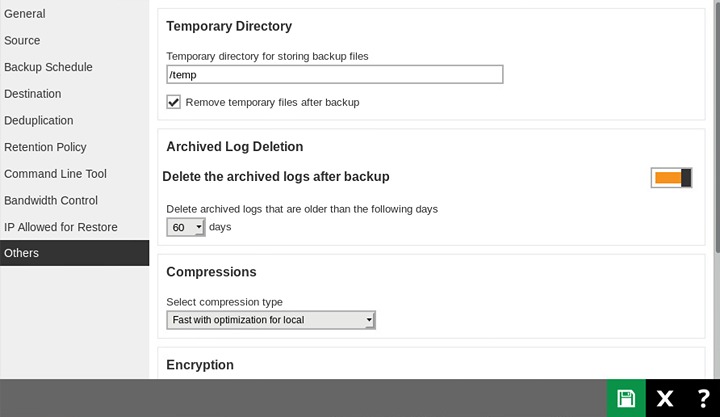
Optional: Archived Log Deletion
The deletion of the archived logs is enabled by default and archived logs of more than 60 days are deleted from the Oracle database instance. This process is done after every database and archived log backup job.
For example, if the Oracle database instance generates a lot of archived log files, you may want to reduce the number of days before they are deleted.

Optional: Select your preferred Compression type. The compression type is set to Fast with optimization for local for default.
To change the compression type, go to Others>Compressions.
Select from the following:
- No Compression
- Normal
- Fast (Compressed size larger than normal)
- Fast with optimization for local

- Click Save.
Open ssh session in the Linux machine and execute the RunConfigurator.sh script. The Login Menu will be displayed. Select (1). Login then press Enter to log in. Input your “Login Name” and “Password”.
# cd /usr/local/obm/bin
# sh RunConfigurator.sh
Startup Ahsay Online Backup Manager ...
Config file found
Login Menu
----------
 (1). Login
 (2). Change Network Settings
 (3). Forgot Password
 (4). Quit
----------------------
Your Choice: 1
Login Name : test
Password : *******************
Please wait while verifying user account with server...
Your profile has been downloaded and updated.
Encryption setting has not been defined for backup set " Oracle Database
Server Backup Set "
Do you want to set the encryption setting for this backup set? (Y/N) ? Y
Enable Encryption (Y/N) ? Y
Choose Encryption Type
----------------------
 (1). Default
(2). User password
 (3). Custom
----------------------
Your Choice: 2
Select (1). List Backup Sets to list the backup set created in AhsayCBS.
Main Menu
---------
 (1). List Backup Sets
 (2). Delete Backup Set
 (3). Export Backup Set Settings to XML
 (4). Import Backup Set Settings from XML
 (5). Generate new Backup Set Settings Template
 (6). Change Language [English]
 (7). Update Profile Settings
 (8). Quit
---------
Your Choice: 1
. Select the backup set to show the details by selecting (1). Name of your backup set. Then set the encryption setting for the backup set. Example, option (2) User password is selected as the encryption key for this backup set.
Select a Backup Set to show more details
----------------------------------------
 (1). Oracle Database Server Backup Set
----------------------------------------
Your Choice: 1
Name : Oracle Database Server Backup Set
Owner : oracle-db-19c.ahsay.com
Type : Oracle Database Server
Selected Source : Oracle Database Server
Deselected Source : Oracle Database Server/PDB$SEED/TEMP
Deselected Source : Oracle Database Server/TEMP
Deselected Source : Oracle Database Server/PDB1/TEMP
Destination Name : AhsayCBS, Type: OBS
Encryption Key : 123
Encryption Algorithm : AES
Encryption Mode : CBC
Encryption Key Length: 256
Press Enter to continue...
Export the backup set to XML by selecting (3). Export Backup Set Setting to XML
Main Menu
---------
 (1). List Backup Sets
 (2). Delete Backup Set
 (3). Export Backup Set Settings to XML
 (4). Import Backup Set Settings from XML
 (5). Generate new Backup Set Settings Template
 (6). Change Language [English]
 (7). Update Profile Settings
 (8). Quit
---------
Your Choice: 3
Choose your backup set to generate XML file
-------------------------------------------
 (1). Oracle Database Server Backup Set
-------------------------------------------
Your Choice: 1
XML file successfully exported to /root/.obm/config/backupSet.xml
. Exit from the Main Menu then edit the XML file by using an editor (e.g. vi). Add the Value data for “Oracle Password” to the file then save. For example, the password for the “system” is oracle.
# cd /root/.obm/config
# vi backupSet.xml
<!-- Oracle Password -->
 	<Value data="oracle" name="Password" type="string" />
Import the backup set by selecting (4). Import Backup Set Setting from XML. Confirm overwrite of file.
Main Menu
---------
 (1). List Backup Sets
 (2). Delete Backup Set
 (3). Export Backup Set Settings to XML
 (4). Import Backup Set Settings from XML
 (5). Generate new Backup Set Settings Template
 (6). Change Language [English]
 (7). Update Profile Settings
 (8). Quit
---------
Your Choice: 4
Reading xml...
Reading xml...Done
Verifying destination 'AhsayCBS'...
Backup Set ‘Oracle Database Server Backup Set’ already exist. Confirm
overwrite? (Y/N) ? Y
XML imported, uploading to server...
XML successfully uploaded to server
Log in to AhsayCBS web console to check if Oracle “Password” and “Encryption” settings were successfully added. To check for the password, go to General > Password.
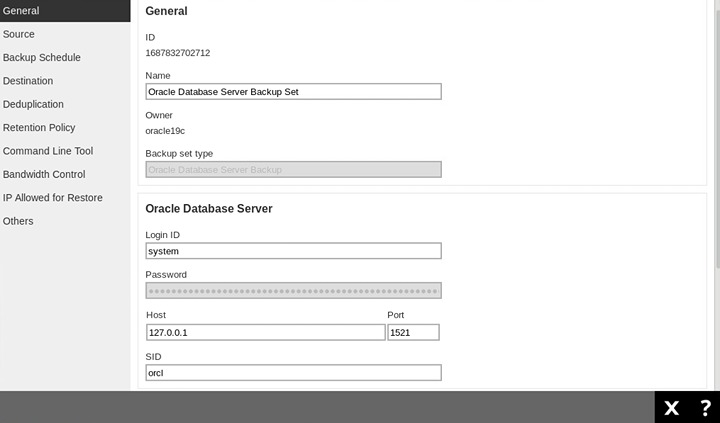
To check for the encryption setting, go to Others>Encryption
Create Oracle Database Backup Set Using Command Line
To create an Oracle database backup set, select (5). Generate new Backup Set Settings Template from the menu.
Main Menu
---------
 (1). List Backup Sets
 (2). Delete Backup Set
 (3). Export Backup Set Settings to XML
 (4). Import Backup Set Settings from XML
 (5). Generate new Backup Set Settings Template
 (6). Change Language [English]
 (7). Update Profile Settings
 (8). Quit
---------
Your Choice: 5
Select (4). Oracle Database Server to generate an Oracle database backup set template file to /root/.obm/config directory.
Choose a template from a backup set type
----------------------------------------
 (1). File
 (2). MySQL Database
 (3). MariaDB
 (4). Oracle Database Server
 (5). IBM Domino
----------------------------------------
Your Choice: 4
XML file successfully exported to /root/.obm/config/backupSet.xml
Main Menu
---------
 (1). List Backup Sets
 (2). Delete Backup Set
 (3). Export Backup Set Settings to XML
 (4). Import Backup Set Settings from XML
 (5). Generate new Backup Set Settings Template
 (6). Change Language [English]
 (7). Update Profile Settings
 (8). Quit
---------
Your Choice:
Configuring Oracle Database Backup Set Settings.
To configure the Oracle database backup set setting, you need to edit the backupSet.xml file: /root/.obm/config/backupSet.xml using a text editor (e.g. vi).
You can either quit the RunConfigurator.sh script or open a new ssh session to edit the backupSet.xml file.
Please refer to the Troubleshooting section (Oracle Database Backup Set XML Template (Raw) and Oracle Database Backup Set XML Template (with explanation)) for details and examples on how to configure backup sets using the backupSet.xml file.
- Before importing the backupSet.xml file, please remove any unused destinations and backup schedule settings. Otherwise, the following error will be displayed “Failed to import XML file (Reason: Value of name is empty!)” when trying to import the backupSet.xml file.
- . Set up of the following cloud storage destinations: OneDrive, OneDrive for Business, DropBox and Google Drive are not supported in Linux CLI environment, as these cloud storage destinations require authentication using a web browser.
Importing the updated backupSet.xml file to AhsayOBM
After you have edited the backupSet.xml file with your chosen backup settings, you need to import the settings back to AhsayOBM, so they can be uploaded to the AhsayCBS backup server to create the backup set.
For example: to create a new Oracle database backup set called “Oracle Database 1” with encryption enabled and option (2) User password is selected as the encryption key for the backup set.
Main Menu
---------
 (1). List Backup Sets
 (2). Delete Backup Set
 (3). Export Backup Set Settings to XML
 (4). Import Backup Set Settings from XML
 (5). Generate new Backup Set Settings Template
 (6). Change Language [English]
 (7). Update Profile Settings
 (8). Quit
---------
Your Choice: 4
Reading xml...
Reading xml...Done
Verifying destination 'AhsayCBS'...
New backup set created.
Enable Encryption (Y/N) ? y
Choose Encryption Type
----------------------
 (1). Default
 (2). User password
 (3). Custom
----------------------
Your Choice: 2
XML imported, uploading to server...
XML successfully uploaded to server
Verify the Backup Set Settings
To verify if the uploaded backup set settings are correct, select (1). List Backup Sets and then select the backup you wish to verify. For example, a backup set named “Oracle Database 1”.
Select a Backup Set to show more details
----------------------------------------
 (1). Oracle Database 1
----------------------------------------
Your Choice: 1
Name : Oracle Database 1
Owner : oracle19c.local
Type : Oracle Database Server
Selected Source : Oracle Database Server
Deselected Source : Oracle Database Server/PDB$SEED/TEMP
Deselected Source : Oracle Database Server/TEMP
Deselected Source : Oracle Database Server/PDB1/TEMP
Destination Name : AhsayCBS, Type: OBS
Encryption Key : abc123$%
Encryption Algorithm : AES
Encryption Mode : CBC
Encryption Key Length: 256
Press Enter to continue...
Backup set creation is now complete.
- We would like to stress that it is very important to keep a separate record of your encryption key in a safe place, as you will not be able to restore your data without the correct key.
- If you re-install AhsayOBM or install AhsayOBM on another machine, the encryption key will be required for restoring data from the backup set.

 Backup and Restore